Suzuki Grand Vitara JB627. Manual — part 381
9C-17 Instrumentation / Driver Info. / Horn:
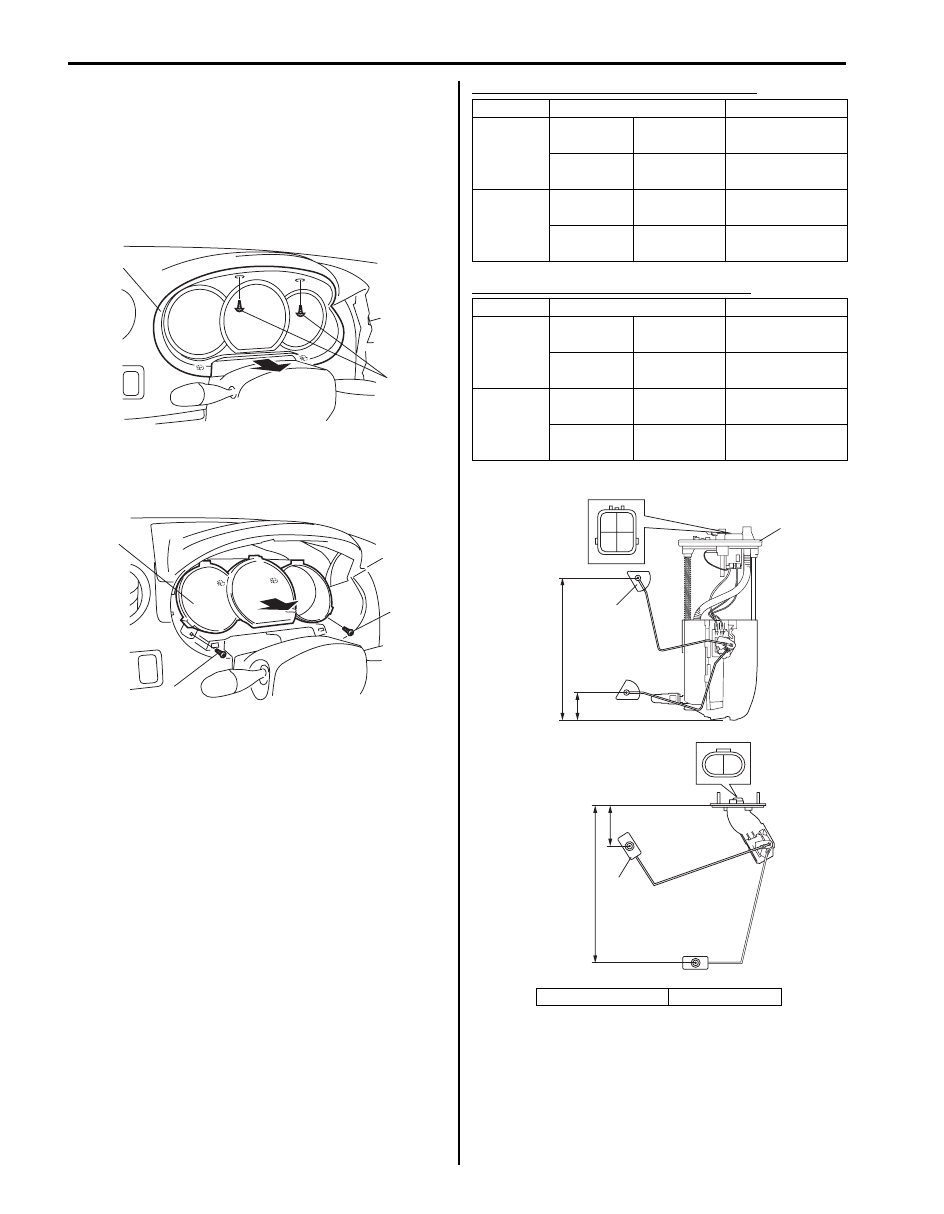
Combination Meter Removal and Installation
S6JB0B9306003
Removal
1) Disconnect negative (–) cable at battery.
2) Remove screws (1) fastening combination meter
cluster panel.
3) Remove combination meter cluster panel (2) pulling
it in arrow direction shown in figure.
4) Remove screws (1) fastening combination meter.
5) Remove combination meter (2) pulling it arrow
direction as shown.
Installation
Reverse removal procedure.
Fuel Level Sensor Removal and Installation
S6JB0B9306004
Main Fuel Level Sensor
For removal and installation, refer to “Fuel Pump
Assembly Removal and Installation in Section 1G”.
Sub Fuel Level Sensor
For removal and installation, refer to “Sub Fuel Level
Gauge Removal and Installation in Section 1G”.
Fuel Level Sensor Inspection
S6JB0B9306005
• Check that resistance between terminals “a” and “b”
of fuel level sensor changes with change of float
position.
• Check resistance between terminals “a” and “b” at
each float position in the following.
If the measured value is out of specification, replace
fuel pump and/or sub fuel level sensor.
Main fuel level sensor [A] specifications
Sub fuel level sensor [B] specifications
2
1
I5JB0A930005-04
1
2
1
I5JB0A930006-04
Float position
Resistance (
Ω)
3 door
model
Full Upper
“C”
194 mm
(7.64 in.)
19.0 – 21.0
Full Lower
“D”
42 mm
(1.65 in.)
111.9 – 115.3
5 door
model
Full Upper
“C”
206 mm
(8.11 in.)
19.0 – 21.0
Full Lower
“D”
38 mm
(1.50 in.)
129.8 – 133.2
Float position
Resistance (
Ω)
3 door
model
Full Upper
“C”
54 mm
(2.13 in.)
19.0 – 21.0
Full Lower
“D”
256 mm
(10.08 in.)
164.7 – 168.1
5 door
model
Full Upper
“C”
56 mm
(2.20 in.)
19.0 – 21.0
Full Lower
“D”
240 mm
(9.45 in.)
146.8 – 150.2
1. Fuel pump
2. Float
“C”
“D”
“D”
[A]
[B]
“b”
“a”
“b”
“a”
1
2
“C”
2
I6JB01930007-03
Instrumentation / Driver Info. / Horn: 9C-18
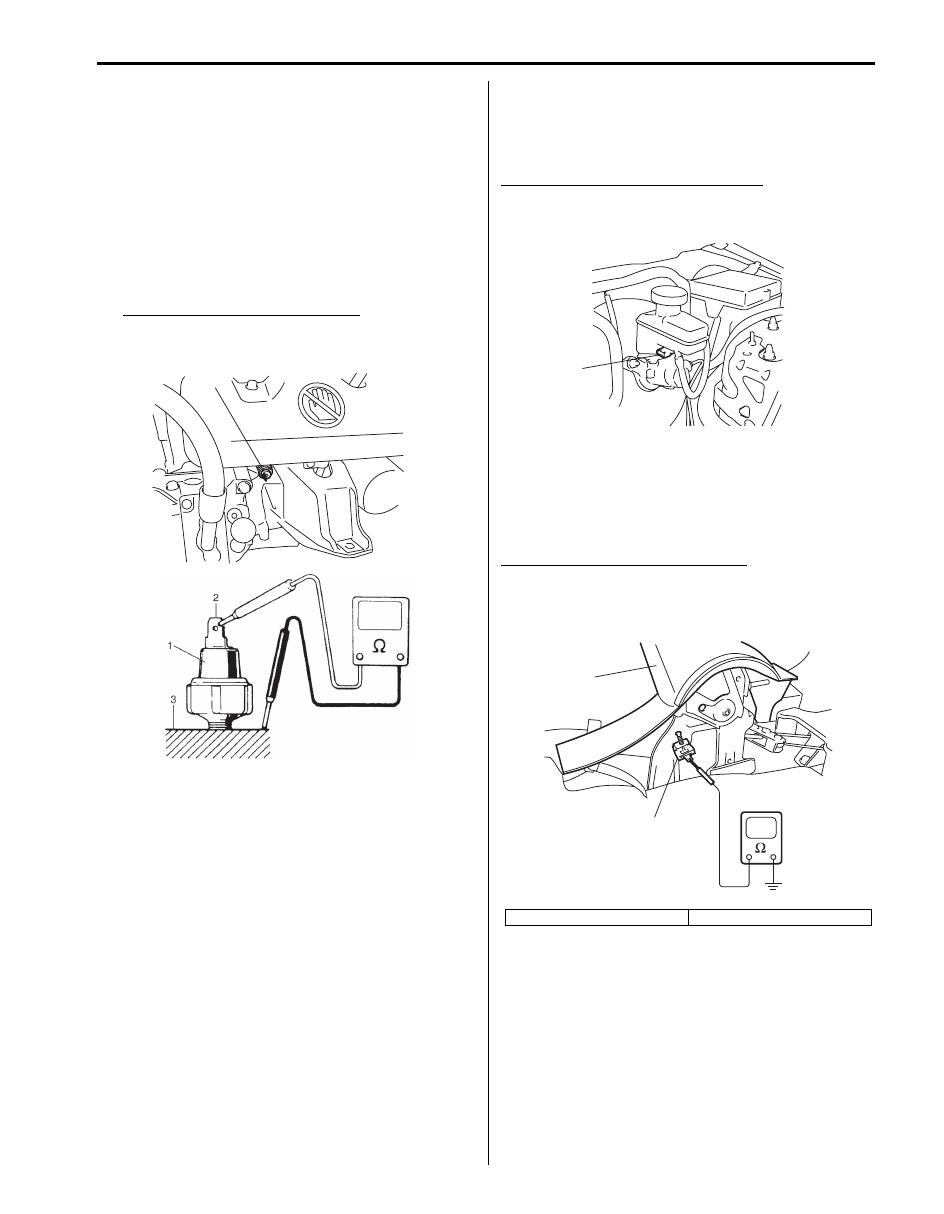
Oil Pressure Switch Removal and Installation
S6JB0B9306006
For removal and installation, refer to “Oil Pressure
Check in Section 1E”.
Oil Pressure Switch Inspection
S6JB0B9306007
1) Disconnect oil pressure switch (1) lead wire.
2) Check for continuity between oil pressure switch
terminal (2) and cylinder block (3) as shown.
If check result is not as specified, replace oil
pressure switch (1).
Oil pressure sensor specification
During engine running: No continuity
At engine stop: Continuity
Engine Coolant Temperature (ECT) Sensor
Inspection
S6JB0B9306008
Check engine coolant temperature sensor for resistance,
refer to “Engine Coolant Temperature (ECT) Sensor
Inspection in Section 1C”.
Brake Fluid Level Switch Inspection
S6JB0B9306009
Check for continuity between terminals of brake fluid
level switch coupler (1). If found defective, replace
switch.
Brake fluid level switch specification
OFF position (float up): No continuity
ON position (float down): Continuity
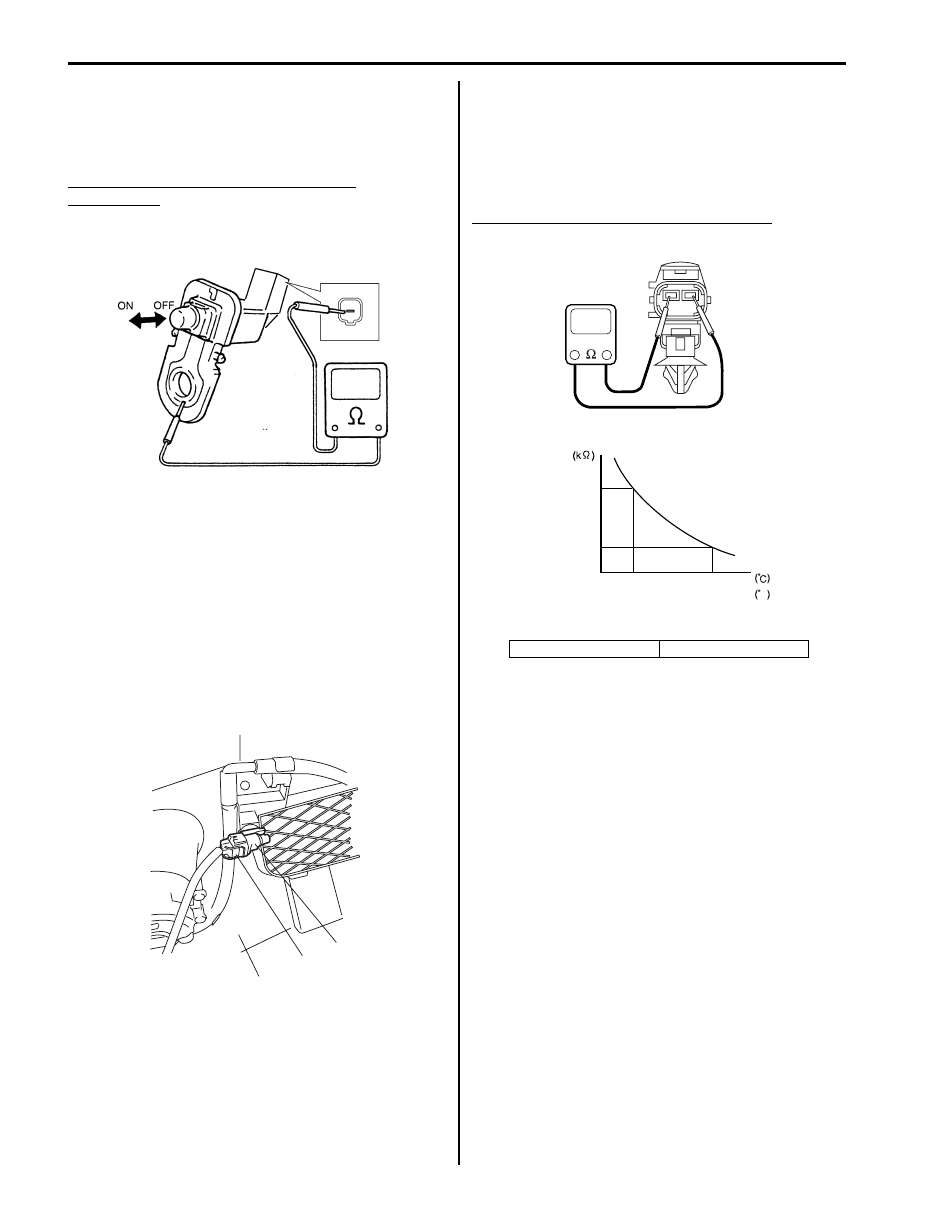
Parking Brake Switch Inspection
S6JB0B9306010
Check for continuity between parking brake switch
terminal and body ground as shown in figure. If found
defective, replace switch.
Parking brake switch specification
OFF position (parking brake released): No continuity
ON position (parking brake lever pulled up):
Continuity
1
I6JB01930004-01
1. Parking brake switch
2. Parking brake lever
1
I5JB0A930008-01
1
2
I5JB0A930009-01
9C-19 Instrumentation / Driver Info. / Horn:
Door Switch (Front / Rear / Rear End Door)
Inspection
S6JB0B9306011
Remove door switch from body and check switch for
continuity. If found defective, replace switch.
Door switch (front / rear / rear end door)
specification
OFF position (Door closed): No continuity
ON position (Door open): Continuity
Outside Air Temperature Sensor Removal and
Installation (If Equipped)
S6JB0B9306012
Removal
1) Disconnect negative (–) cable at battery.
2) Remove front bumper referring to “Front Bumper
3) Disconnect connector (1) from outside air
temperature sensor (2).
4) Remove outside air temperature sensor (2) from
front bumper (3).
Installation
Reverse removal procedure for installation.
Outside Air Temperature Sensor Inspection (If
Equipped)
S6JB0B9306013
Measure resistance of outside air temperature sensor
using an ohmmeter.
If resistance is out of specification, replace outside air
temperature sensor.
Outside air temperature sensor resistance
1.62 k
Ω – 1.78 kΩ at 25 °C (77 °F)
I3RH0A930004-01
1
2
3
I5JB0A930010-01
“A”: Resistance
“B”: Temperature
“B”
“A”
5.50
1.70
0
32
25
77
F
I4RS0A930017-01

Instrumentation / Driver Info. / Horn: 9C-20
Instrument Panel Removal and Installation
S6JB0B9306014
WARNING
!
Refer to “Air Bag Warning in Section 00”
before starting service work.
CAUTION
!
Position heat control mode into FOOT MODE
before removing instrument panel to avoid
the damage to air flow control door.
Removal
1) Disconnect negative cable at battery.
2) Remove driver side instrument panel under cover (1)
and passenger side instrument panel under cover
(2).
3) Disable air bag system referring to “Disabling Air
4) Remove steering column hole cover (1).
5) Turn steering wheel to remove steering column
cover screws (3).
6) Remove steering column covers (2).
7) Remove glove box (1).
8) Remove hood latch release lever (2).
9) Remove console box referring to “Console Box
10) Remove front pillar trims (1) front side sill scuffs (2)
and dash side trims (3).
11) Disconnect instrument panel harness connectors,
inside air temperature sensor duct and antenna
cable instrument panel removal.
12) Remove steering column mounting referring to
“Steering Column Assembly Removal and
Installation in Section 6B”.
13) Remove instrument panel ground wire.
14) Remove instrument panel mounting bolts (1).
15) Remove instrument panel (2) with steering support
member and instrument panel harness.
1
2
I5JB0A930011-02
1
2
3
3
I5JB0A940020-02
1
2
I5JB0A930012-02
2
3
1
I5JB0A930013-02
2
1
1
1
I5JB0A930014-01
Нет комментариевНе стесняйтесь поделиться с нами вашим ценным мнением.
Текст