BMW 3 (E46). Manual — part 162
Support car securely before starting
work underneath rear suspension.
WARNING!
Make sure that the car is firmly
supported on jack stands designed for
the purpose. Place the jack stands
beneath a structural chassis point. Do
not place jack stands under
suspension parts.
Trailing arm front bushing
-
Before removing trailing arm, be
sure to mark position of trailing arm
front bracket on body to facilitate
resetting of rear toe.
Using appropriate press tools:
Press bushing out of trailing arm.
Clean all grease from eye of trailing
arm.
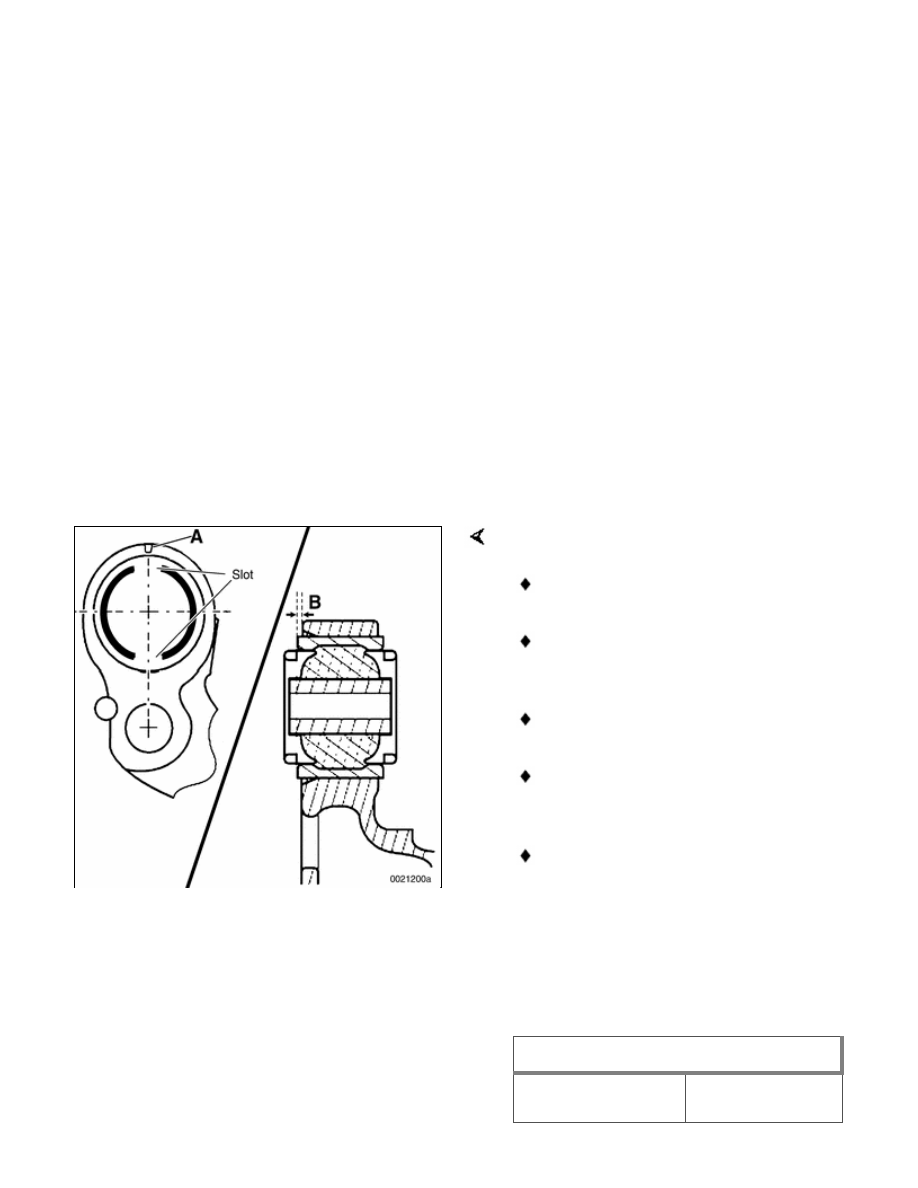
Draw new bushing into trailing arm:
Line up slot in bushing with mark
(A) on eye of trailing arm.
Fully pressed in, cylindrical bushing
must protrude from trailing arm eye
by measurement B = 2.5 mm (0.1
in.)
-
Have car professionally aligned
when job is complete.
Tightening torques
Trailing arm to front
110 Nm (81 ft-lb)
Tightening torques
bracket
Trailing arm
bracket to body
77 Nm (57 ft-lb)
Upper or lower control arm outer
bushing (in trailing arm)
-
Upper control arm bushing:
Remove trailing arm from car as
described earlier. Note direction of
bolt insertion.
-
Lower control arm bushing: Detach
lower control arm from trailing arm.
There is no need to remove trailing
arm.
-
Before detaching lower control arm
from trailing arm, be sure to mark
position of eccentric mounting bolt
to facilitate resetting of rear camber.
Note direction of bolt insertion.
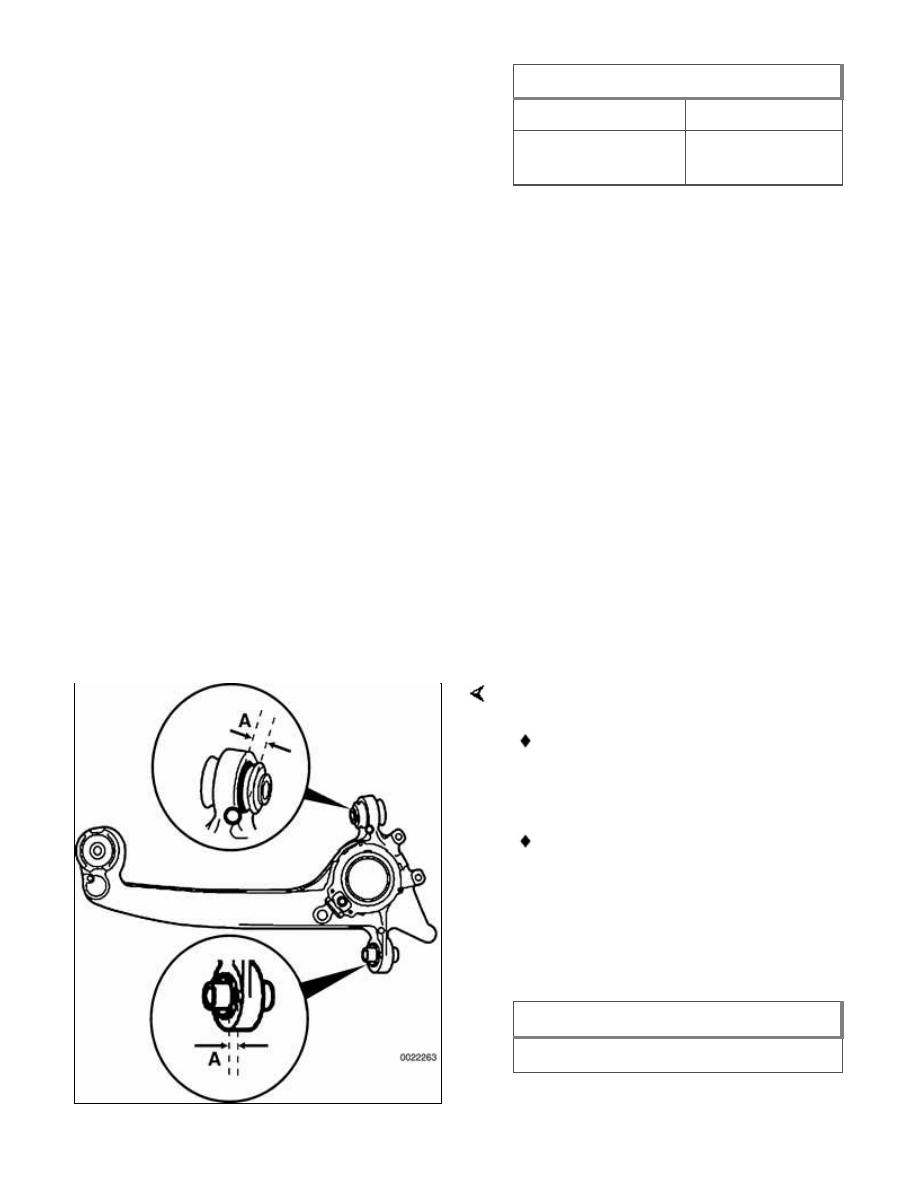
To replace bushing:
Measure and record protrusion (A)
of old bushing from trailing arm
boss.
Press old bushing out and install
new bushing, using protrusion A as
a reference.
-
Have car professionally aligned
when job is complete.
Tightening torques
Drive axle collar nut to drive flange

Tightening torques
M24
250 Nm (184
ft-lb)
M27
300 Nm (221
ft-lb)
Drive axle to final drive flange
M10x20 mm Torx
bolt
83 Nm (61 ft-lb)
M10x46 mm bolt
(black)
100 Nm (74 ft-lb)
M10x46 mm bolt
(silver) (always
replace)
80 Nm (59 ft-lb)
Lower control arm
to trailing arm M12
eccentric bolt
110 Nm (81 ft-lb)
Road wheel to hub
100 ± 10 Nm
(74 ± 7 ft-lb)
Shock absorber to
trailing arm car in
normal loaded
position
100 Nm (74 ft-lb)
Upper control arm
to rear subframe
M12 bolt
77 Nm (57 ft-lb)
Upper control arm
to trailing arm M12
bolt
110 Nm (81 ft-lb)
Upper control arm inner bushing
-
Remove upper control arm as
described earlier.
-
Press old bushing out using
appropriate press tools.
Press new bushing starting at inner
bevelled end (arrow) of control arm
bore.
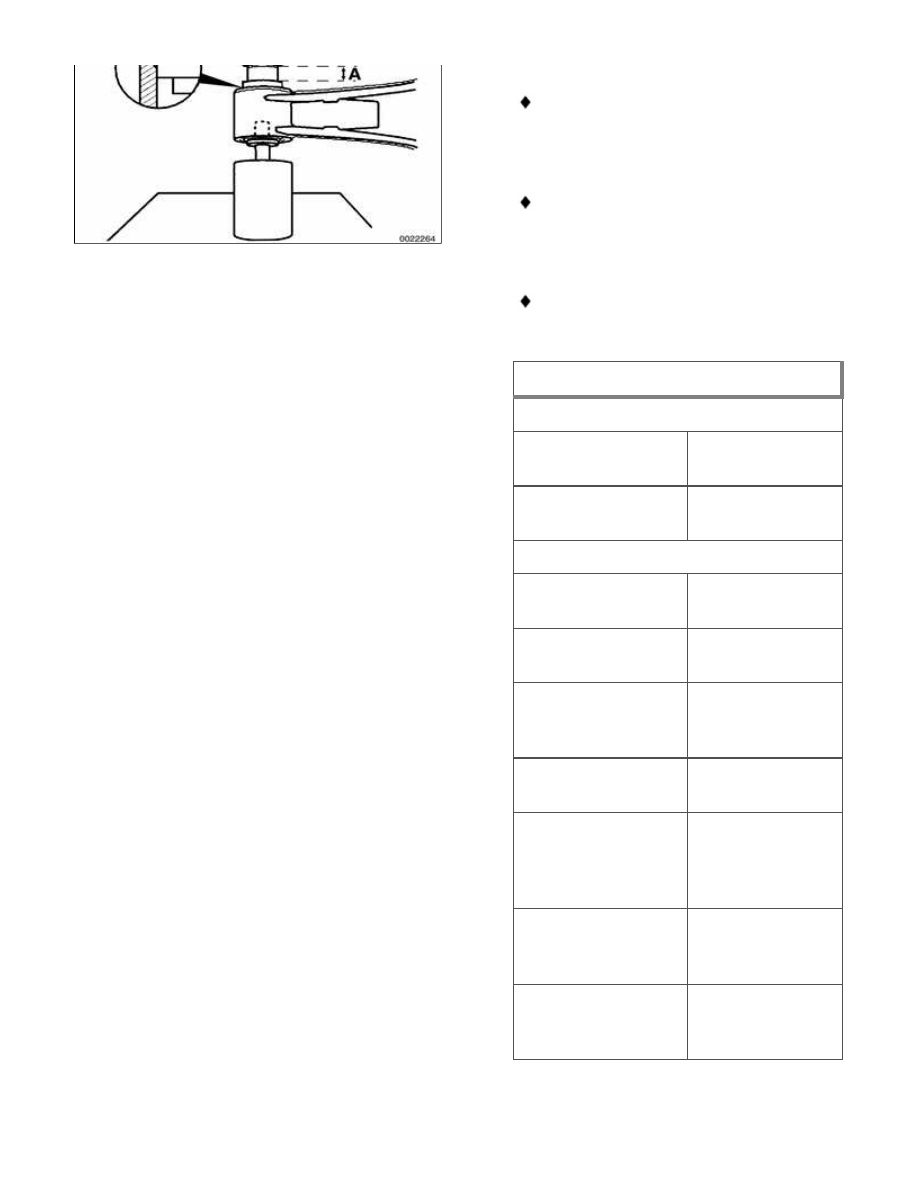
Be sure that longer collar of
bushing (A) is on same side as
bevel in control arm.
Outer bushing housing must be
flush with control arm bore when
fully pressed in.
Have car professionally aligned
when job is complete.
Tightening torque
Drive axle collar nut to drive flange
M24
250 Nm (184
ft-lb)
M27
300 Nm (221
ft-lb)
Drive axle to final drive flange
M10x20 mm Torx
bolt
83 Nm (61 ft-lb)
M10x46 mm bolt
(black)
100 Nm (74 ft-lb)
M10x46 mm bolt
(silver) (always
replace)
80 Nm (59 ft-lb)
Road wheel to hub
100 ± 10 Nm
(74 ± 7 ft-lb)
Shock absorber to
trailing arm (car in
normal loaded
position)
100 Nm (74 ft-lb)
Upper control arm
to rear subframe
M12 bolt
77 Nm (57 ft-lb)
Upper control arm
to trailing arm M12
bolt
110 Nm (81 ft-lb)
Нет комментариевНе стесняйтесь поделиться с нами вашим ценным мнением.
Текст