Hummer H1 (2002+). Manual — part 258
____________________________________________________________
Accessories 13-25
®
05745159
Roof Rack Crossbar Replacement
Removal
1.
Remove roof rack from vehicle.Remove ten floor pieces
from roof rack.Roof Rack Crossbar Replacement
Removal
1.
Remove roof rack from vehicle.
2.
Remove ten floor pieces from roof rack.
3.
Remove four locknuts, washers, bolts, washers, and
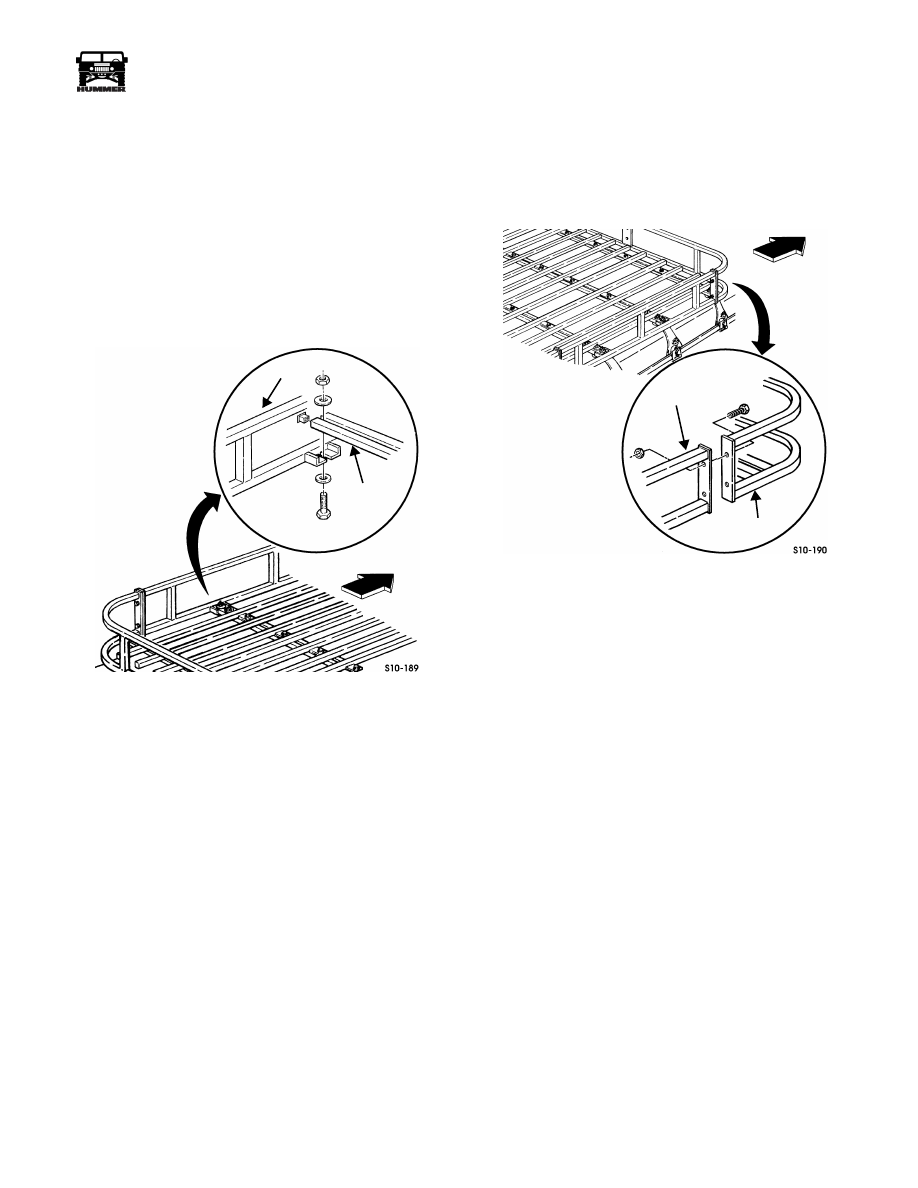
crossbar from sides (Figure 13-56).
Figure 13-56: Roof Rack Crossbar
Installation
1.
Install crossbar on sides with four washers, bolts, washers,
and locknuts. Tighten locknuts to 25 lb-ft
(34 N•m) (Figure 13-56).
2.
Install ten floor pieces on roof rack.
3.
Install roof rack onto vehicle.
Roof Rack End Replacement
Removal
Remove four bolts, locknuts, and rack end from sides
(Figure 13-57).
Figure 13-57: Roof Rack End
Installation
Install rack end on sides with four bolts and locknuts. Tighten
locknuts to 15 lb-ft (20 N•m) (Figure 13-57).
SIDE
CROSSBAR
FRONT
OF
VEHICLE
RACK END
SIDE
FRONT
OF
VEHICLE

13-26
Accessories
_____________________________________________________________
®
Roof Rack Clamp Replacement
Removal
4.
Loosen support screw on clamp securing clip to clamp
(Figure 13-58).
5.
Loosen locknut securing clip to drip rail.
6.
Remove clip from under drip rail.
7.
Remove locknut, washer, capscrew, and clamp from roof
rack.
Installation
1.
Install clamp on roof rack with capscrew, washer, and
locknut.
2.
Position clip under drip rail and over support capscrew.
3.
Tighten locknut securing clip to drip rail to 20-25 lb-in (2-
3 N•m).
4.
Tighten support screw on clamp. Tighten locknut installed
in step 1 to 25 lb-ft (34 N•m).
Figure 13-58: Roof Rack Clamp
SIDE
RACK END
DRIP RAIL
CLAMP
CLIP
SUPPORT SCREW
____________________________________________________________
Accessories 13-27
®
05745159
AUXILIARY SEAT
Auxiliary Seat Replacement
Removal
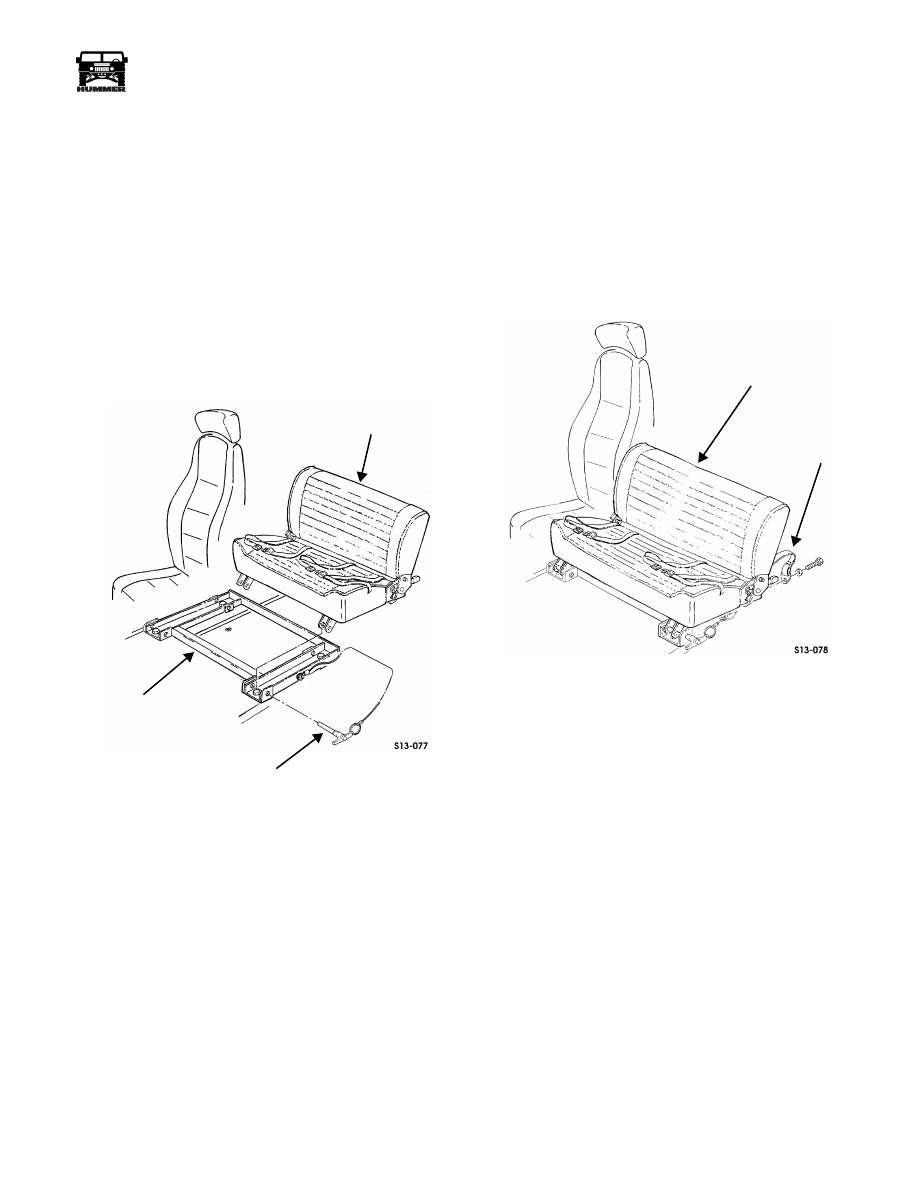
1.
Release and remove four locking pins from auxiliary seat
frame and auxiliary seat (Figure 13-59).
2.
Remove auxiliary seat from auxiliary seat frame.
Installation
1.
Install auxiliary seat on auxiliary seat frame.
2.
Install and fasten four locking pins to auxiliary seat frame
and auxiliary seat. (Locking pins are properly installed
when balls near end of pins are visible.)
Figure 13-59: Auxiliary Seat
Auxiliary Seat Belt Replacement
Removal
1.
Release and tilt forward auxiliary seat.
NOTE:
Retain initial seat belt mounting positions during in-
stallation.
2.
Remove four bolts, washers, and two auxiliary seat belt
assemblies from auxiliary seat (Figure 13-60).
Figure 13-60: Auxiliary Seat Belt
Installation
1.
Install two auxiliary seat belt assemblies on auxiliary seat
with four washers and bolts (Figure 13-60). Torque to 72-
78 ft-lb (98-106 N•m).
2.
Tilt and fasten auxiliary seat back to normal position.
AUXILIARY SEAT
SEAT FRAME
LOCKING PIN
AUXILIARY SEAT
SEAT BELT
ASSEMBLY
Section 13 Accessories
13-28
Accessories
_____________________________________________________________
®
Auxiliary Seat Frame Replacement
Removal
1.
Remove auxiliary seat locking pins.
2.
Remove auxiliary seat.
3.
Remove four bolts, washers, and auxiliary seat frame from
tunnel floor (Figure 13-61).
Figure 13-61: Auxiliary Seat Frame
Installation
1.
Install auxiliary seat frame on tunnel floor with four wash-
ers and bolts (Figure 13-61). Torque bolts to 27-30 lb-ft
(36-40 N•m).
2.
Install auxiliary seat.
3.
Attach auxiliary seat locking pins to seat frame.
Auxiliary Seat Locking Pin Replacement
Removal
NOTE:
Left and right side locking pins are replaced the same.
This procedure covers the left side only.
1.
Remove two screws and locking pin cables from auxiliary
seat frame (Figure 13-62).
2.
Release and remove two locking pins from auxiliary seat
frame and auxiliary seat.
Figure 13-62: Auxiliary Seat Locking Pin
Installation
1.
Install and fasten two locking pins on auxiliary seat frame
and auxiliary seat (Figure 13-62).
2.
Install two locking pin cables on auxiliary seat frame with
two screws.
SEAT FRAME
TUNNEL FLOOR
AUXILIARY SEAT
LOCKING PIN
LOCKING PIN
SEAT FRAME
CABLE
Нет комментариевНе стесняйтесь поделиться с нами вашим ценным мнением.
Текст