Jaguar XJ (X350). Manual — part 322
For additional information, refer to .
All Vehicles
3
.
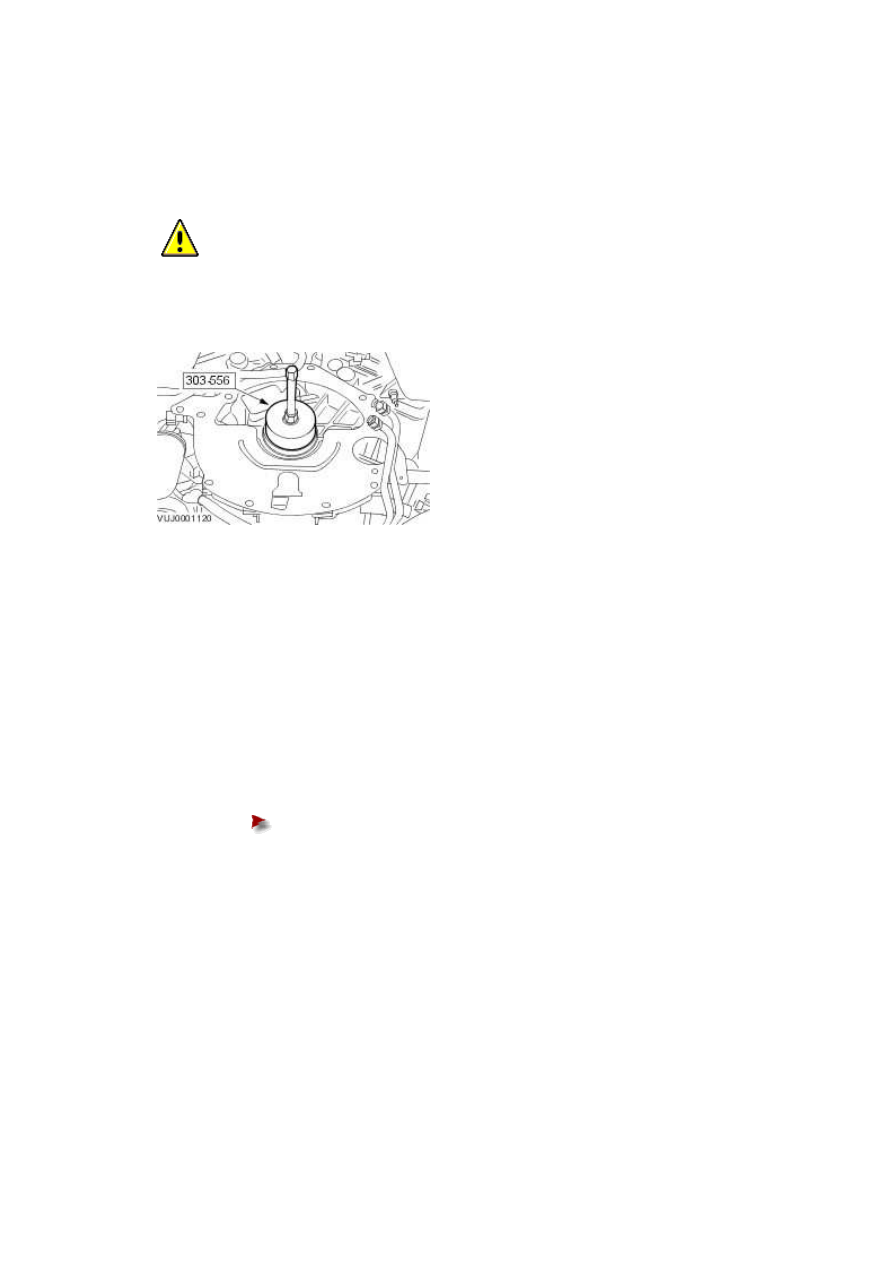
CAUTION: Avoid scratching or damaging the oil seal sealing surfaces on the
crankshaft and cylinder block.
Using the special tools, remove the crankshaft rear main oil seal.
Installation
All Vehicles
1 . Clean and inspect the crankshaft rear oil seal sealing surfaces.
2
.
Lubricate the crankshaft flange, the crankshaft rear oil bore seal, and the oil seal lip.
Use engine assembly lubricant or equivalent meeting Jaguar specification
ESR-M99C80-A.
3
.
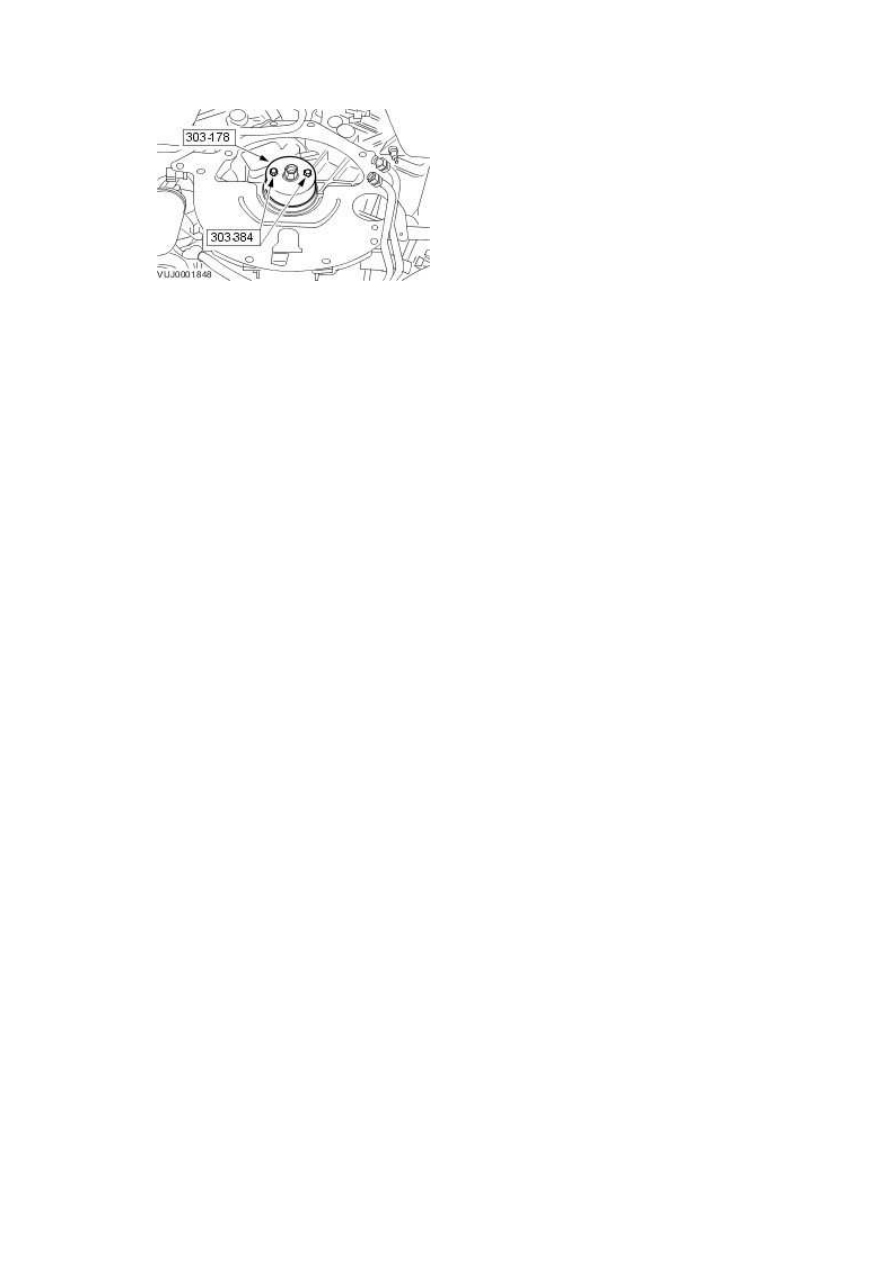
NOTE:
Alternate bolt tightening to correctly seat the crankshaft rear oil seal until it is flush with
the cylinder block.
Using the special tools, install the crankshaft rear oil seal.
Vehicles With Automatic Transmission
4 . Install the flexplate. For additional information, refer to
For additional information, refer to .
Vehicles With Manual Transmission
5 . Install the flywheel. For additional information, refer to
For additional information, refer to .
www.
Cylinder Head (12.29.01)
Removal
RH and LH Cylinder Heads
1 . Remove the right-hand valve cover.
For additional information, refer to Valve Cover RH (12.29.44)
2 . Remove the left-hand valve cover.
For additional information, refer to
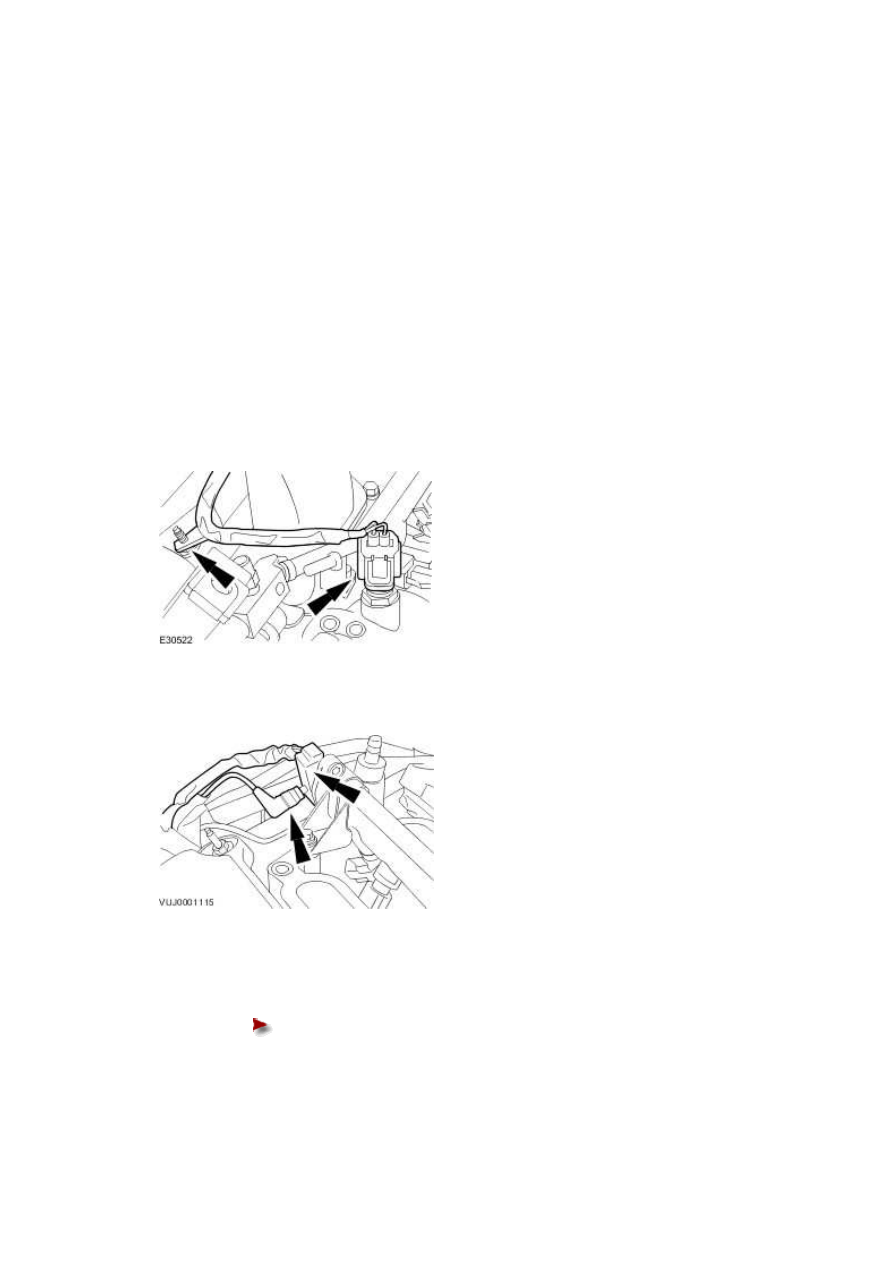
3 . Disconnect the coolant temperature (ECT) electrical connector.
4 . Disconnect the fuel pressure regulator electrical connector and vacuum hose.
5 . Remove the fuel supply manifold and lower intake manifold.
Remove and discard the lower intake manifold gaskets.

6 . Remove the coolant crossover tube.
Discard the O-ring seals.
7 . Remove the catalytic converters. <<309-00>>
8 . Remove the camshafts.
For additional information, refer to Camshafts LH (12.13.19)
Cylinder Head-LH
9 . Remove the oil level indicator tube.
1) Remove the retaining nut.
2) Remove the oil level indicator tube.
www.
Нет комментариевНе стесняйтесь поделиться с нами вашим ценным мнением.
Текст