Jaguar S-Type. Manual — part 18
77
Seats
R
DRIVING POSITION
!
WARNING:
• Driver and front seat passenger
should always move their seats as
far rearwards as is practical.
• Adjust the head restraint so that it
is behind your head and never
behind your neck.
• An inflating air bag may cause
serious injuries or death if the seats
are positioned, or adjusted
incorrectly.
The seats, head restraints, seat belts and
air bags all contribute to the protection of
the occupants. Optimal use of these
components will maximise protection.
Therefore, observe the following points:
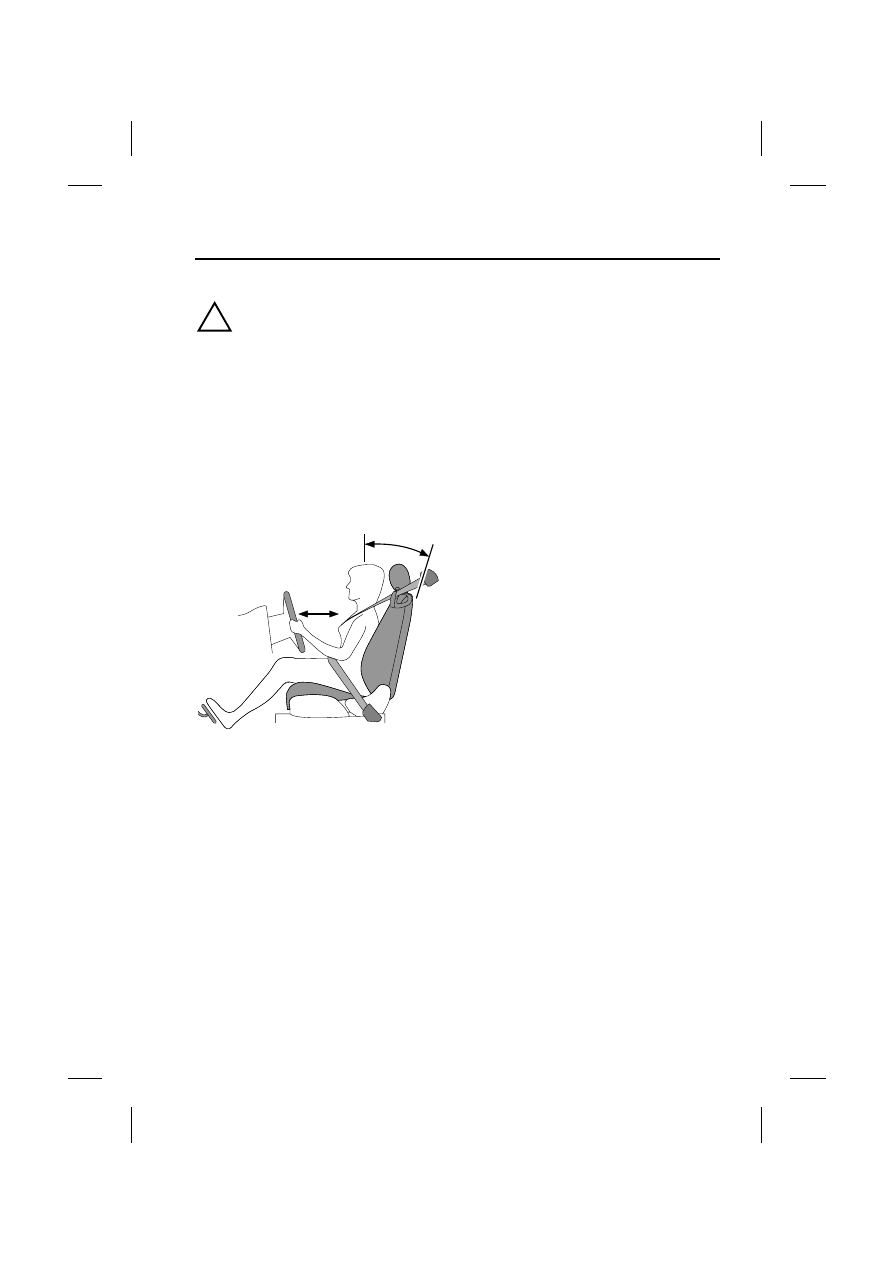
• Sit in the most upright position with
the base of your spine as far back as
possible and the back restraint
reclined not more than 30 degrees, A.
• Adjust the head restraints so that the
top of the head restraint is behind
your head and never behind your
neck.
• Do not move the driver’s seat too
close to the steering wheel. A
minimum distance of at least 254mm
(10 inches), B, between the center of
the breastbone and the cover of the
steering wheel air bag is
recommended. The driver should hold
the steering wheel with slightly bent
arms. The legs should be slightly bent
so that the pedals can be pressed to
the floor.
• The seat belt should rest in the center
of the shoulder. The lap part should fit
tightly across the hips and not the
stomach.
The front seats are adjusted by switches
on the seat.
The driver and front passenger seats
should be positioned as far rearwards as
practical.
Make sure your driving position is
comfortable and enables you to maintain
full control of the vehicle.
Note: Seat and steering wheel
adjustments are described on pages 75
and 80.
JAG0100L
A
B
Seats
78
L
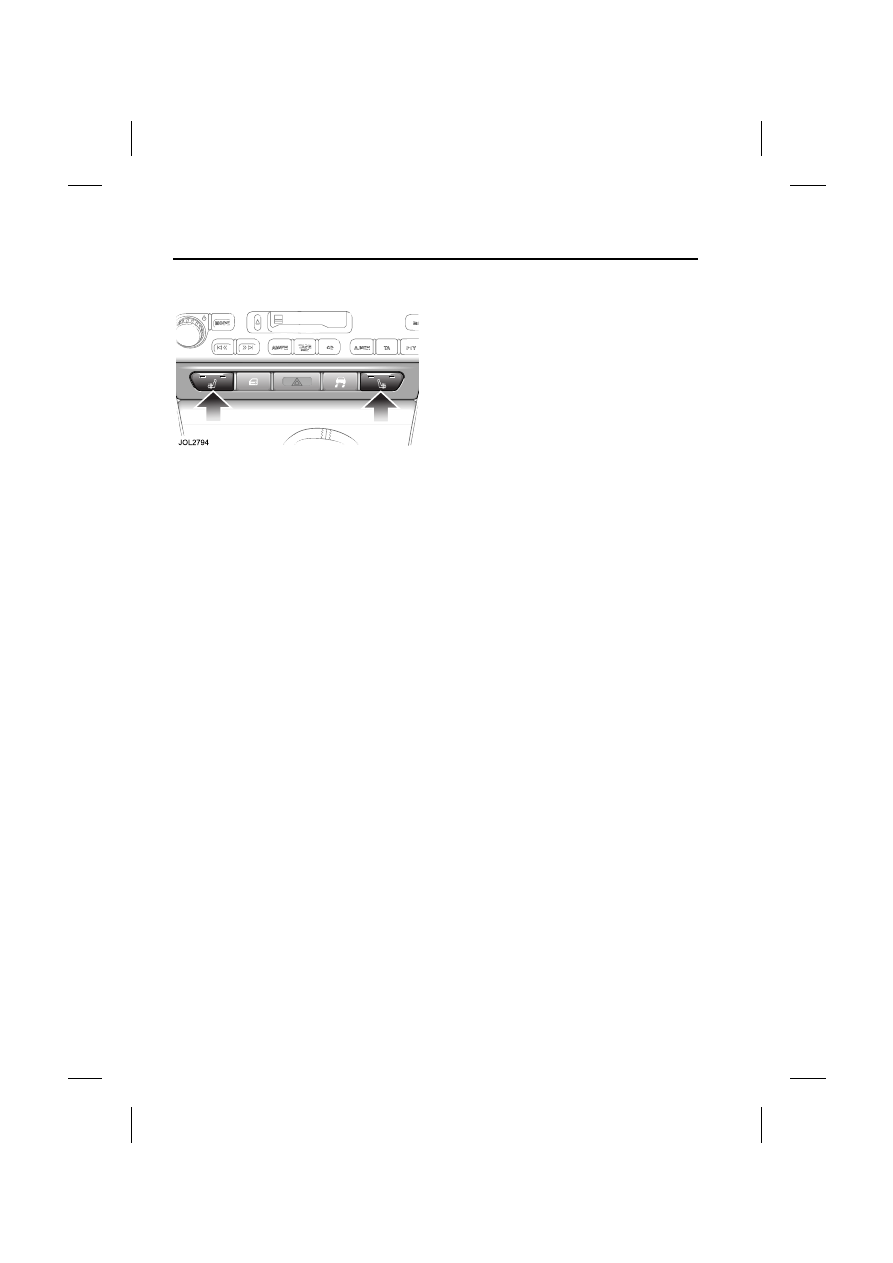
FRONT SEAT HEATERS
Each seat has a heater switch on the
center console. With the ignition switch in
position II, press a switch to select the
heat setting:
• A first press selects the higher
temperature setting, indicated by two
red lamps on the switch.
• A second press selects the lower
temperature setting, indicated by one
red lamp.
• A third press turns the seat heater off;
both indicator lamps off.
The optional heated front seats
incorporate heaters in the back restraint
and cushions and have two heat settings.
The heater will automatically switch OFF
after ten minutes or if the ignition is turned
OFF or a fault is detected.
The heater will maintain a preset
temperature while it is switched on.
Storage of the vehicle in a heated garage,
body heat or warm ambient temperatures
may prevent operation of the seat heater.
79
Clock
R
Clock
CLOCK ADJUSTMENT
The position of the digital clock depends
on the equipment fitted to the vehicle.
If a touch-screen is fitted, the clock will be
incorporated in the touch-screen display.
• For more information concerning the
operation of the touch-screen, refer to
the touch-screen display handbook.
If the vehicle is not equipped with a
touch-screen, the clock is included in the
audio display.
• For more information concerning the
operation of the audio system
controls, refer to the audio systems
handbook.
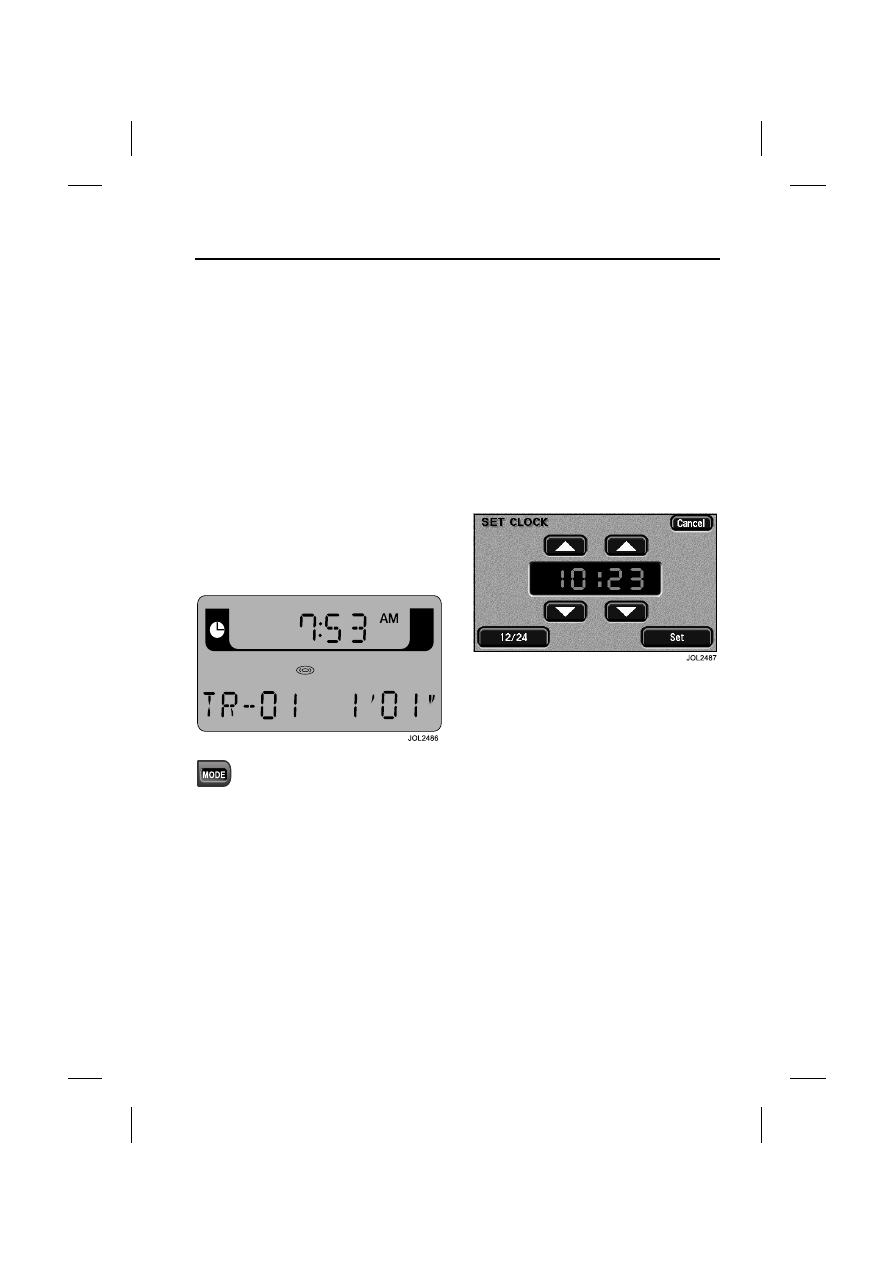
Non-touch-screen
Adjust the clock using the audio
system MODE control button as
follows:
1. Press and hold MODE until CLOCK
SET is displayed with the 12/24 hours
indicator flashing.
2. To set 12 or 24 hour display rotate the
volume control knob clockwise for 24
hour display, counter clockwise for 12
hour display. AM or PM is,
subsequently, automatically
displayed.
3. Press MODE to select hour setting.
4. Rotate the volume control knob
clockwise to increase the hour,
counter clockwise to decrease the
hour.
5. Press MODE to select the minute
setting. Rotate the volume control
knob clockwise to increase the
minute, counter clockwise to
decrease the minute.
6. To exit, press and hold MODE until
the display reverts to audio mode.
Touch-screen
If the vehicle is fitted with a touch-screen,
the clock is adjusted as follows:
1. Press the MENU button on the
touch-screen control panel. The
system menu screen will be
displayed.
2. Touch the System Setup button on
the MENU screen.
3. Touch the SET CLOCK button on the
SYSTEM SETUP screen.
4. Clock adjustment is made by
touching the hour or minute, up or
down arrow buttons.
5. Touch the 12/24 button to select
twelve or twenty-four hour display.
6. Confirm your setting by touching Set.
Steering Column
80
L
Steering Column
STEERING COLUMN
ADJUSTMENT
!
WARNING:
Do not adjust the steering column
whilst driving.
Caution: Do not use steering wheel
mounted security devices, since
movement of the steering wheel in
entry or exit mode could result in
damage to the vehicle (e.g. the
windshield) or possible injuries to the
occupant.
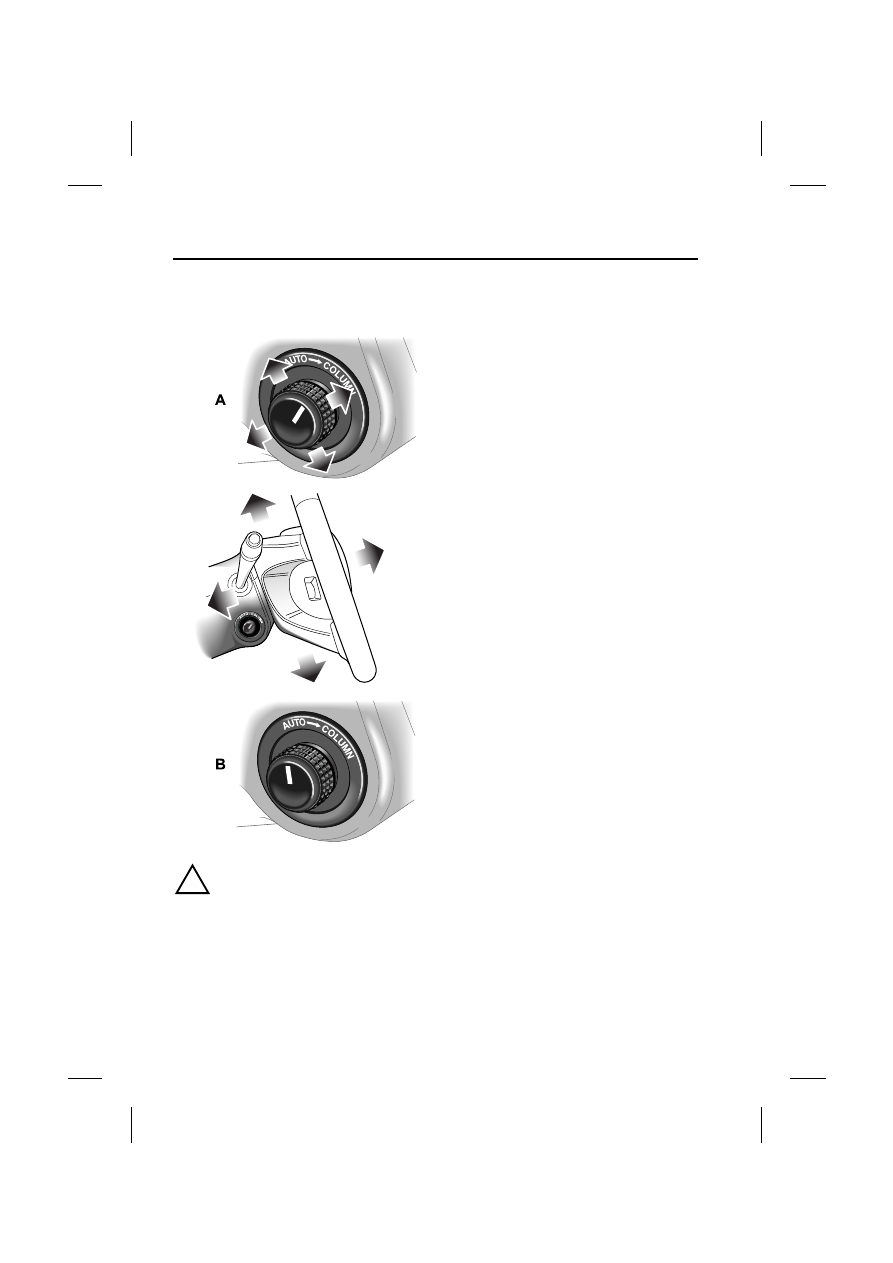
The steering column can be adjusted for
tilt and reach by operating the rotary/
joystick control switch (A) on the left side
of the steering column.
1. Turn the switch to the COLUMN or
AUTO position.
2. Move the switch forwards or
backwards to adjust reach.
3. Move the switch up or down to adjust
tilt.
Two column positions may be stored and
recalled by the driver position memory
system, refer to Memory Setting on
page 86.
Entry or exit mode
Entry or exit mode provides automatic
movement of the steering column and
driver’s seat to allow easier entry to or exit
from the vehicle.
Entry or exit mode is selected by setting
the steering column adjustment switch to
the AUTO position (B).
Exit - If the ignition key is in position 0 or
position I and the driver’s door is opened
or if the ignition key is removed, the
steering column will move to the
uppermost tilt position (unless already in
that position) and the seat will move
slightly rearwards and/or downwards,
depending on its current position.
JAG0563
Нет комментариевНе стесняйтесь поделиться с нами вашим ценным мнением.
Текст