DAF LF45, LF55 Series. Manual — part 256
©
200508
2-1
Description of components
ALLISON 1000 & 2000 AUTOMATIC GEARBOXES
ΛΦ45/55 series
3
7
2. DESCRIPTION OF COMPONENTS
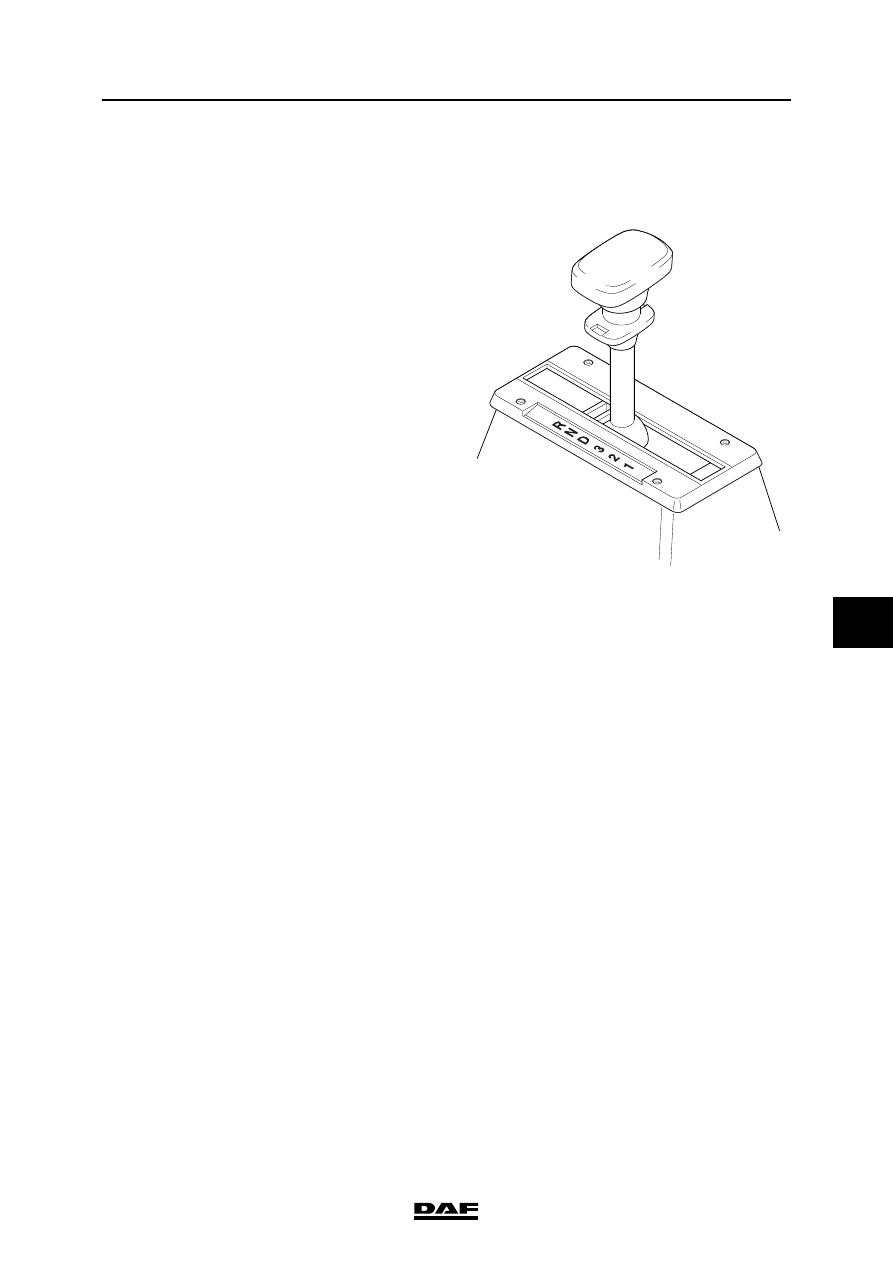
2.1 SELECTOR LEVER
The various gears of the automatic gearbox are
selected using the selector lever. The selector
lever has four positions for the forward gears
(1, 2, 3 and D), a neutral position (N) and a
reverse position (R).
The neutral position (N) is the usual position for
starting and stopping the engine and for longer
stationary periods when the engine is idling. The
gearbox must not be put in the neutral position
when driving.
In the drive position (D) the gearbox automatically
changes up and down in all forward gears.
In positions (1), (2) and (3) the gearbox changes
up as far as the selected gear. These positions
can be used to keep the engine in the correct rev
band or to obtain maximum engine brake
performance.
To reverse, the selector lever must be in the (R)
position. A warning signal is also activated when
reversing.
V3 00 593
ALLISON 1000 & 2000 AUTOMATIC GEARBOXES
2-2
©
200508
Description of components
7
ΛΦ45/55 series
3
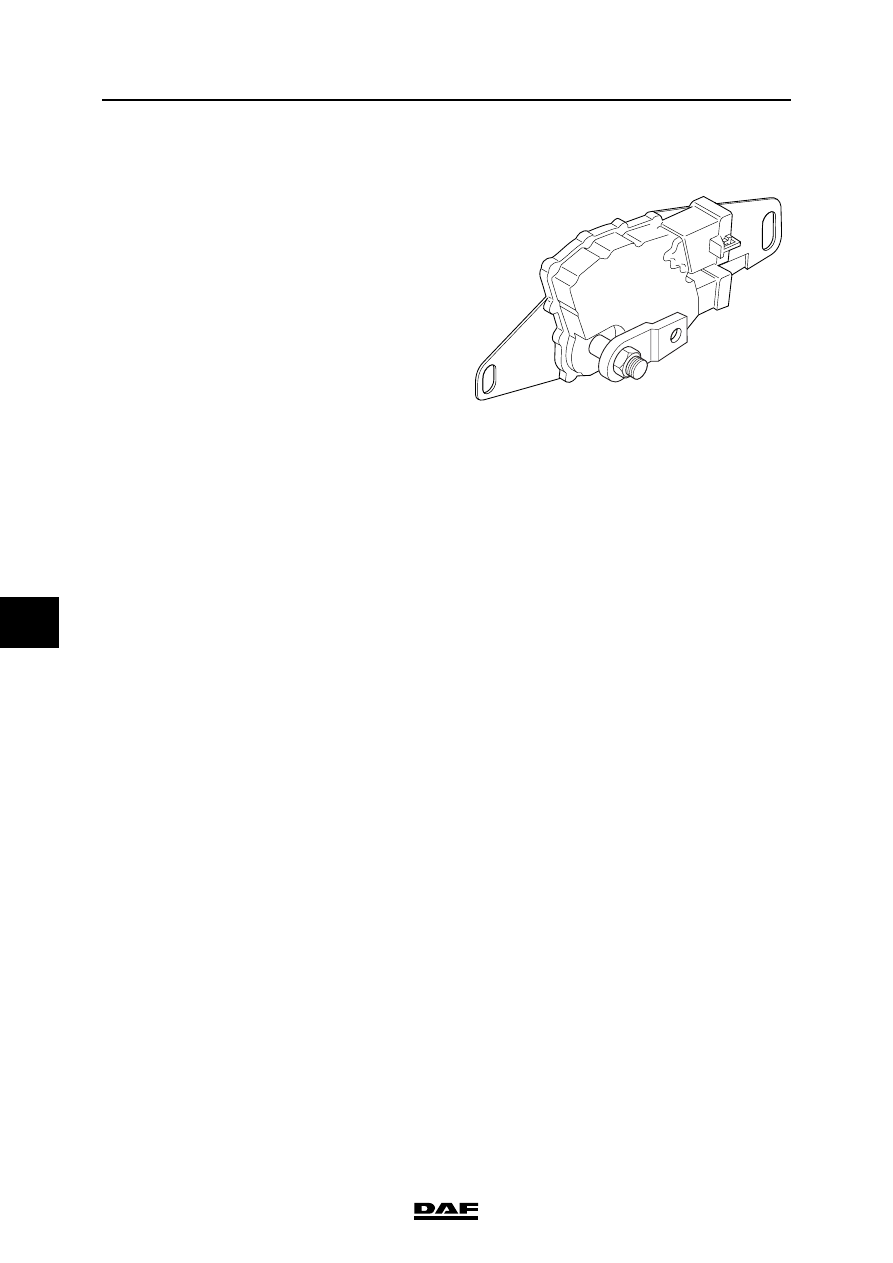
2.2 SELECTOR SWITCH
The selector switch is mounted on the gearbox
housing. The selector switch communicates the
selector shaft angular displacement to the ECU.
Before the vehicle can be started, the electronic
unit must receive a signal from the selector switch
confirming that the automatic gearbox is in
neutral.
V3 00 557
©
200508
3-1
Inspection and adjustment
ALLISON 1000 & 2000 AUTOMATIC GEARBOXES
ΛΦ45/55 series
3
7
3. INSPECTION AND ADJUSTMENT
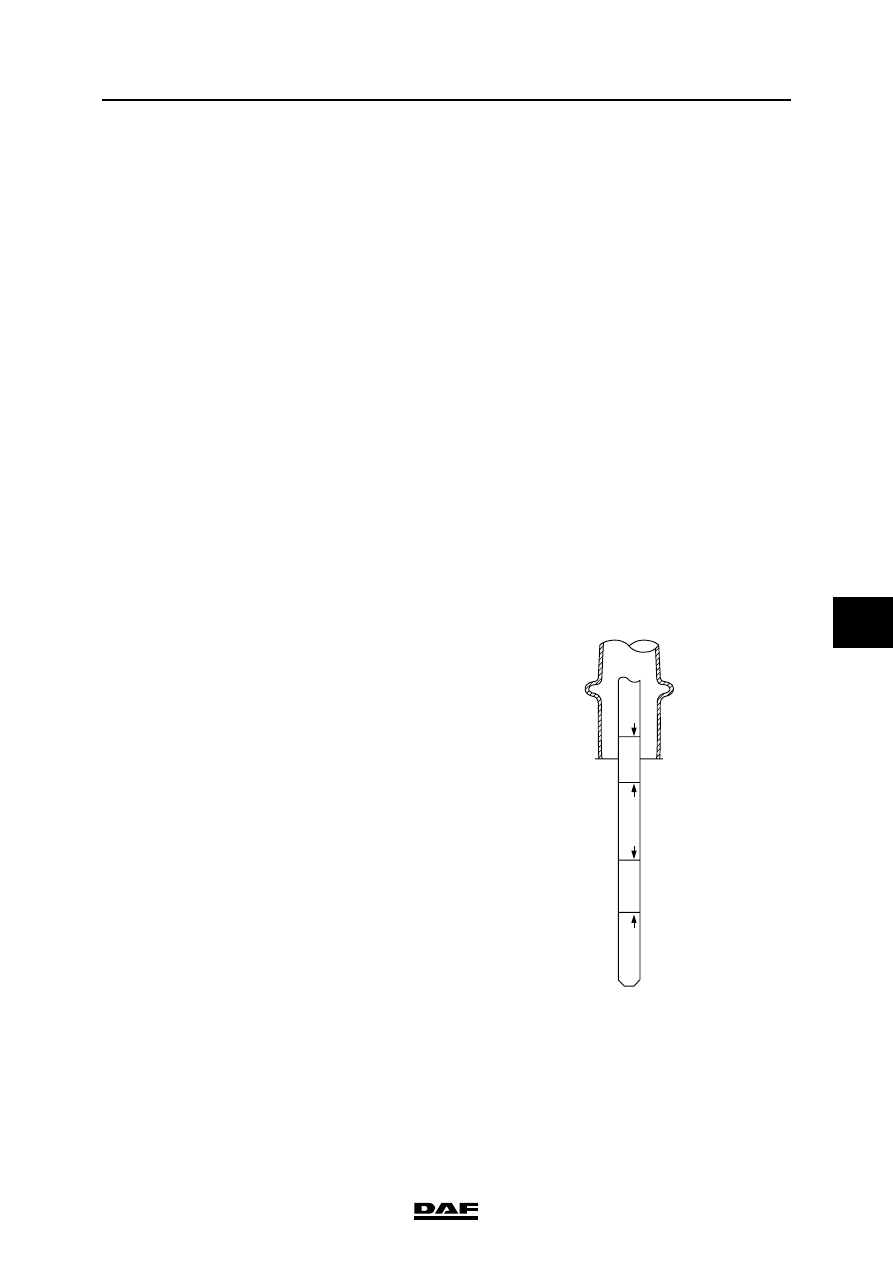
3.1 CHECKING OIL LEVEL
Checking cold oil level
1.
Place the vehicle on a flat and level surface
and apply the parking brake.
2.
Make sure the gearbox is in neutral and allow
the engine to idle for several minutes.
3.
Apply the service brake, switch the gearbox
to D, then to N and finally switch the gearbox
to R. The purpose of this is to fill the hydraulic
system.
4.
Switch the gearbox to the neutral position
and release the service brake.
5.
Remove the dipstick when the engine is
idling and wipe it clean with a lint-free cloth.
Note:
To take the dipstick out of the holder, the
sealing cap must be held while the dipstick is
turned anti-clockwise.
6.
Put the dipstick back.
7.
Remove the dipstick and check the oil level.
The oil level should be between the "Cold
add" and "Cold full" marks.
8.
Clean the dipstick with a lint-free cloth and
put it back.
9.
Remove the dipstick and check the oil level
again.
10. Oil needs to be added when the oil level is
below the "Cold add" mark.
11. Check the oil level in the gearbox at
operating temperature.
HOT FULL
COLD FULL
HOT ADD
COLD ADD
W 3 03 099
ALLISON 1000 & 2000 AUTOMATIC GEARBOXES
3-2
©
200508
Inspection and adjustment
7
ΛΦ45/55 series
3
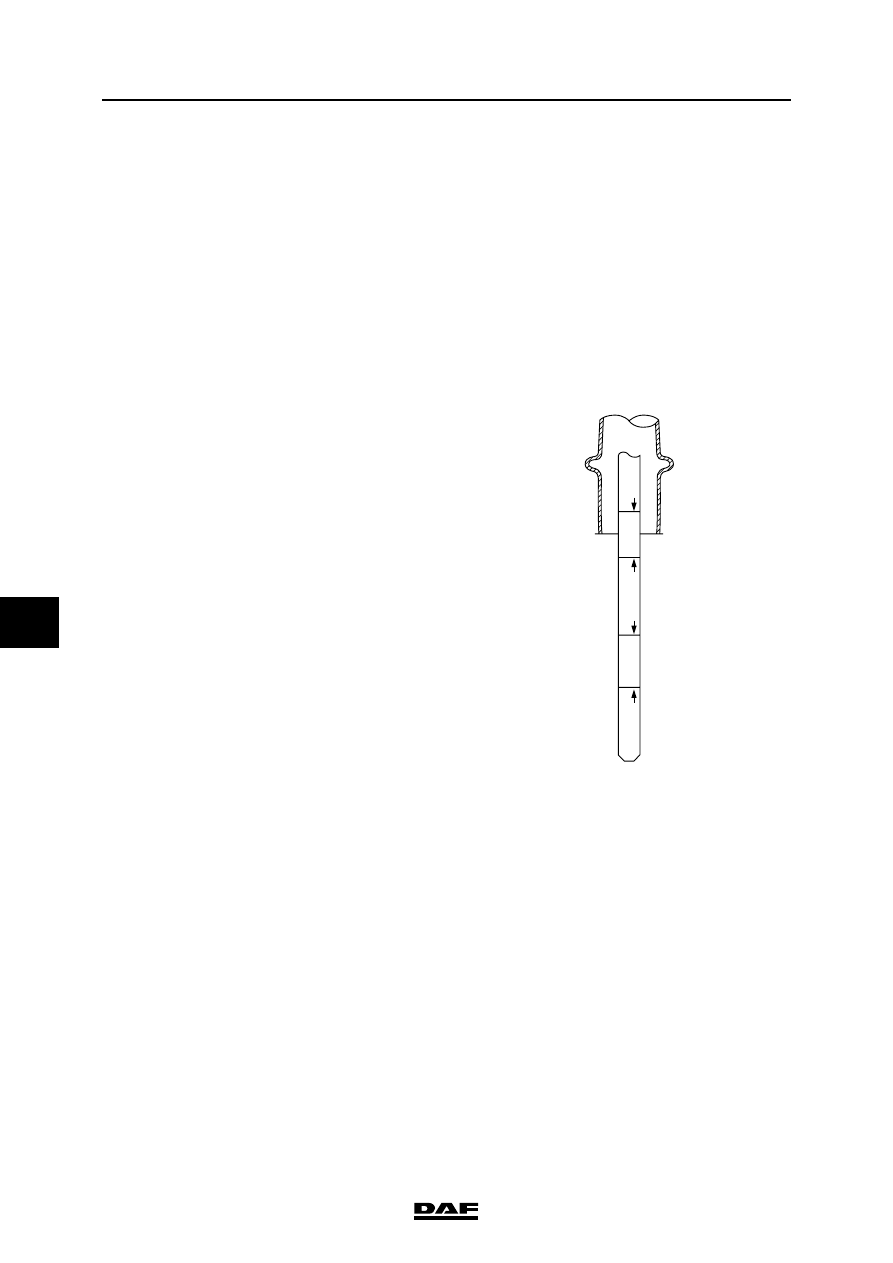
Checking hot oil level
1.
Bring the gearbox up to operating
temperature (approx. 71
″C - 93″C).
2.
Remove the dipstick when the engine is
idling and wipe it clean with a lint-free cloth.
Note:
To take the dipstick out of the holder, the
sealing cap must be held while the dipstick is
turned anti-clockwise.
3.
Put the dipstick back.
4.
Remove the dipstick and check the oil level.
5.
Remove the dipstick and check the oil level.
The oil level should be between the "Hot
add" and "Hot full" marks.
6.
Clean the dipstick with a lint-free cloth and
put it back.
7.
Remove the dipstick and check the oil level
again.
8.
Oil needs to be added when the oil level is
below the "Hot add" mark.
9.
Oil needs to be drained when the oil level is
above the "Hot full" mark.
Note:
The oil level must be checked at least twice.
When there are differences between the
measurements, check the bleeder for clogging.
HOT FULL
COLD FULL
HOT ADD
COLD ADD
W 3 03 099
Нет комментариевНе стесняйтесь поделиться с нами вашим ценным мнением.
Текст