DAF LF45, LF55 Series. Manual — part 659

©
200515
5-9
Draining and filling
EXPLANATORY NOTES ON THE MAINTENANCE ACTIVITIES
ΛΦ45/55 series
5
5.7 DRAINING AND FILLING, WHEEL HUB
To prevent skin injury, avoid
unnecessary contact with the
drained oil.
Note:
The design of the hub and the location of the
drain/filler plug may differ from the illustration,
depending on the version.
Draining the wheel hub
1.
Position the vehicle on a level surface.
2.
Position the wheels in such a way that the
drain/filler plug (1) is on the underside.
3.
Place a suitable tray under the hub to collect
the oil. Remove the drain/filler plug (1).
4.
Drain the oil and let the oil leak out of the
hub.
Filling the wheel hub
1.
Position the wheels in such a way that the
drain/filler plug (1) is on the top side.
2.
Fill the wheel hub with the specified, correct
quantity of oil, see "Technical data".
3.
Apply sealant to the thread of the drain/filler
plug (1). Fit the drain/filler plug (1) into the
hub.
}
1
A8 00 427
1
A8 00 428
EXPLANATORY NOTES ON THE MAINTENANCE ACTIVITIES
5-10
©
200515
Draining and filling
5
ΛΦ45/55 series
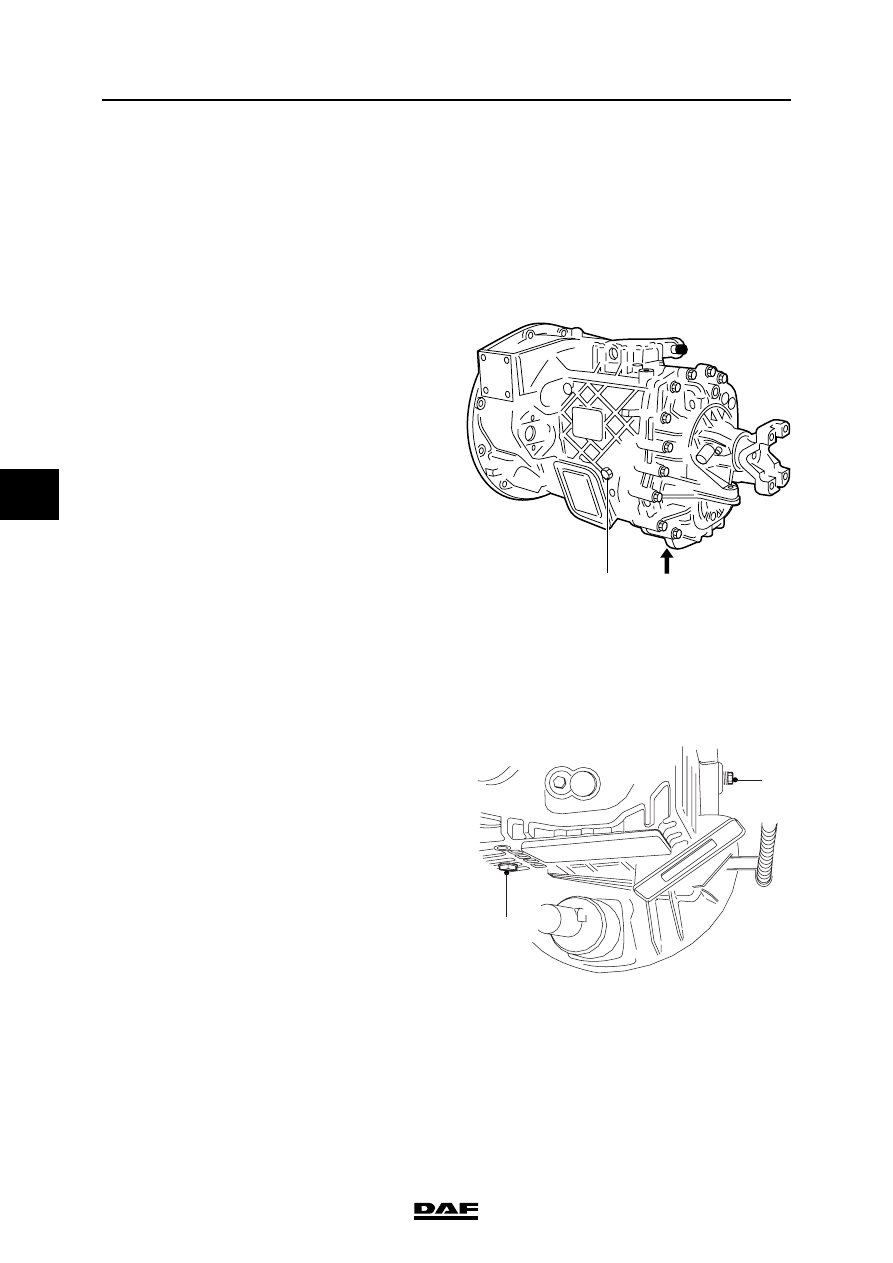
5.8 DRAINING AND FILLING, GEARBOX
ZF S5-42 gearbox
To prevent skin injury, avoid
unnecessary contact with the
drained oil.
Draining the gearbox
1.
Place the vehicle on a flat and level surface.
2.
Drain the gearbox at operating temperature.
3.
Remove the drain plug (1) and the level
check/filler plug (2) and drain the oil.
Filling the gearbox
1.
Clean the drain plug (1) and fit it, tightening it
to the specified torque. See "Technical data".
2.
Fill the oil through level check/filler opening
(2) until the oil reaches the rim of the filling
opening.
3.
Fit level check/filler plug (2), tightening it to
the specified torque, see "Technical data".
ZF 6S850 gearbox
To prevent skin injury, avoid
unnecessary contact with the
drained oil.
Draining the gearbox
1.
Place the vehicle on a flat and level surface.
2.
Drain the gearbox at operating temperature.
3.
Remove the drain plug (2) and the level
check/filler plug (1) and drain the oil.
Filling the gearbox
1.
Clean the drain plug (2) and fit it, tightening it
to the specified torque. See "Technical data".
2.
Fill the oil through level check/filler opening
(1) until the oil reaches the rim of the filling
opening.
3.
Fit level check/filler plug (1), tightening it to
the specified torque, see "Technical data".
}
2
1
V3 00 403
}
2
1
V3 00 884
©
200515
5-11
Draining and filling
EXPLANATORY NOTES ON THE MAINTENANCE ACTIVITIES
ΛΦ45/55 series
5
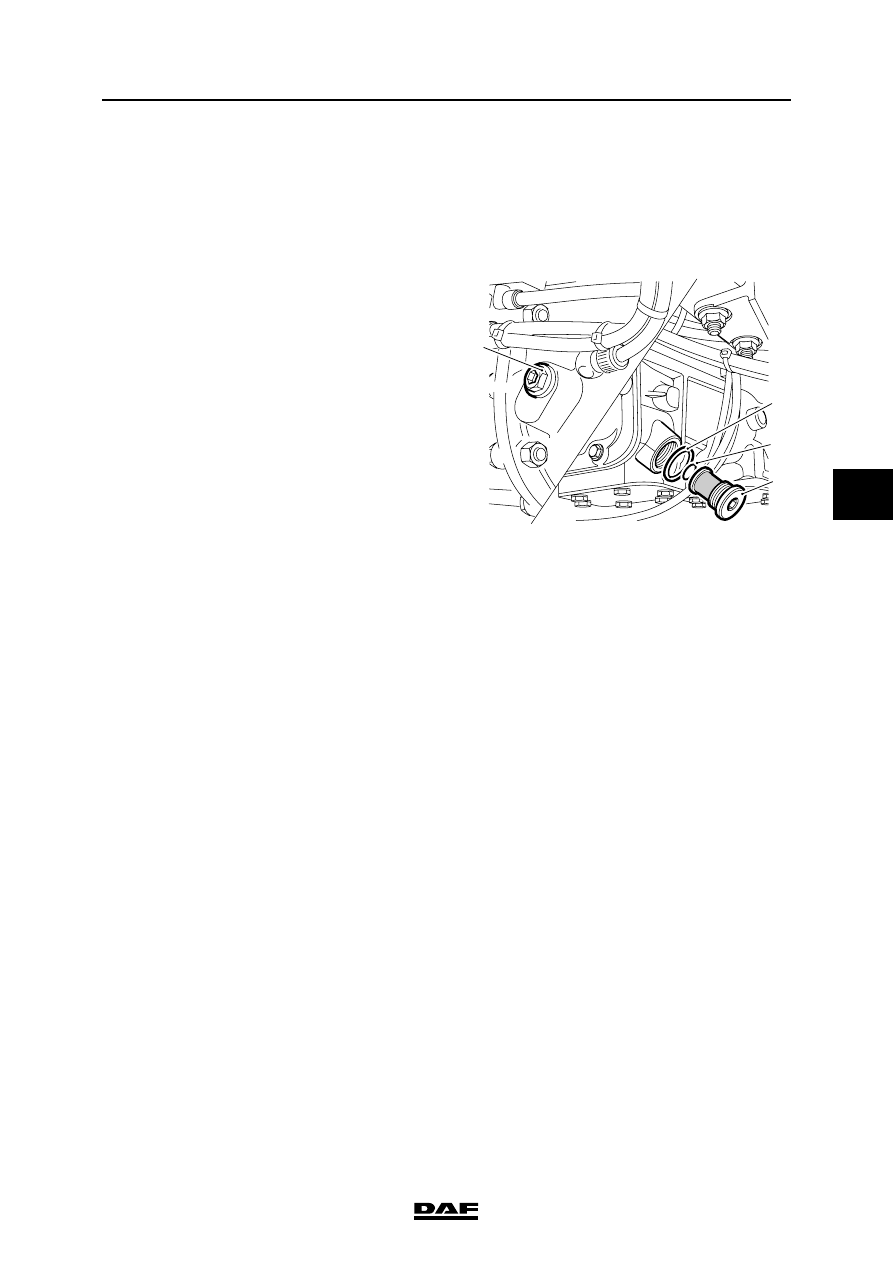
EATON 6309A gearbox
To prevent skin injury, avoid
unnecessary contact with the
drained oil.
Draining the gearbox
1.
Place the vehicle on a flat and level surface.
2.
Drain the gearbox at operating temperature.
3.
Remove the oil strainer/drain plug (4) and
the level check/filler plug (1) and drain the oil.
4.
Clean the oil strainer (4) in a suitable solvent
and dry the oil strainer (4) thoroughly.
Filling the gearbox
1.
Check and replace the O-ring (3) and the
sealing ring (2), if necessary.
2.
Tighten the oil strainer/drain plug (4) to the
specified tightening torque. See "Technical
data".
3.
Fill the oil through level check/filler opening
(1) until the oil reaches the rim of the filling
opening.
4.
Fit level check/filler plug (1), tightening it to
the specified torque, see "Technical data".
}
1
2
3
4
V3 00 376
EXPLANATORY NOTES ON THE MAINTENANCE ACTIVITIES
5-12
©
200515
Draining and filling
5
ΛΦ45/55 series
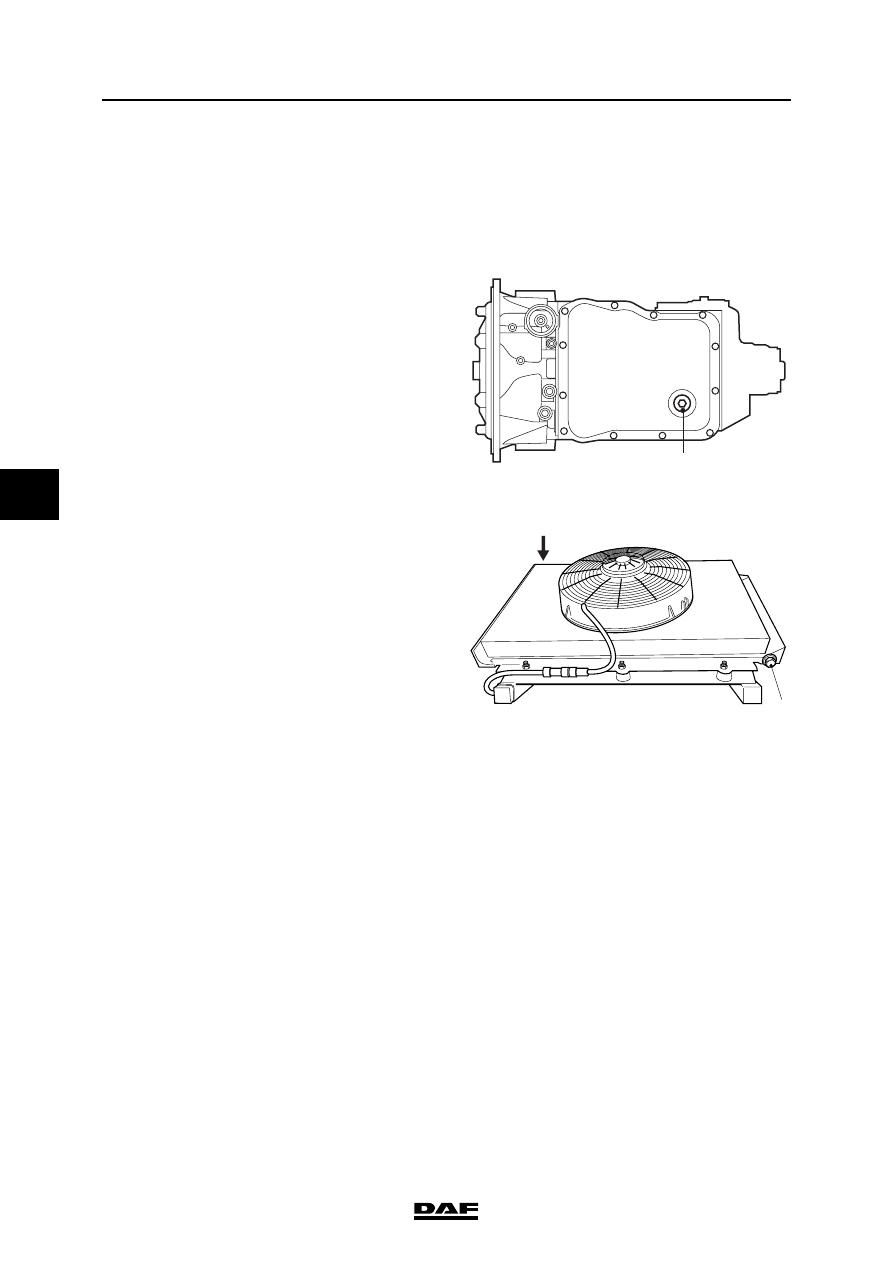
Allison 1000 & 2000 automatic gearboxes
To prevent skin injury, avoid
unnecessary contact with the
drained oil.
Draining the gearbox
1.
Place the vehicle on a level and horizontal
surface.
2.
Bring the gearbox to operating temperature
(approx. 71
C - 93C) to allow the oil to drain
more quickly and more fully.
3.
Remove the drain plug (1) from the gearbox
oil sump.
4.
Remove the drain plug (1) from the heat
exchanger and loosen the bleed screw (2).
5.
Remove the oil filters. See "Removal and
installation".
}
1
V3 00 885
1
2
V300912
Нет комментариевНе стесняйтесь поделиться с нами вашим ценным мнением.
Текст