DAF LF45, LF55 Series. Manual — part 660

©
200515
5-13
Draining and filling
EXPLANATORY NOTES ON THE MAINTENANCE ACTIVITIES
ΛΦ45/55 series
5
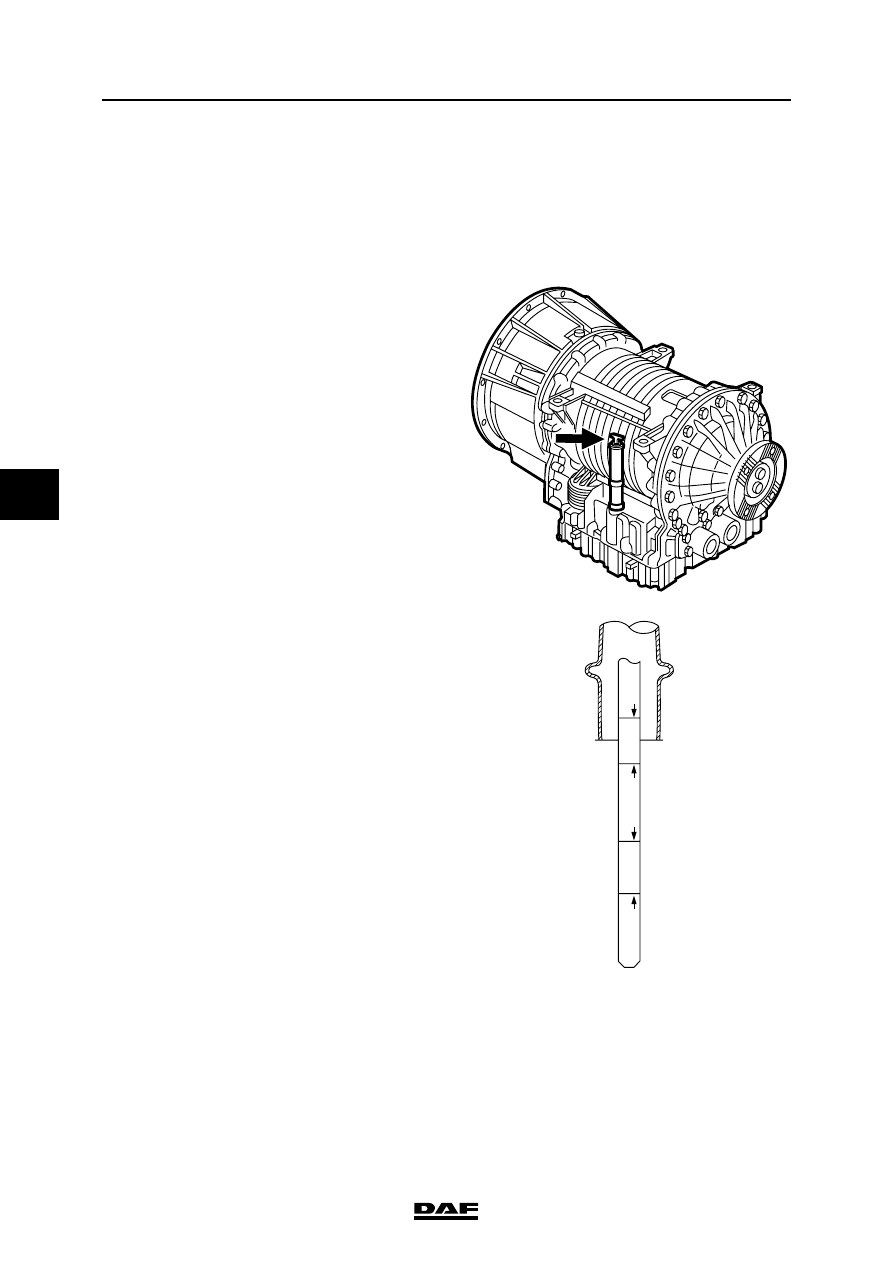
Filling the gearbox
1.
Clean the drain plugs, provide them with new
sealing rings and fit them, tightening them to
the specified torque, see "Technical data".
2.
Fill the gearbox through the dipstick holder
with the specified quantity of oil; see
"Technical data".
3.
Start the engine and run it at idling speed.
4.
Tighten the bleed screw (2) to the specified
torque, if only gearbox oil escapes. See
"Technical data".
5.
With the engine running at idling speed, top
up gearbox oil until the oil level is between
the "Cold add" and "Cold Full" marks.
6.
Check the oil level. See "Inspection and
adjustment".
Allison MD3060 automatic gearbox
To prevent skin injury, avoid
unnecessary contact with the
drained oil.
Draining the gearbox
1.
Place the vehicle on a flat and level surface.
2.
Bring the gearbox to operating temperature
(approx. 71
C - 93C) to allow the oil to drain
more quickly and more fully.
3.
Remove the drain plug (1) from the gearbox
oil sump.
4.
Remove the oil filters (2). See "Removal and
installation".
HOT
FULL
COLD
FULL
HOT
ADD
COLD
ADD
W 3 03 099
}
V300371
2
1
EXPLANATORY NOTES ON THE MAINTENANCE ACTIVITIES
5-14
©
200515
Draining and filling
5
ΛΦ45/55 series
Filling the gearbox
1.
Clean the drain plug (1), fit a new sealing ring
and tighten the plug to the specified torque;
see "Technical data".
2.
Fit the oil filters (2). See "Removal and
installation".
3.
Fill the gearbox through the dipstick holder
with the specified quantity of oil; see
"Technical data".
4.
Check that the oil level reaches the "Cold
full" mark.
Note:
To take the dipstick out of the holder, the
sealing cap must be held while the dipstick is
turned anti-clockwise.
5.
Check the oil level using the selector keypad.
See "Inspection and adjustment".
W 3 03 098
HOT
FULL
COLD
FULL
HOT
ADD
COLD
ADD
W 3 03 099

©
200515
6-1
Cleaning
EXPLANATORY NOTES ON THE MAINTENANCE ACTIVITIES
ΛΦ45/55 series
5
6. CLEANING
6.1 CLEANING THE BATTERY TERMINALS
Avoid sparks and open flames in the
vicinity of batteries. Battery acid is
an aggressive fluid.
In the event of contact with the skin:
rinse the skin with plenty of water for
a sustained period. If redness or
pain persists, consult a doctor.
Remove any clothing affected and
rinse with water.
In the event of contact with the eyes:
rinse with plenty of water for at least
15 minutes and consult a doctor.
If swallowed: do NOT induce
vomiting. Rinse the mouth, drink two
glasses of water and consult a
doctor.
In the event of inhalation: get fresh
air, rest and consult a doctor.
1.
Disconnect the earth lead from the battery
terminal.
2.
Disconnect the positive lead from the battery
terminal.
3.
Clean the battery terminals, battery cables
and the top of the battery (oxide and dirt
discharge the battery).
4.
If the top of the battery has acid on it, it
should be rinsed with water.
5.
Check the fastening of the earth cable
connection to the chassis. Grease the
connection with petroleum jelly.
6.
Check the connection between the cable and
the fuse holder located behind the batteries;
see the arrow in the illustration. Clean the
connection and grease it with petroleum jelly.
7.
Fit the positive lead to the battery terminal.
8.
Fit the earth lead to the battery terminal.
9.
Grease the battery terminals with petroleum
jelly.
10. Check the routing and attachment of the
battery cables.
}
G0 00 227

EXPLANATORY NOTES ON THE MAINTENANCE ACTIVITIES
6-2
©
200515
Cleaning
5
ΛΦ45/55 series
6.2 CLEANING THE EXTERIOR OF RADIATOR AND AIR COOLER
Inhalation of dust may have serious
consequences for your health.
Take the necessary precautions,
such as wearing goggles and a
facemask.
Note:
With the aid of a simple tool, the radiator and the
air cooler can be blow-cleaned.
The tool (radiator cleaner) cannot be ordered
from DAF. It should be manufactured by yourself
according to the drawing.
Key to drawing:
1.
If the vehicle has air conditioning, loosen the
support of the refrigerant pipes (1) on the
radiator and remove the condenser from the
air cooler supports. Push the condenser as
far as possible forwards.
2.
Insert the radiator cleaner (3) between the air
cooler (1) and radiator (2) from underneath,
with the air holes facing the air cooler (1).
3.
Apply air pressure to the radiator cleaner (3)
and continue blow-cleaning the air cooler (1)
until no more dirt comes out.
}
100mm
5mm
2
1150mm
2
4
3
5
5
4
1
1
M2108
1
Solder up
2
Solder
3
Quick-release coupling for air hose
4
Steel pipe,
10 mm
5
6 x
1.5 mm between holes, with a
centre-to-centre distance between the
holes of 7 mm, drilled on one side
i400824
1
1
2
3
M201351
P
Нет комментариевНе стесняйтесь поделиться с нами вашим ценным мнением.
Текст