DAF LF45, LF55 Series. Manual — part 259
©
200508
4-7
Removal and installation
ALLISON 1000 & 2000 AUTOMATIC GEARBOXES
ΛΦ45/55 series
3
7
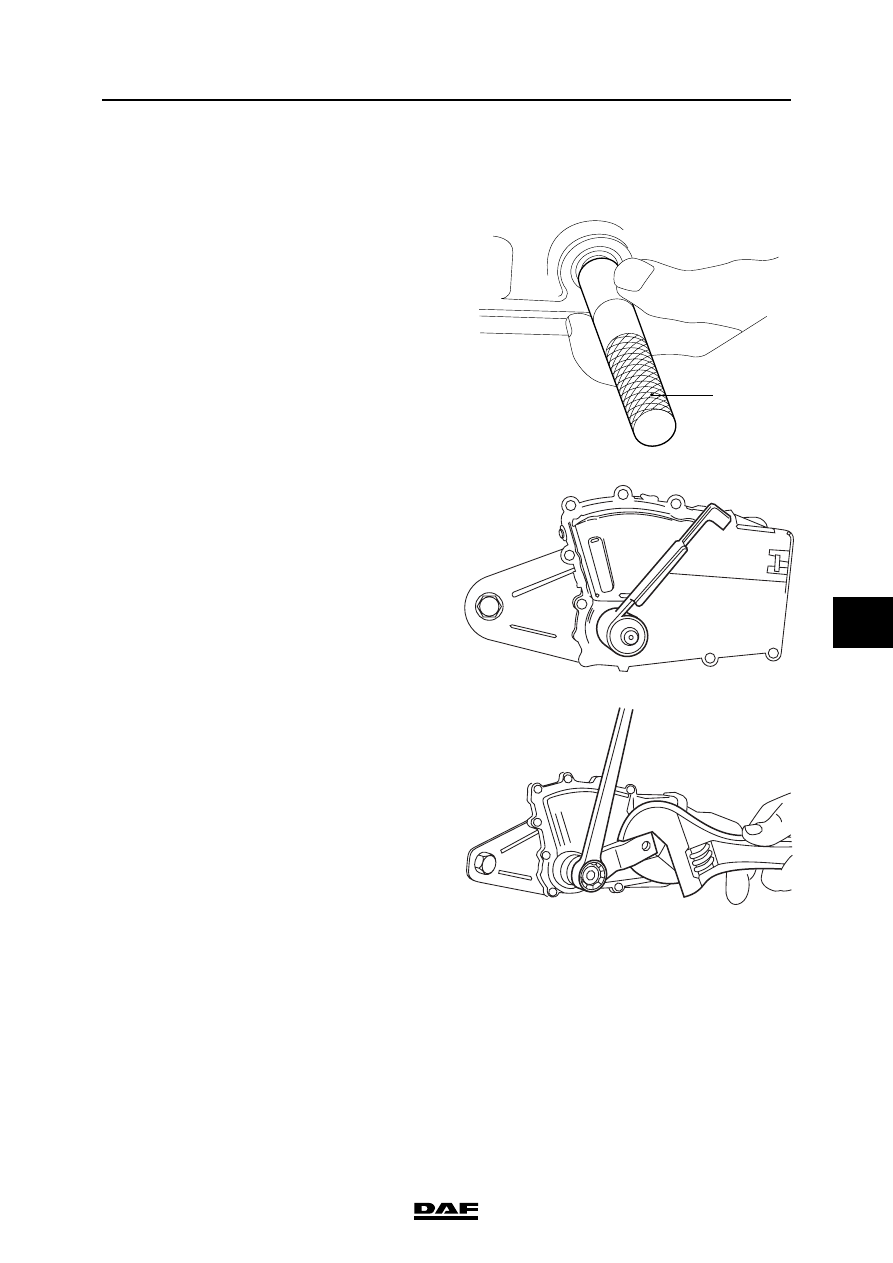
Fitting the selector shaft oil seal
1.
Lightly lubricate lip of the oil seal with clean
gearbox oil.
2.
Fit the oil seal on the special tool
(DAF no. 1453125).
3.
Fit the oil seal as far as possible into the
gearbox housing and remove the special
tool (1).
4.
Fit the selector switch using special tool
(DAF no. 1451992).
5.
Fit the selector arm onto the selector shaft
and tighten the attachment nut to the
specified torque. See "Technical data".
The selector shaft must not be
turned while the attachment nut is
being loosened or tightened. While
loosening or tightening the
attachment nut, lock the selector
shaft using the selector arm and an
appropriate tool.
6.
Fit the selector cable into the selector arm.
Note:
The attachment of the selector cable must be
fitted so that the connecting pin can move
freely in every gear.
1
V3 00 561
V3 00 481
V3 00 482
}
ALLISON 1000 & 2000 AUTOMATIC GEARBOXES
4-8
©
200508
Removal and installation
7
ΛΦ45/55 series
3
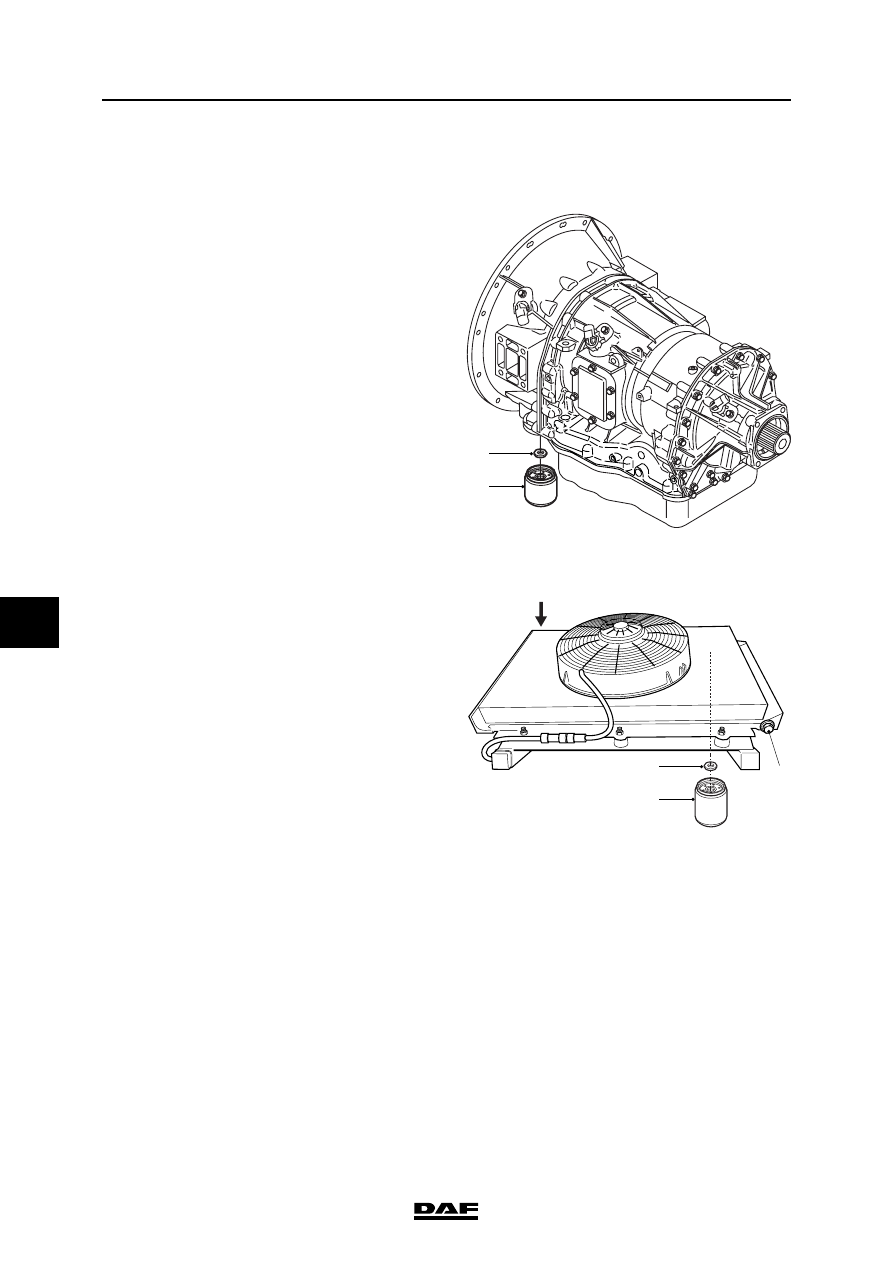
4.5 REMOVING AND INSTALLING OIL FILTERS
Removing oil filters
1.
Clean the oil filters (1) and (5) and the
surrounding area.
2.
Loosen the oil filters on the gearbox and the
heat exchanger.
3.
Remove the magnetic rings (2) and (4) and
check them for wear particles.
Note:
If there are large wear particles in the wear
swarf, this indicates excessive wear in the
gearbox and the cause must be ascertained.
4.
Clean the magnetic rings and the contact
surfaces on the gearbox housing and the
heat exchanger.
Installing oil filters
1.
Fit the magnetic rings (2) and (4) on the
gearbox housing and the heat exchanger.
2.
Lightly lubricate the new oil filters (1) and (5)
with clean gearbox oil and place the oil filters
on the gearbox and heat exchanger.
3.
Tighten the oil filters until they touch the
contact surface. Manually tighten the oil
filters another 360
″.
4.
Check the oil level. See "Inspection and
adjustment".
1
2
V3 00 480
5
4
6
3
V3 00 556
©
200508
5-1
Draining and filling
ALLISON 1000 & 2000 AUTOMATIC GEARBOXES
ΛΦ45/55 series
3
7
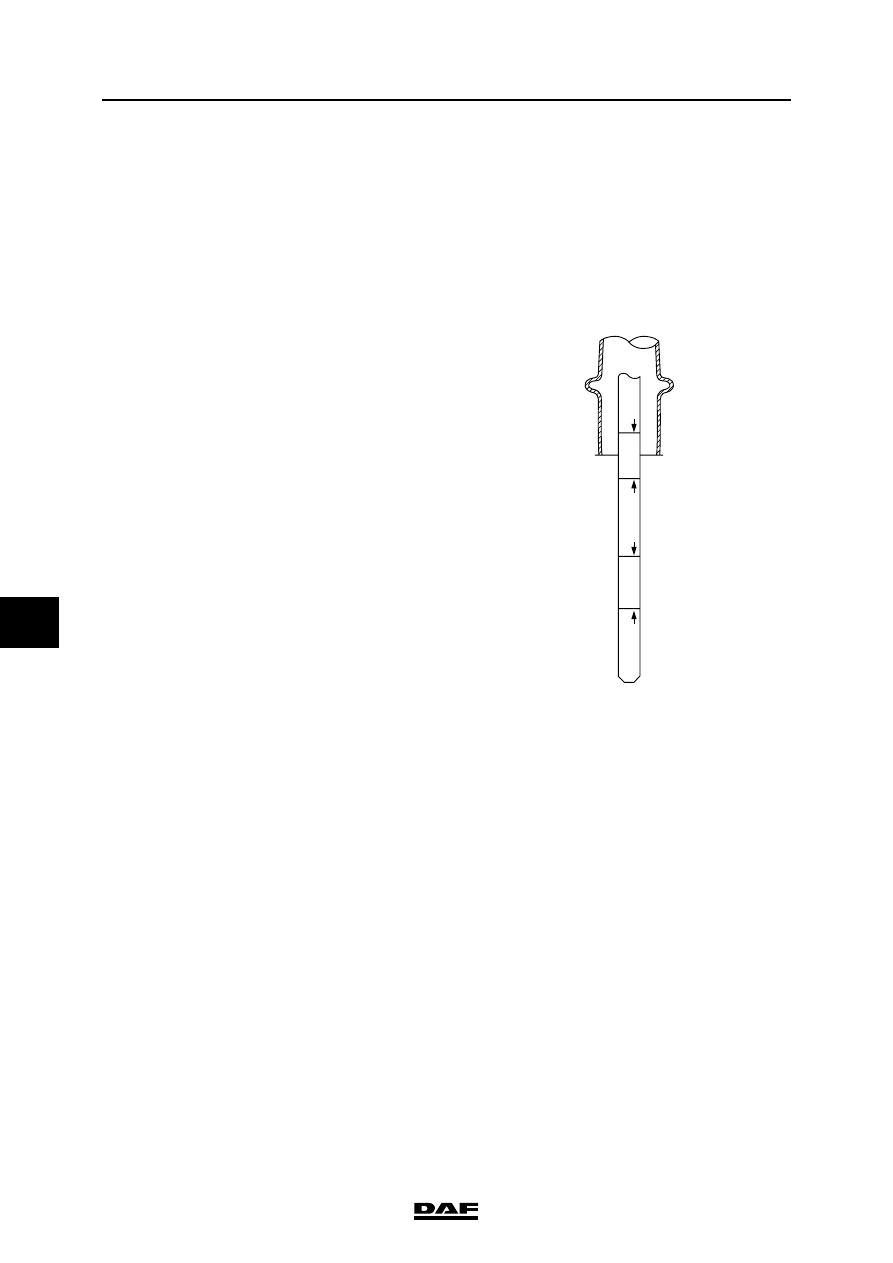
5. DRAINING AND FILLING
5.1 DRAINING AND FILLING GEARBOX
Draining gearbox
1.
Bring the gearbox to operating temperature
(approx. 71
″C - 93″C) so that the oil can be
drained more quickly and more completely.
2.
Place the vehicle on a level and horizontal
surface.
3.
Remove the drain plug from the gearbox oil
sump.
4.
Remove the drain plug (6) from the heat
exchanger and loosen the bleed screw (3).
5.
Remove the oil filters. See "Removal and
installation".
5
4
6
3
V3 00 556
ALLISON 1000 & 2000 AUTOMATIC GEARBOXES
5-2
©
200508
Draining and filling
7
ΛΦ45/55 series
3
Filling gearbox
1.
Clean the drain plugs, provide them with new
sealing rings and fit them, tightening to the
specified torque. See "Technical data".
2.
Fill the gearbox through the dipstick holder
with the specified quantity of oil; see
"Technical data".
3.
Start the engine and run it at idling speed.
4.
If only gearbox oil escapes, tighten the bleed
screw (3) to the specified torque. See
"Technical data".
5.
While the engine is idling, add gearbox oil
until the oil level is between the "Cold add"
mark and the "Cold full" mark.
6.
Check the oil level. See "Inspection and
adjustment".
HOT FULL
COLD FULL
HOT ADD
COLD ADD
W 3 03 099
Нет комментариевНе стесняйтесь поделиться с нами вашим ценным мнением.
Текст