Dodge Dakota (ND). Manual — part 1167
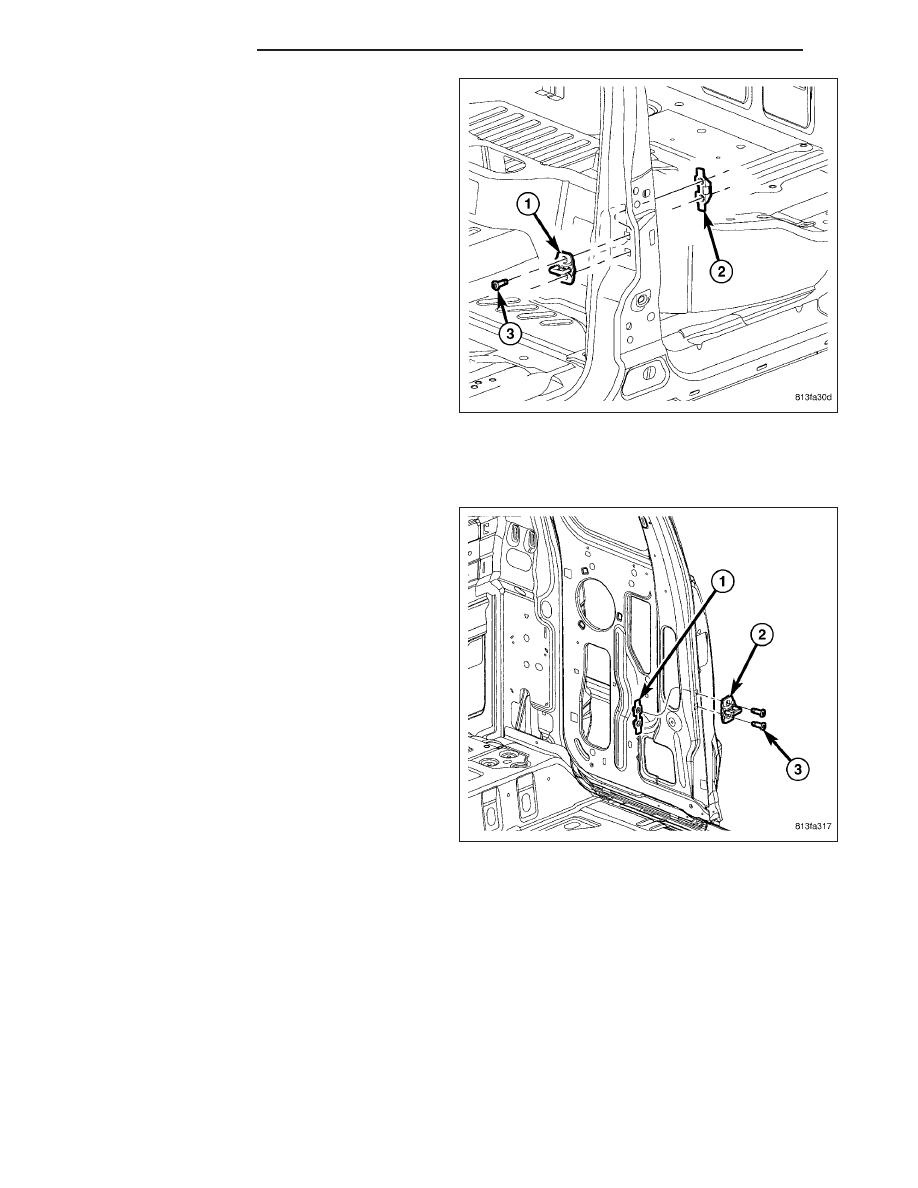
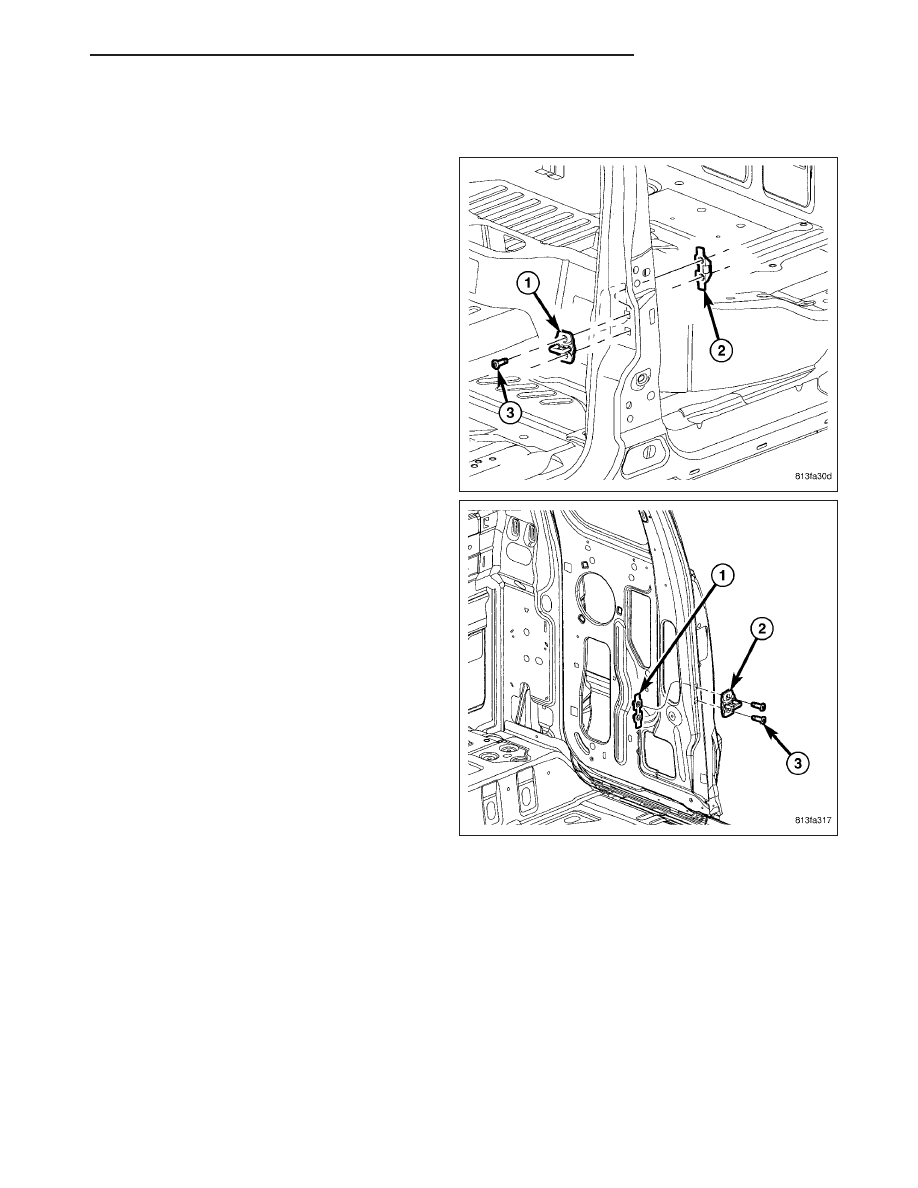
2. Using a grease pencil or equivalent, mark the posi-
tion of the striker (1).
3. Remove the bolts (3) and remove the striker.
INSTALLATION
Club Cab
1. Position the tapping plate into the rear cargo door
(1).
2. Install the striker and install the bolts.
3. Tighten the bolts to 28 N·m (21 ft. lbs.).
4. Adjust the striker if needed. (Refer to 23 - BODY/
DOOR - FRONT/LATCH STRIKER - ADJUST-
MENTS)
23 - 80
DOOR - FRONT
ND

CAUTION: Do not allow the watershield or adhe-
sive to become contaminated with dirt or other
foreign substances.
Do not damage the watershield during removal
and installation.
If the watershield becomes contaminated or dam-
aged, replace the watershield.
5. Position the watershield back into place.
6. Install the cargo door trim panel. (Refer to 23 -
BODY/DOOR - CARGO/TRIM PANEL - INSTALLA-
TION)
ND
DOOR - FRONT
23 - 81
Quad Cab
1. Position the tapping plate (2) into the b-pillar.
2. Install the striker (1) and install the bolts (3).
3. Tighten the bolts to 28 N·m (21 ft. lbs.).
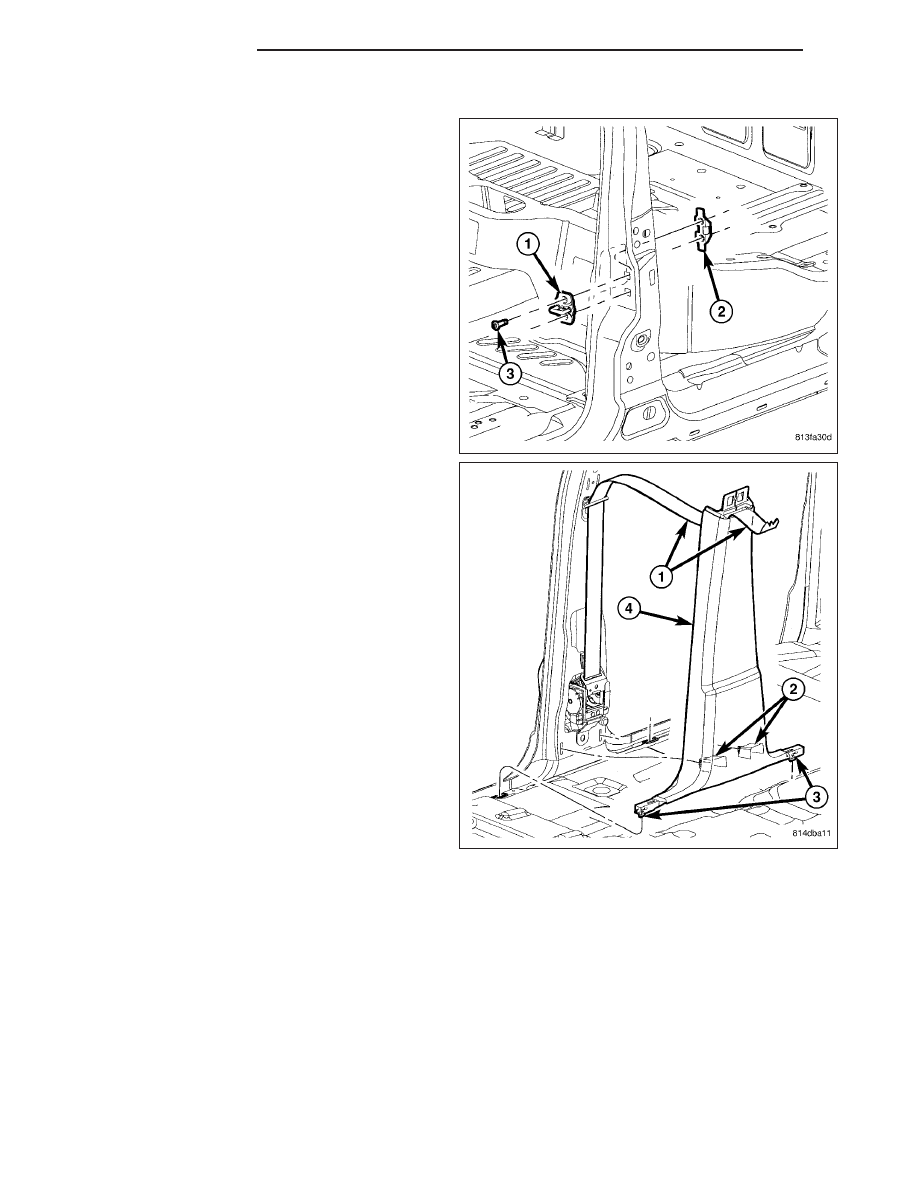
Install the lower b-pillar trim (4). (Refer to 23 - BODY/
INTERIOR/B-PILLAR TRIM - INSTALLATION)
4. Adjust the striker if needed. (Refer to 23 - BODY/
DOOR - FRONT/LATCH STRIKER - ADJUST-
MENTS)
23 - 82
DOOR - FRONT
ND
ADJUSTMENTS
ADJUSTMENT
1. Using a grease pencil or equivalent, mark the posi-
tion of the striker (1) to aid in adjustment.
2. Loosen the striker bolts (3).
3. Change the striker position to adjust the rear gap
and flush measurement. (Refer to 23 - BODY/
BODY STRUCTURE/GAP AND FLUSH - SPECIFI-
CATIONS)
4. Tighten the bolts to 28 N·m (21 ft. lbs.).
ND
DOOR - FRONT
23 - 83
Нет комментариевНе стесняйтесь поделиться с нами вашим ценным мнением.
Текст