Dodge Dakota (ND). Manual — part 1177
INSTALLATION
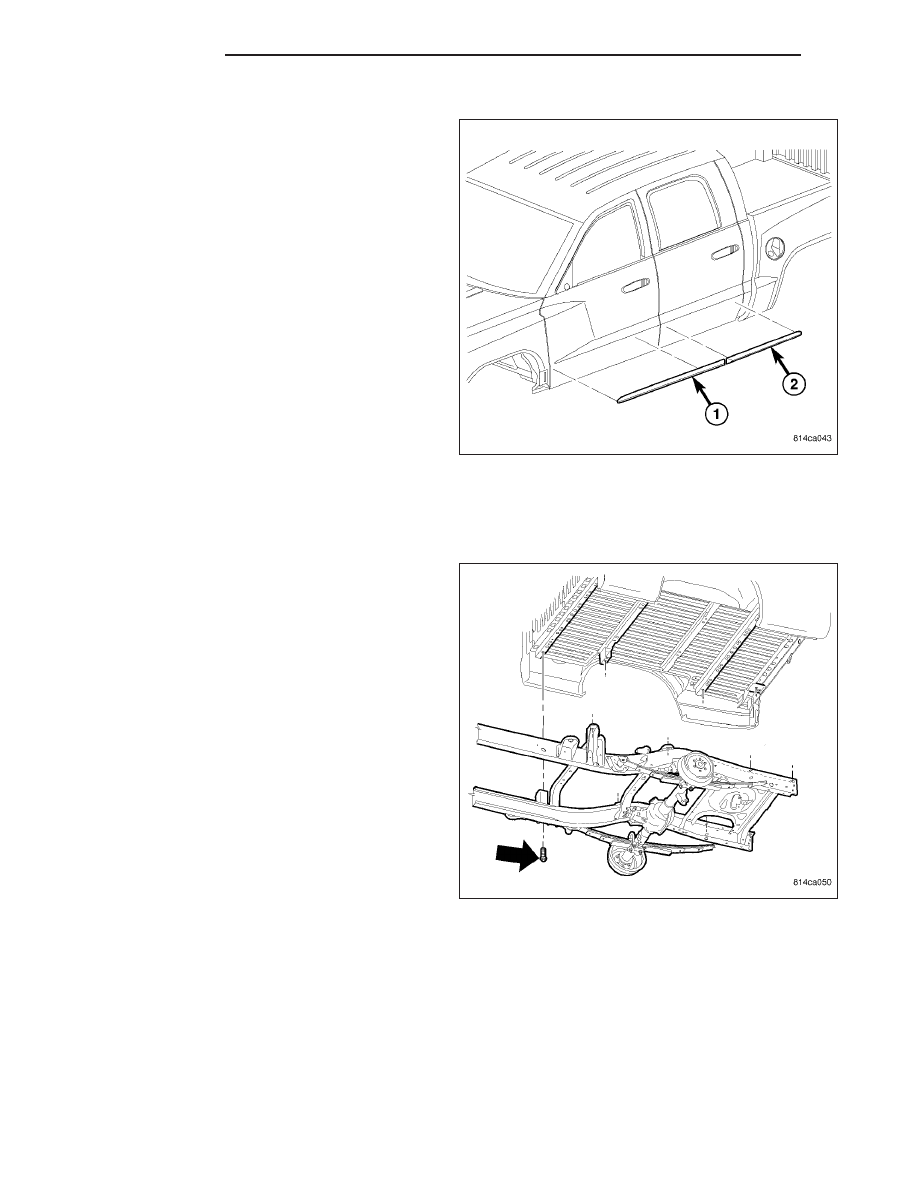
1. Clean body surface with MOPAR
T
Super Kleen sol-
vent or equivalent. Wipe surface dry with lint free
cloth.
2. Remove protective cover from tape on back of
molding. Apply molding to body below the masking
tape guide.
3. Remove masking tape guide and firmly press mold-
ing to body surface to assure adhesion.
CARGO BOX
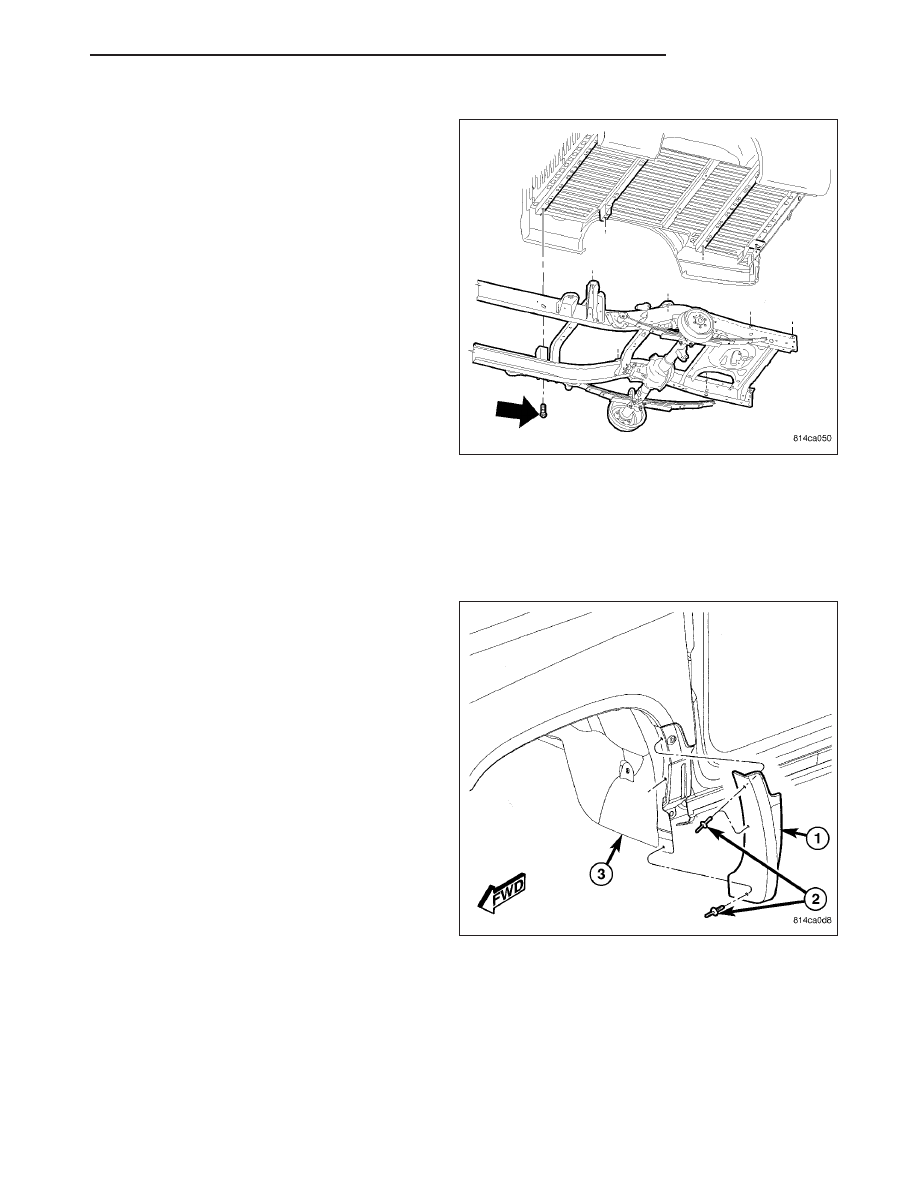
REMOVAL
1. Disconnect the fuel fill hose and vent hose. (Refer
to 14 - FUEL SYSTEM/FUEL DELIVERY/FUEL
TANK - REMOVAL)
2. Disconnect the tail lamp wire harness.
3. Remove the cargo box bolts.
4. Remove the cargo box.
23 - 120
EXTERIOR
ND
INSTALLATION
1. Install the cargo box and install the bolts.
2. Tighten the bolts to 108 N·m (80 ft. lbs.).
3. Connect the fuel fill and vent hoses. (Refer to 14 -
FUEL SYSTEM/FUEL DELIVERY/FUEL TANK -
INSTALLATION)
4. Connect the tail lamp wire harness.
CLADDING-BODY SIDE
REMOVAL
FENDER CLADDING
1. From inside the wheelwell (3), remove the fasten-
ers (2) holding the fender cladding (1) to the
fender.
ND
EXTERIOR
23 - 121
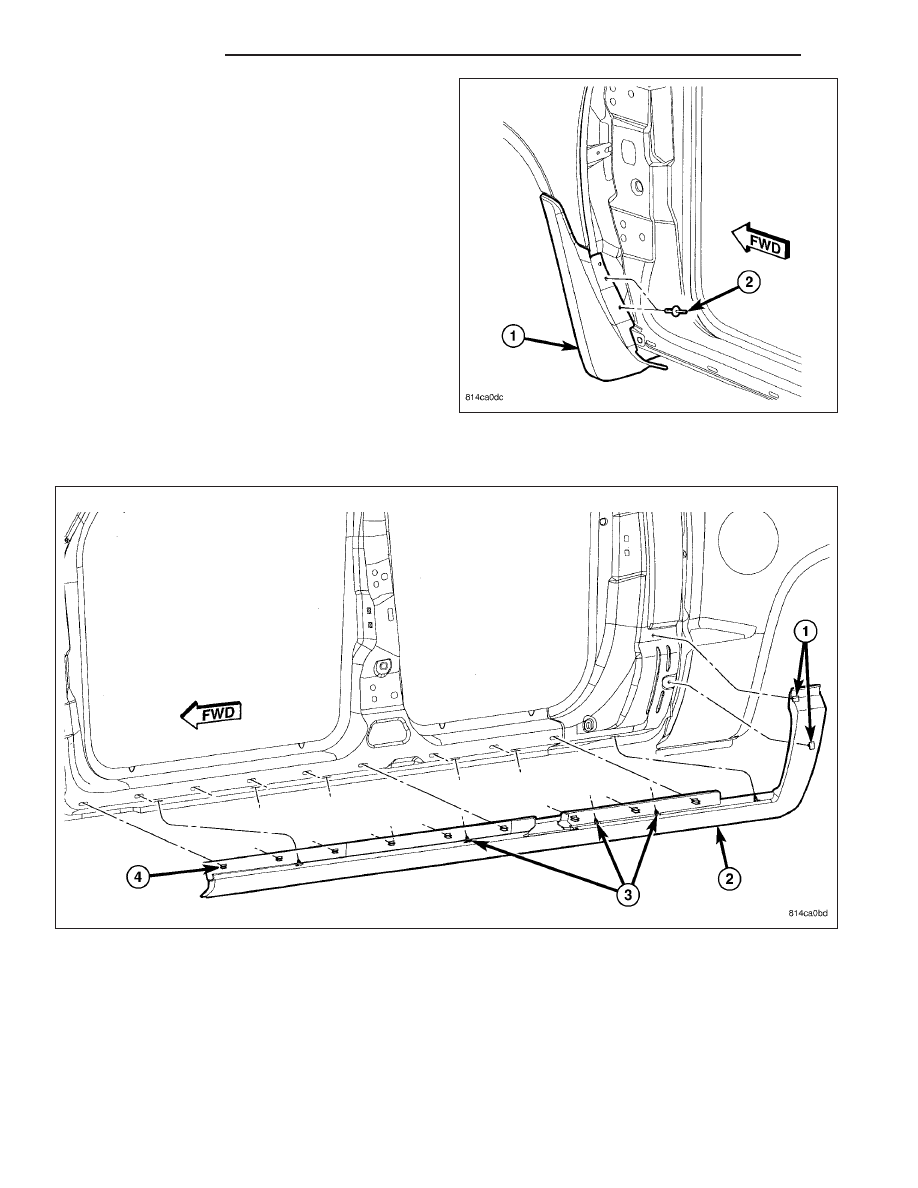
2. Open the front door, from inside the a-pillar open-
ing, remove the rear fasteners (2) from the fender
cladding (1).
BODYSIDE CLADDING
1. Open door(s) and remove the fasteners (3) holding the bodyside cladding (2) in the lower door opening.
2. Remove the two fasteners holding the rear (1) of the bodyside cladding (2) to the rear side of the cab.
23 - 122
EXTERIOR
ND
INSTALLATION
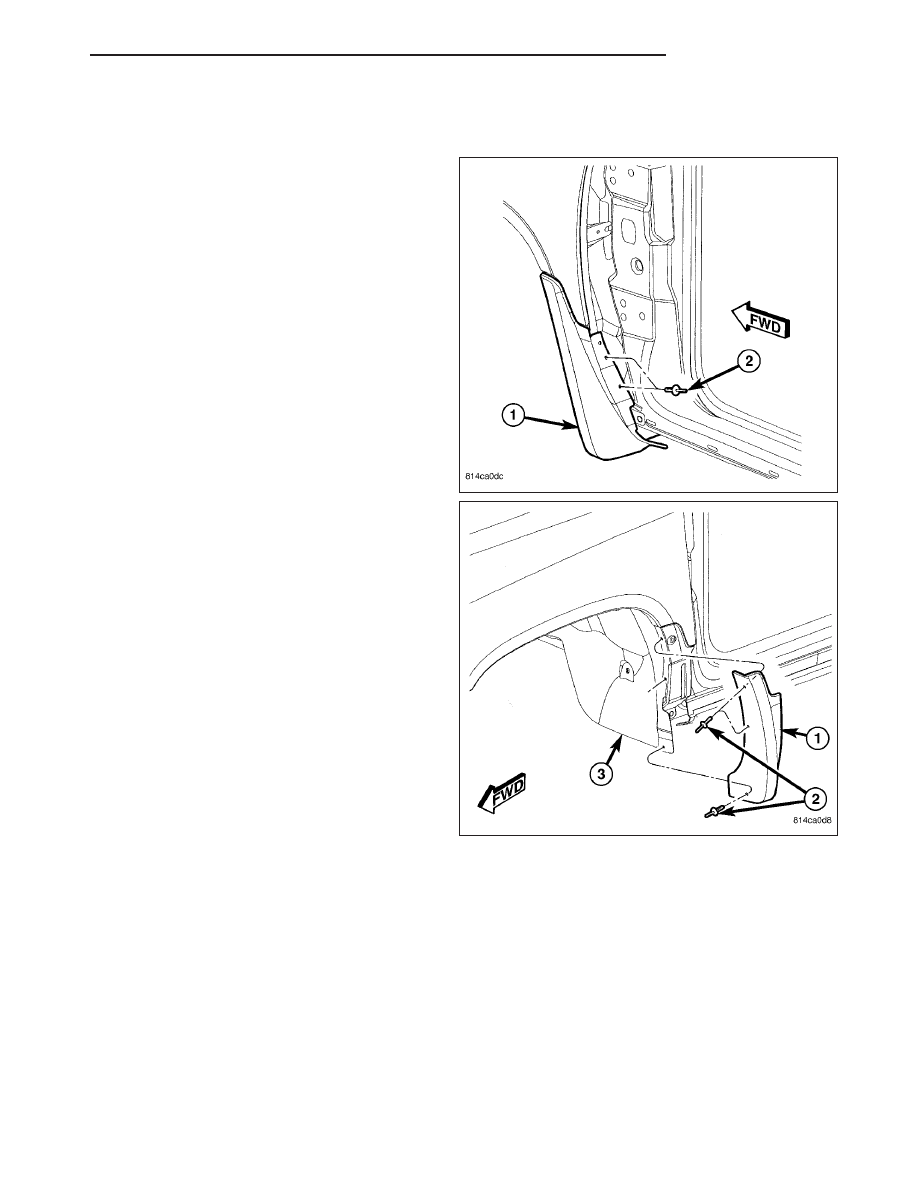
FENDER CLADDING
1. Position the fender cladding (1) and install the fas-
teners (2) into the a-pillar opening.
2. From inside the wheelwell (3), install the fasteners
(2) holding the fender cladding (1) to the fender.
Fig. 1
ND
EXTERIOR
23 - 123
Нет комментариевНе стесняйтесь поделиться с нами вашим ценным мнением.
Текст