Dodge Dakota (ND). Manual — part 1176
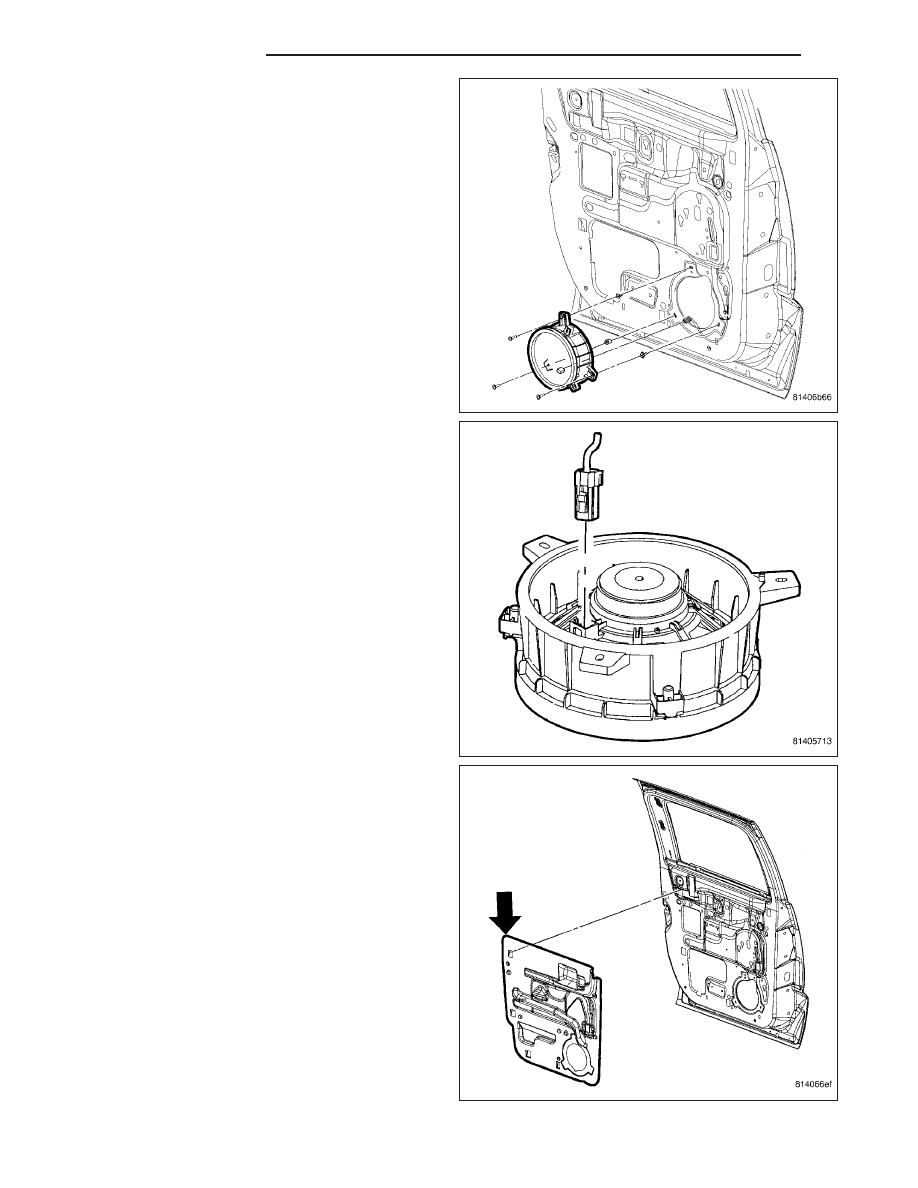
4. Remove the speaker mounting fasteners.
5. Remove speaker and disconnect the electrical har-
ness connector.
CAUTION: Do not allow the watershield or adhe-
sive to become contaminated with dirt or other
foreign substances.
Do not damage the watershield during removal
and installation.
If the watershield becomes contaminated or dam-
aged, replace the watershield.
6. Carefully remove the watershield from around the
perimeter of the door.
7. Separate the watershield from the interior handle
actuator
rod
and
the
door
wire
harness
(if
equipped) and remove the watershield.
23 - 116
DOORS - REAR
ND

INSTALLATION
CAUTION: Do not allow the watershield or adhe-
sive to become contaminated with dirt or other
foreign substances.
Do not damage the watershield during removal
and installation.
If the watershield becomes contaminated or dam-
aged, replace the watershield.
1. Position
the
wire
harness
and
actuator
rods
through the holes in the watershield.
2. Secure the watershield to the inner door panel.
3. Connect electrical harness connector and position
speaker to door.
4. Install and tighten mounting fasteners.
ND
DOORS - REAR
23 - 117
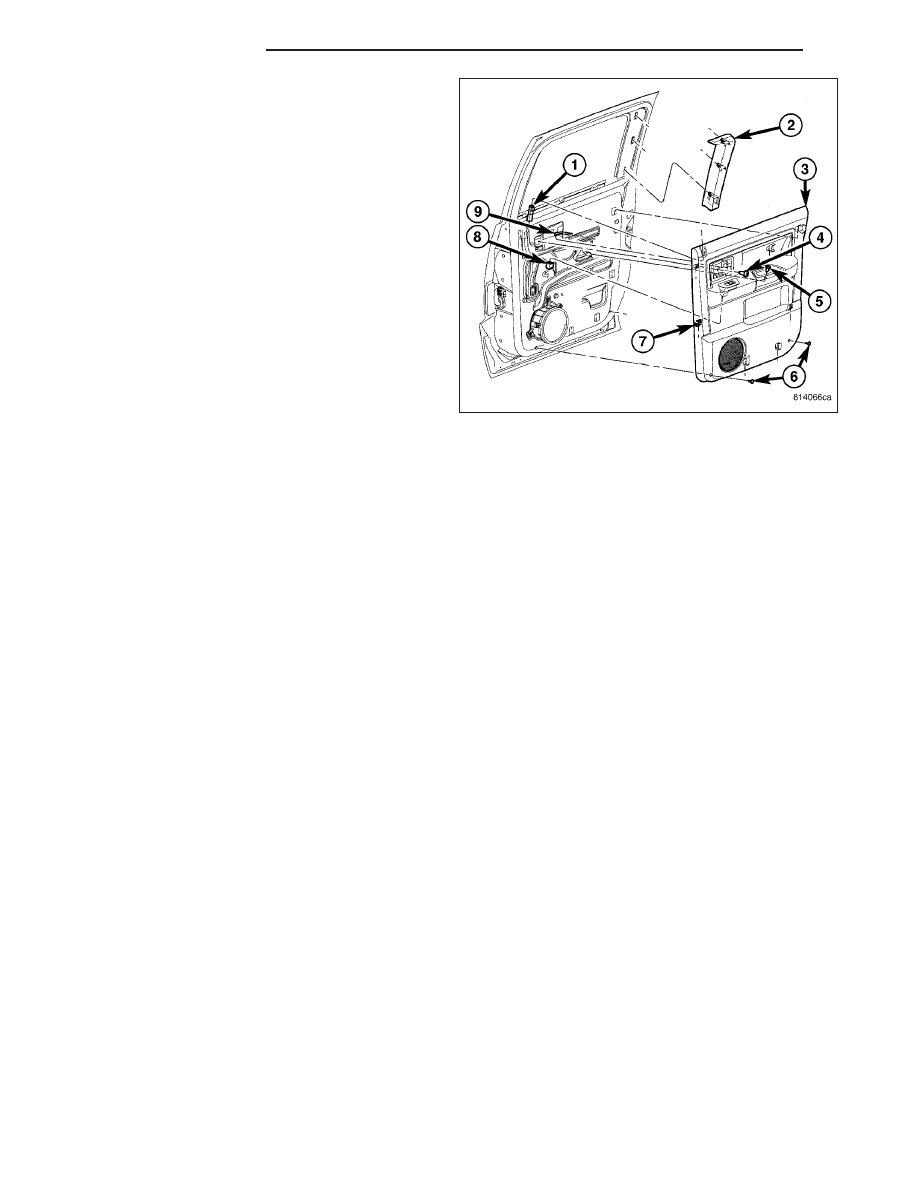
5. Install the door pull cup bracket and install the
bolts.
6. Install door trim panel (3). (Refer to 23 - BODY/
DOORS - REAR/PANEL-TRIM - INSTALLATION)
7. Connect battery negative cable.
23 - 118
DOORS - REAR
ND
EXTERIOR
TABLE OF CONTENTS
page
page
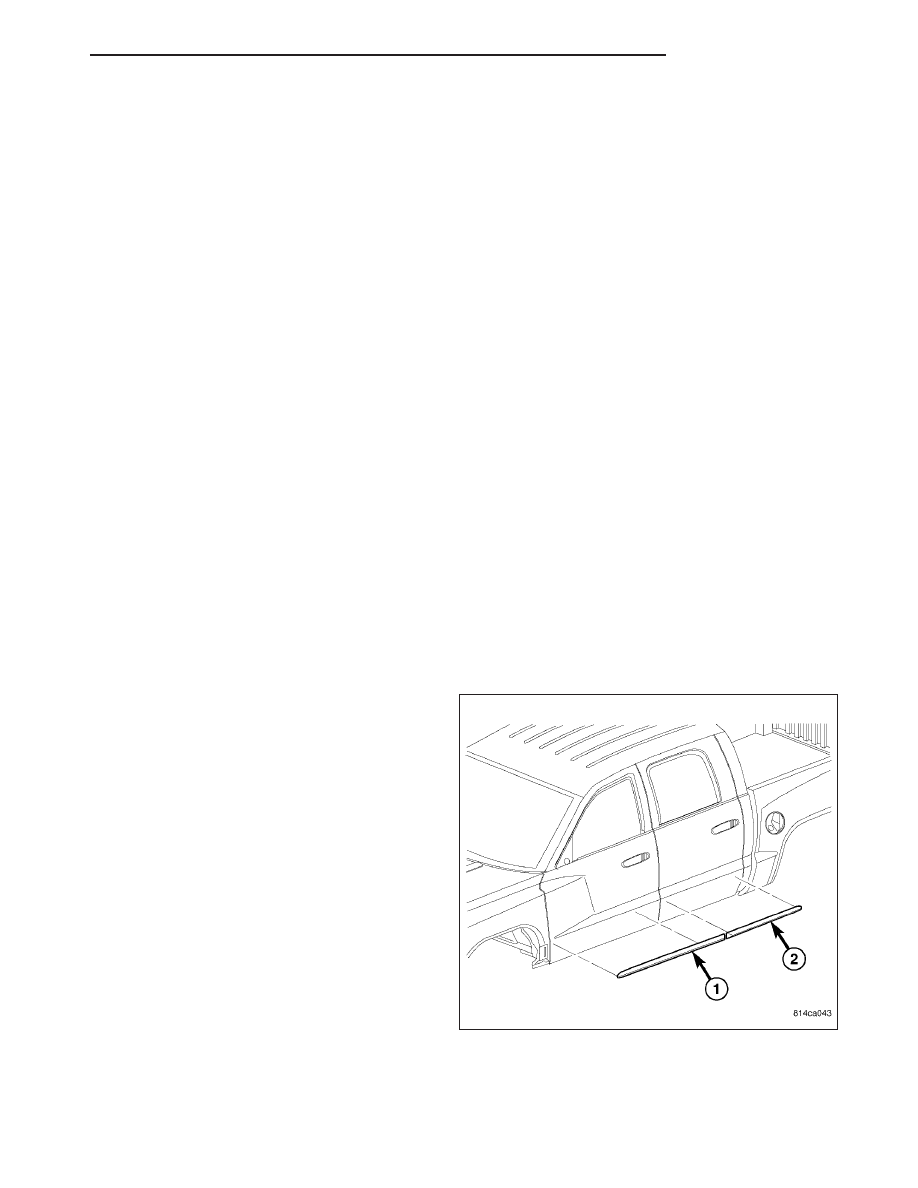
BODY SIDE MOLDINGS
. . . . . . . . . . . . . . . . . . . . . . . . . . . . 119
. . . . . . . . . . . . . . . . . . . . . . . . 120
CARGO BOX
. . . . . . . . . . . . . . . . . . . . . . . . . . . . 120
. . . . . . . . . . . . . . . . . . . . . . . . 121
CLADDING-BODY SIDE
. . . . . . . . . . . . . . . . . . . . . . . . . . . . 121
. . . . . . . . . . . . . . . . . . . . . . . . 123
FENDER
. . . . . . . . . . . . . . . . . . . . . . . . . . . . 125
. . . . . . . . . . . . . . . . . . . . . . . . 126
GLASS-OUTSIDE REARVIEW MIRROR
. . . . . . . . . . . . . . . . . . . . . . . . . . . . 127
. . . . . . . . . . . . . . . . . . . . . . . . 127
GRILLE
. . . . . . . . . . . . . . . . . . . . . . . . . . . . 128
. . . . . . . . . . . . . . . . . . . . . . . . 128
ISOLATORS-BODY
. . . . . . . . . . . . . . . . . . . . . . . . . . . . 129
. . . . . . . . . . . . . . . . . . . . . . . . 130
LINER-FRONT FENDER
. . . . . . . . . . . . . . . . . . . . . . . . . . . . 130
. . . . . . . . . . . . . . . . . . . . . . . . 131
MIRROR-OUTSIDE REARVIEW
. . . . . . . . . . . . . . . . . . . . . . . . . . . . 131
. . . . . . . . . . . . . . . . . . . . . . . . 132
PANEL-COWL TOP
. . . . . . . . . . . . . . . . . . . . . . . . . . . . 132
. . . . . . . . . . . . . . . . . . . . . . . . 133
PLATES-EXTERIOR NAME
. . . . . . . . . . . . . . . . . . . . . . . . . . . . 133
. . . . . . . . . . . . . . . . . . . . . . . . 134
RADIATOR CROSSMEMBER - UPPER
. . . . . . . . . . . . . . . . . . . . . . . . . . . . 134
. . . . . . . . . . . . . . . . . . . . . . . . 135
STRIPES AND DECALS-BODY
. . . . . . . . . . . . . . . . . . . . . . . . . . . . 135
. . . . . . . . . . . . . . . . . . . . . . . . 135
SHIELD-SPLASH
. . . . . . . . . . . . . . . . . . . . . . . . . . . . 136
. . . . . . . . . . . . . . . . . . . . . . . . 136
BODY SIDE MOLDINGS
REMOVAL
1. Apply a length of masking tape on the body, paral-
lel to the top edge of the molding to use as a
guide, if necessary.
2. Warm the effected adhesive type molding and body
metal to approximately 38°C (100°F) using a suit-
able heat lamp or heat gun.
3. Pull stick-on molding from painted surface.
ND
EXTERIOR
23 - 119
Нет комментариевНе стесняйтесь поделиться с нами вашим ценным мнением.
Текст