Dodge Dakota (ND). Manual — part 1175
INSTALLATION
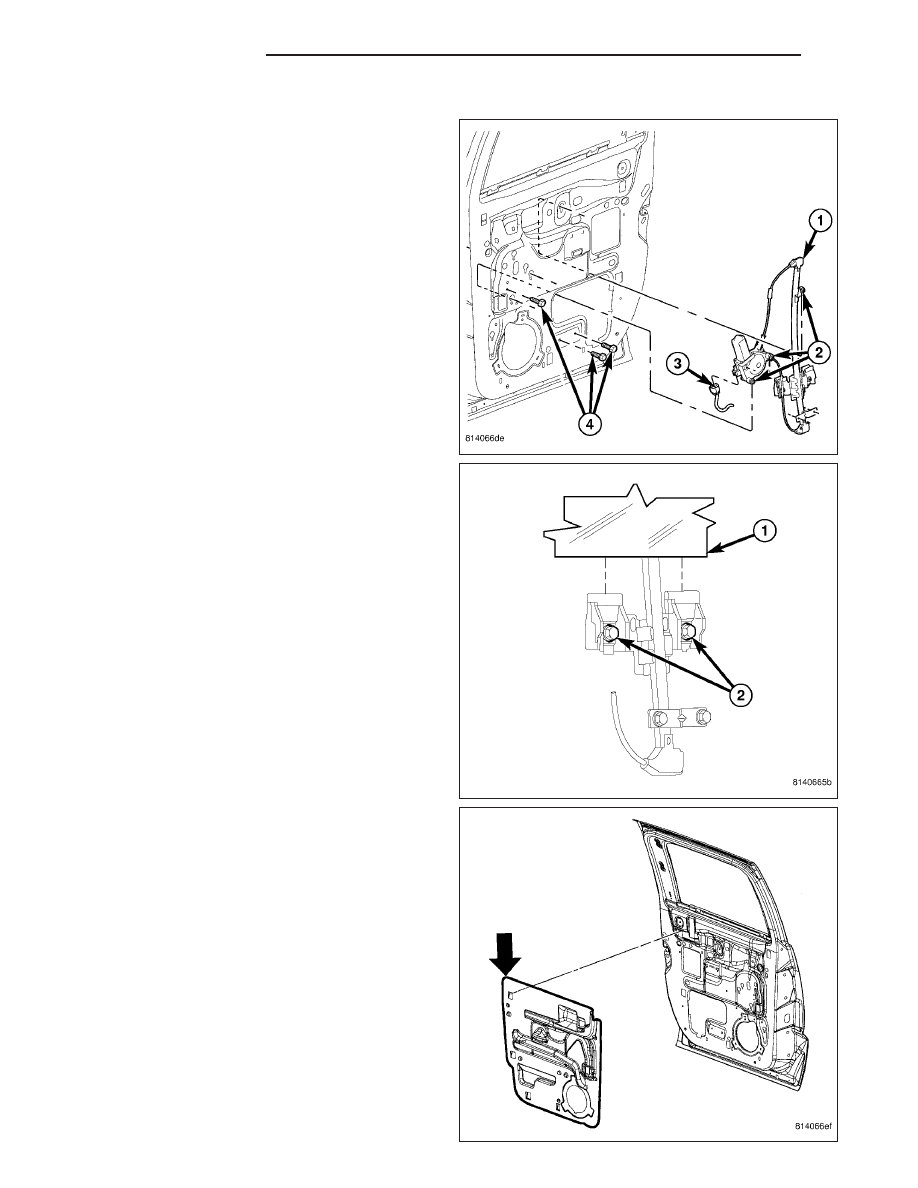
1. Place the regulator into the door and engage the
bolts (2) into the keyhole slots in the door.
2. Install the one bolt at the motor and the two lower
bolts (4).
3. Tighten all the regulator bolts to 10 N·m (85 in.
lbs.).
4. Connect the electrical connector (3).
5. Remove the tape used to secure the glass during
removal and position the glass (1) into the glass
clamps.
6. Temporarily install the window switch and raise the
glass into the full up position.
7. Tighten the glass clamp screws (2) securely.
8. Remove the window switch and install the water-
shield. (Refer to 23 - BODY/DOORS - REAR/WA-
TERSHIELD - INSTALLATION)
23 - 112
DOORS - REAR
ND
STRIKER
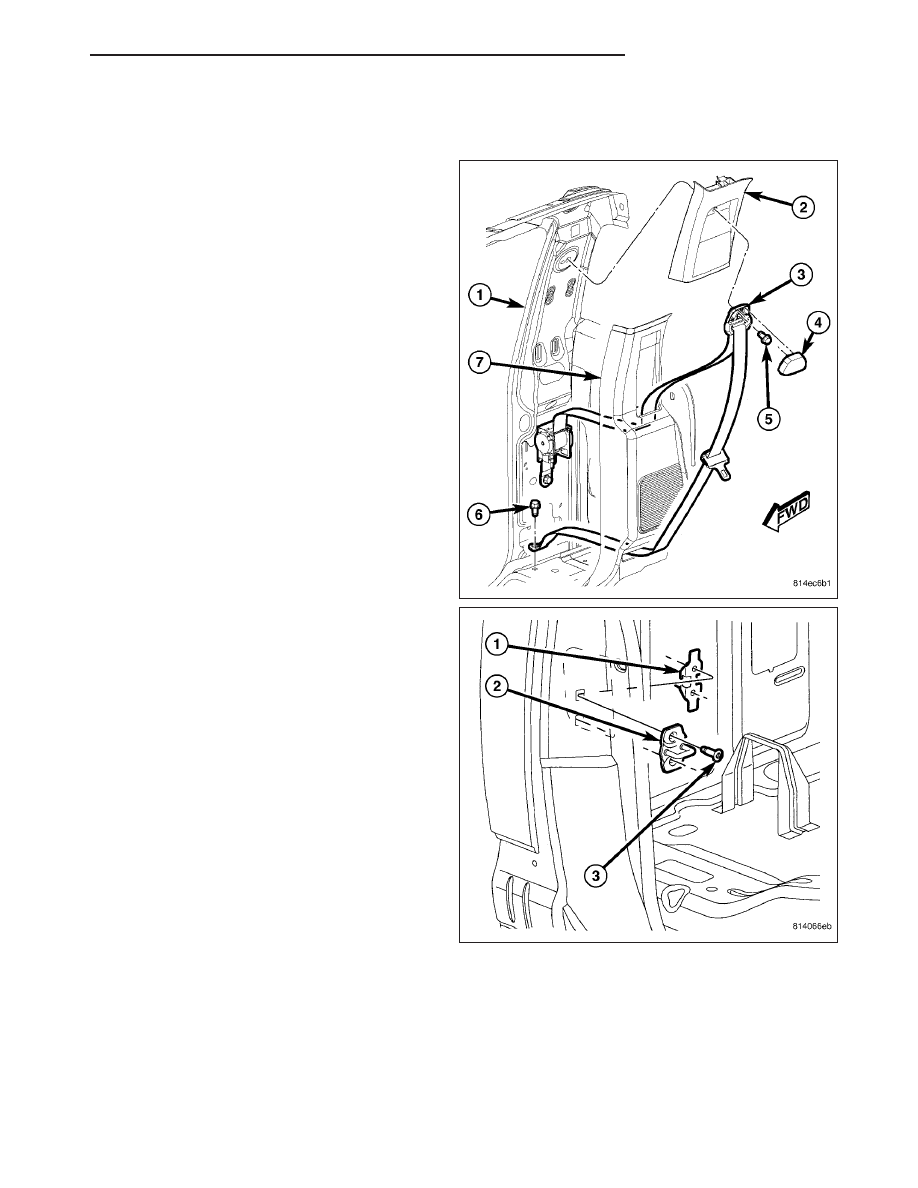
REMOVAL
1. Remove the lower c-pillar trim (7). (Refer to 23 -
BODY/INTERIOR/PANEL-C PILLAR LOWER TRIM
- REMOVAL)
2. Using a grease pencil or equivalent, mark the posi-
tion of the striker (2).
3. Remove the bolts (1) and remove the striker.
ND
DOORS - REAR
23 - 113
INSTALLATION
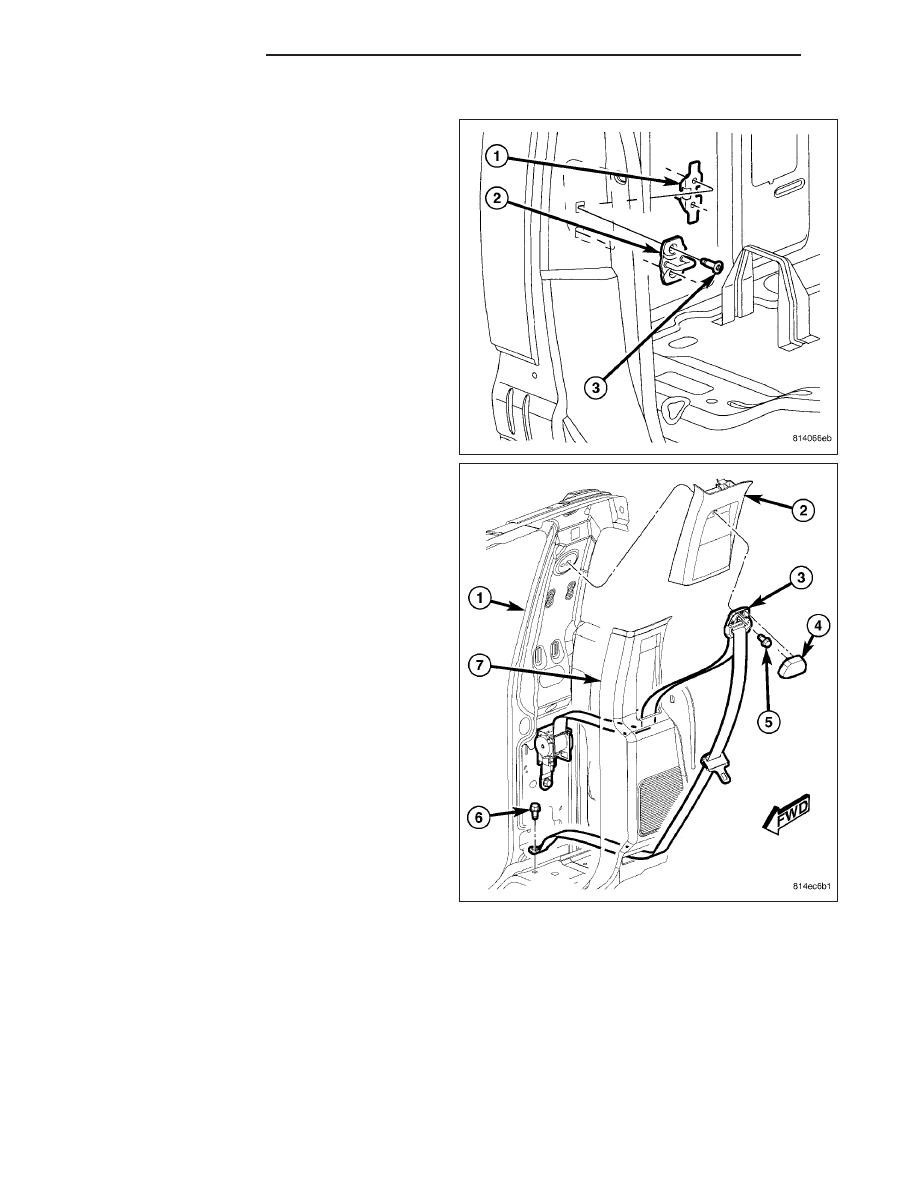
1. Position the tapping plate (1) into the b-pillar.
2. Install the striker (2) and install the bolts (3).
3. Tighten the bolts to 28 N·m (21 ft. lbs.).
4. Adjust the striker if needed. (Refer to 23 - BODY/
DOORS - REAR/STRIKER - ADJUSTMENTS)
5. Install the lower c-pillar trim (7). (Refer to 23 -
BODY/INTERIOR/PANEL-C PILLAR LOWER TRIM
- INSTALLATION)
23 - 114
DOORS - REAR
ND
ADJUSTMENTS
ADJUSTMENT
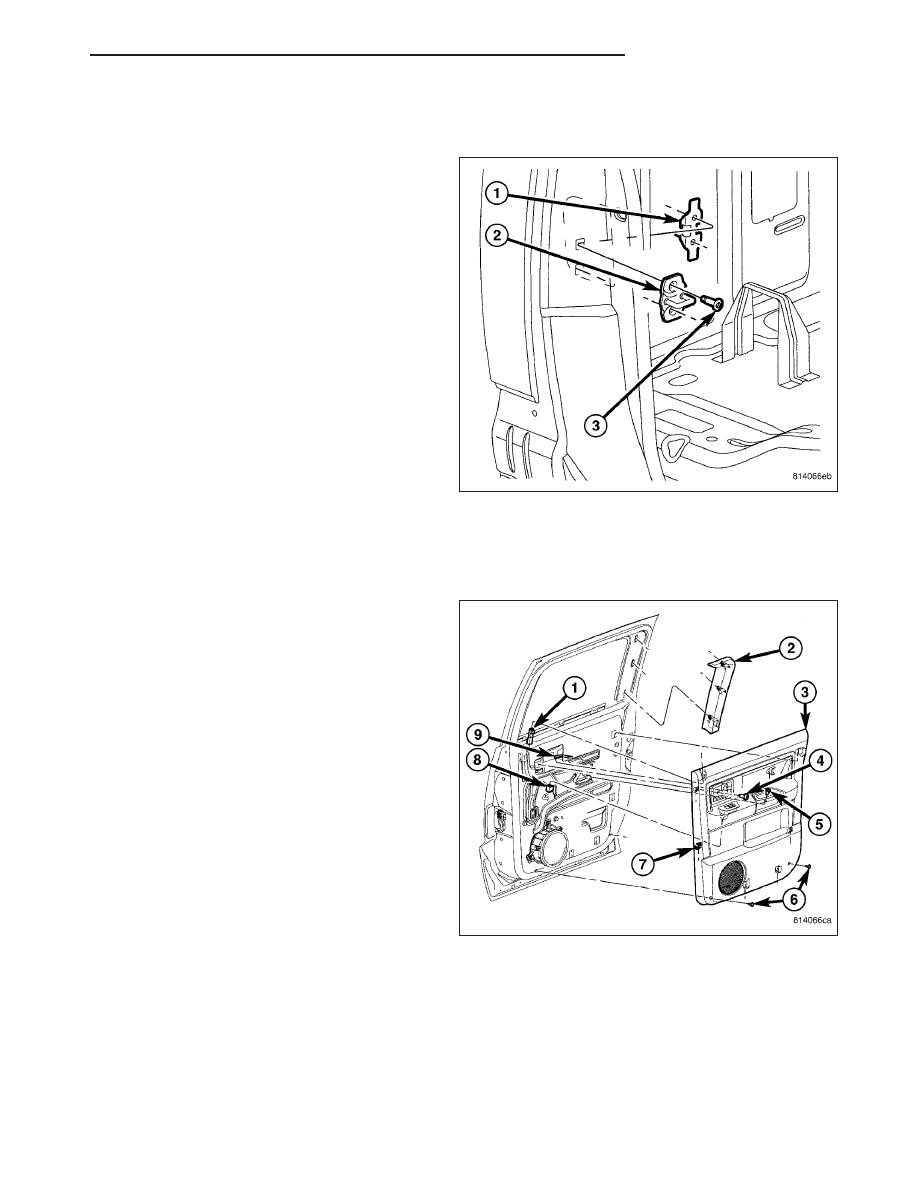
1. Using a grease pencil or equivalent, mark the posi-
tion of the striker (2) to aid in adjustment.
2. Loosen the striker bolts (3).
3. Change the striker position to adjust the rear gap
and flush measurement. (Refer to 23 - BODY/
BODY STRUCTURE/GAP AND FLUSH - SPECIFI-
CATIONS)
4. Tighten the bolts to 28 N·m (21 ft. lbs.).
WATERSHIELD
REMOVAL
1. Disconnect and isolate the battery negative cable.
2. Remove the rear door trim panel (3). (Refer to 23 -
BODY/DOORS - REAR/TRIM PANEL - REMOVAL)
3. Remove the pull cup bracket bolts and bracket.
ND
DOORS - REAR
23 - 115
Нет комментариевНе стесняйтесь поделиться с нами вашим ценным мнением.
Текст