Dodge Dakota (ND). Manual — part 1201
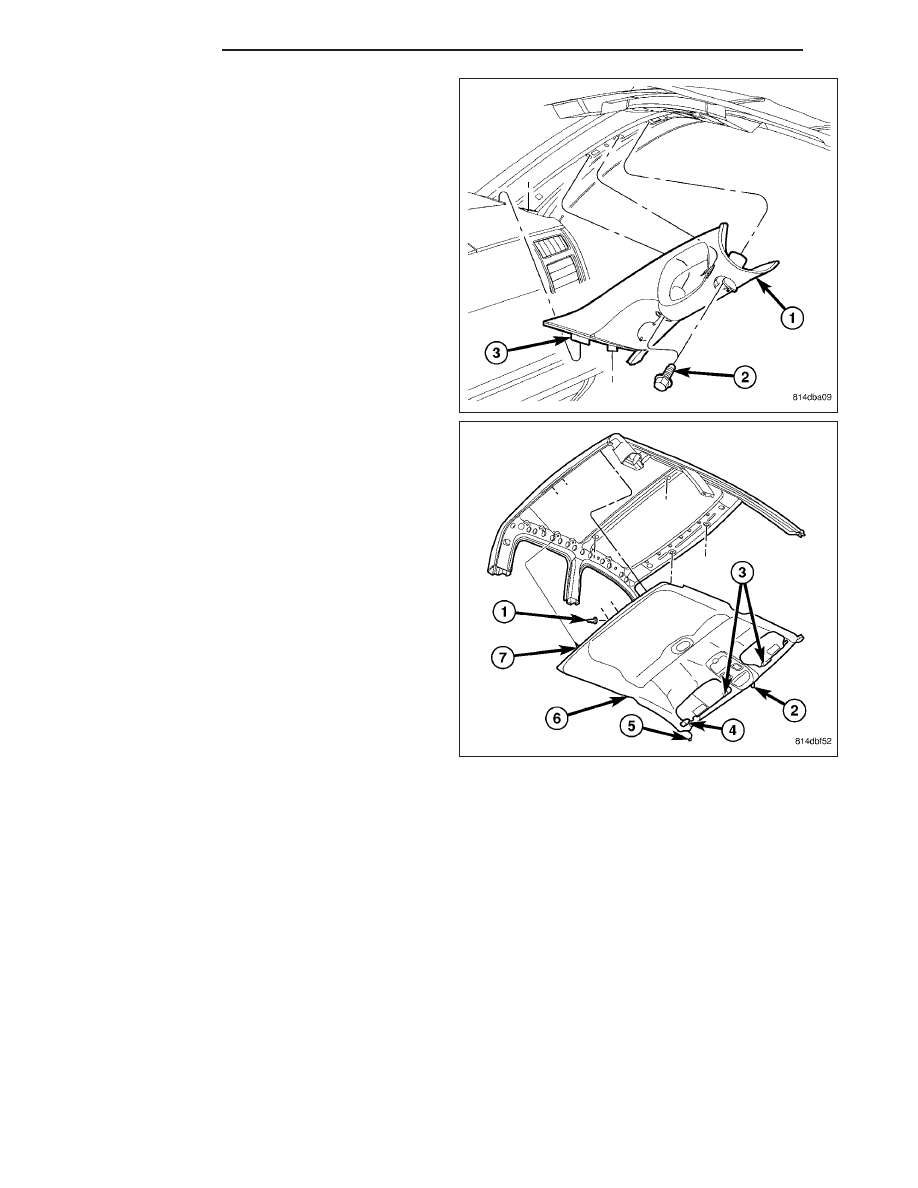
5. Remove the A-pillar trim panels, (Refer to 23 -
BODY/INTERIOR/PANEL-A
PILLAR
TRIM
-
REMOVAL).
NOTE: Headliner for Quad Cab models shown.
Club Cab similar.
6. Disconnect the wire harness connector (5) located
at the right A-pillar.
7. If equipped, disconnect the headliner wire harness
connector (2) from the inside rear view mirror.
8. If equipped, remove the overhead console, (Refer
to 8 - ELECTRICAL/OVERHEAD CONSOLE -
REMOVAL).
9. Remove the sun visors (4), (Refer to 23 - BODY/
INTERIOR/SUN VISOR - REMOVAL).
10. Remove the sun visor supports (3), (Refer to 23 -
BODY/INTERIOR/SUN
VISOR
SUPPORT
-
REMOVAL).
11. If equipped, remove the front dome lamp, (Refer
to 8 - ELECTRICAL/LAMPS/LIGHTING - INTERI-
OR/FRONT DOME LAMP - REMOVAL).
12. If equipped, remove the rear dome lamp, (Refer to 8 - ELECTRICAL/LAMPS/LIGHTING - INTERIOR/REAR
DOME LAMP - REMOVAL).
13. Remove the two coat hooks, (Refer to 23 - BODY/INTERIOR/COAT HOOK - REMOVAL).
14. Remove the front seat headrests.
15. Lower the rear of the headliner (7) and disconnect the headliner wire harness connector (1) from the center
high mounted stop lamp.
16. Recline the front seats.
17.
CAUTION: Be careful not to crease the headliner.Lower the front of the headliner and remove the headliner
through the door opening where the seat belt turning loop and height adjuster was disconnected from the
upper roof rail.
23 - 216
INTERIOR
ND
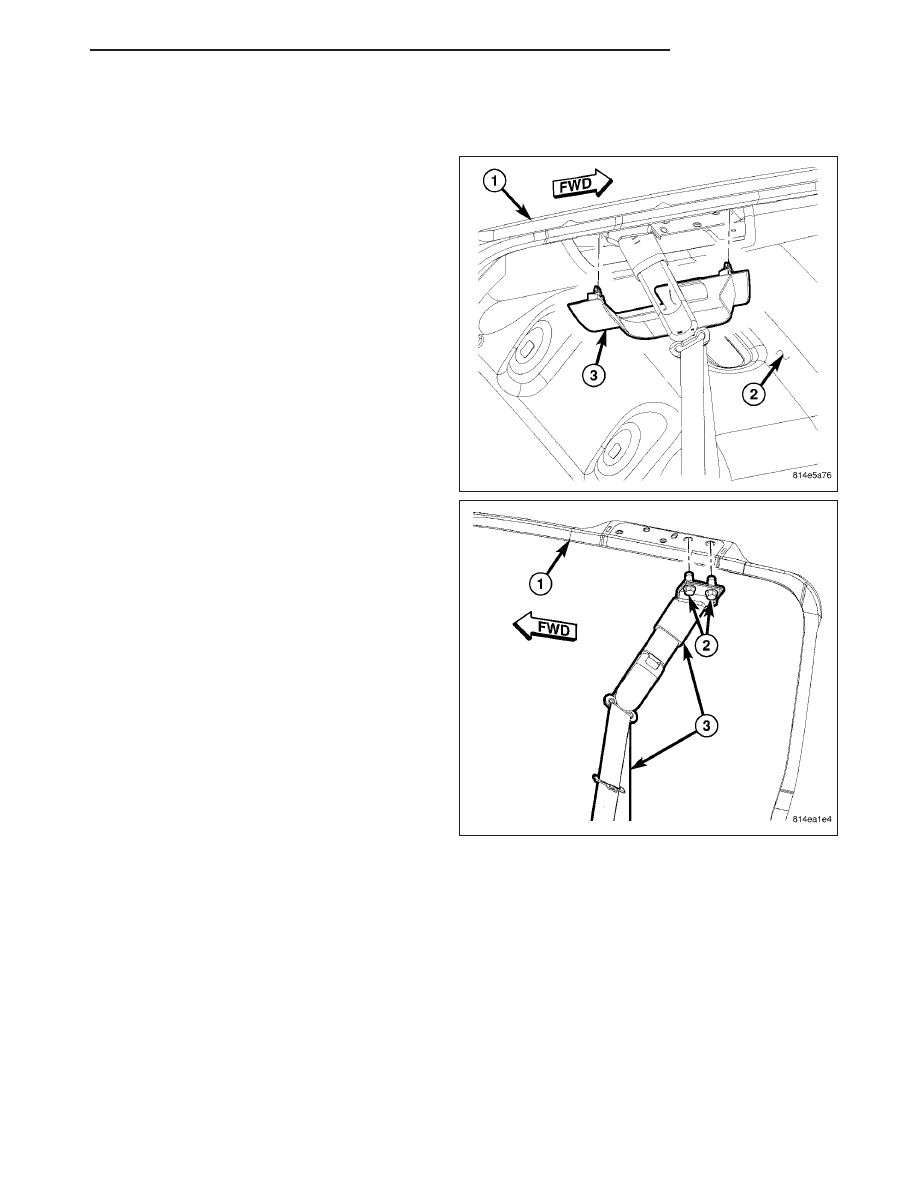
Club Cab, With Rear Jumper Seats
1. Pull the top of each door seal downward slightly.
2. Remove the upper door striker trim covers (3) as
follows:
•
Using a trim stick or another suitable wide flat-
bladed tool, gently pry the edges of the upper
door striker trim cover (3) away from the head-
liner (2) far enough to disengage the two snap
clips that secure the cover to the upper roof rail
(1).
3. Determine which side of the vehicle the headliner
will be removed from and disconnect the seat belt
turning loop and height adjuster (3) from the upper
roof rail (1) on that side of the vehicle as follows:
•
Remove the two screws (2) that secure the seat
belt turning loop and height adjuster bracket (3)
to the upper roof rail (1) and position it aside.
ND
INTERIOR
23 - 217
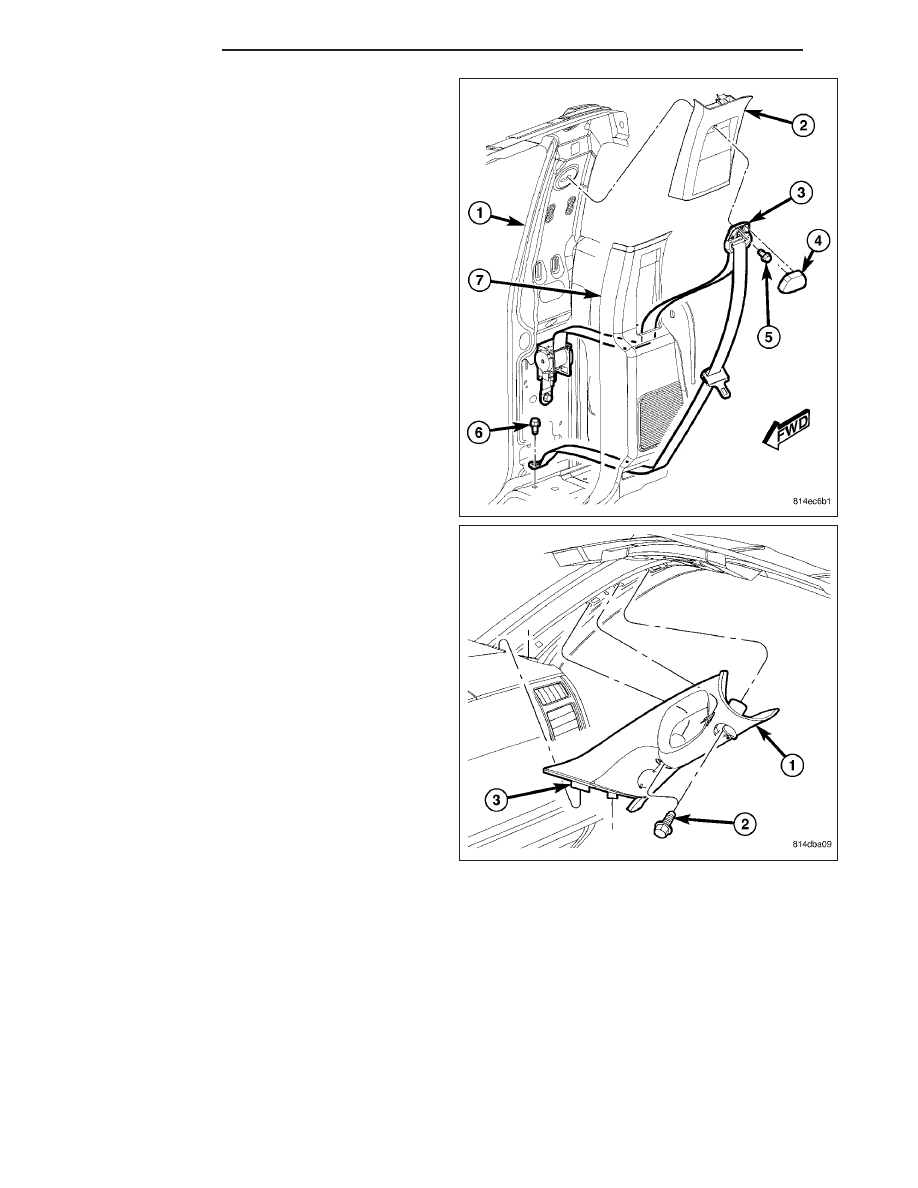
4. Remove the upper C-pillar trim panels, (Refer to 23
-
BODY/INTERIOR/PANEL-C
PILLAR
UPPER
TRIM - REMOVAL).
5. Remove the A-pillar trim panels, (Refer to 23 -
BODY/INTERIOR/PANEL-A
PILLAR
TRIM
-
REMOVAL).
23 - 218
INTERIOR
ND
NOTE: Headliner for Quad Cab models shown.
Club Cab similar.
6. Disconnect the wire harness connector (5) located
at the right A-pillar.
7. If equipped, disconnect the headliner wire harness
connector (2) from the inside rear view mirror.
8. If equipped, remove the overhead console, (Refer
to 8 - ELECTRICAL/OVERHEAD CONSOLE -
REMOVAL).
9. Remove the sun visors (4), (Refer to 23 - BODY/
INTERIOR/SUN VISOR - REMOVAL).
10. Remove the sun visor supports (3), (Refer to 23 -
BODY/INTERIOR/SUN
VISOR
SUPPORT
-
REMOVAL).
11. If equipped, remove the front dome lamp, (Refer
to 8 - ELECTRICAL/LAMPS/LIGHTING - INTERI-
OR/FRONT DOME LAMP - REMOVAL).
12. If equipped, remove the rear dome lamp, (Refer to 8 - ELECTRICAL/LAMPS/LIGHTING - INTERIOR/REAR
DOME LAMP - REMOVAL).
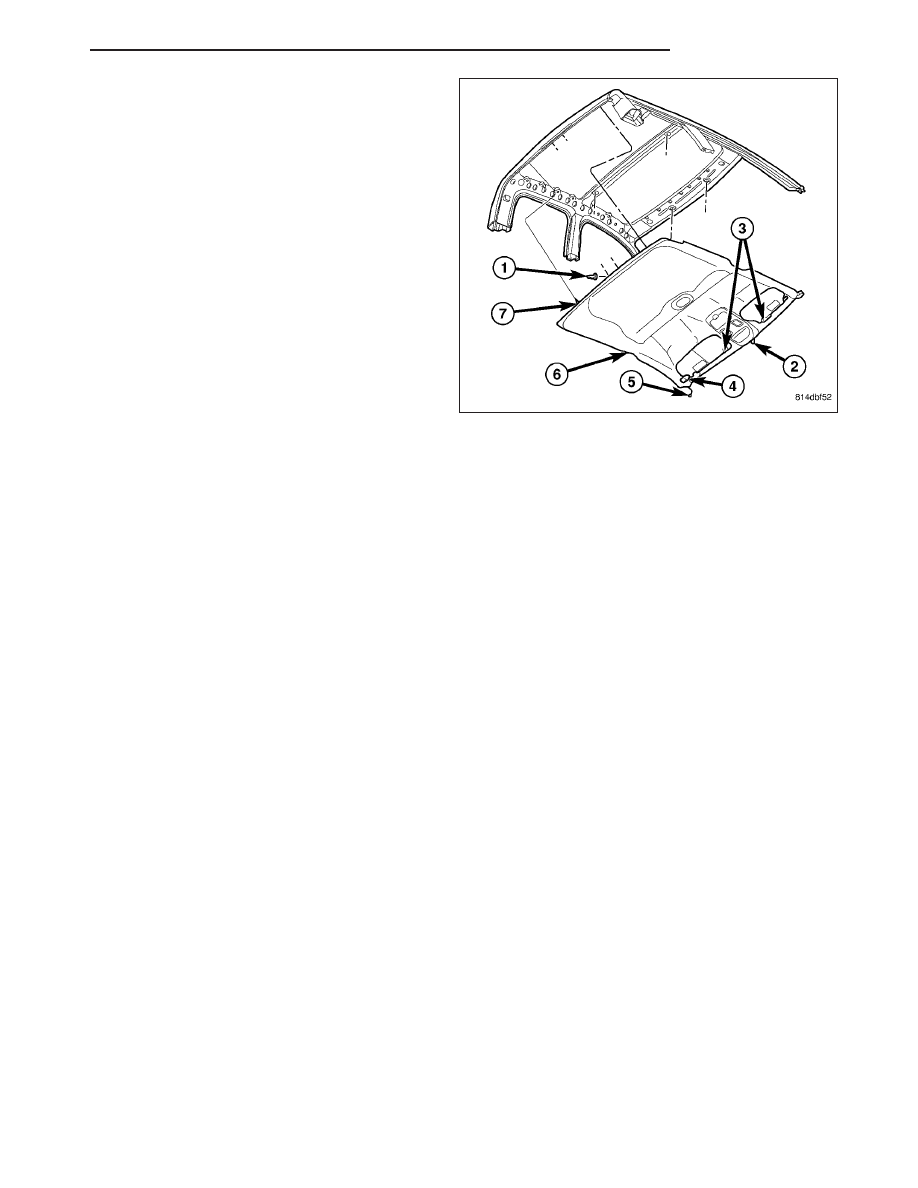
13. Remove the two coat hooks, (Refer to 23 - BODY/INTERIOR/COAT HOOK - REMOVAL).
14. Remove the front seat headrests.
15. Remove the cab back trim panel, (Refer to 23 - BODY/INTERIOR/PANEL-CAB BACK TRIM - REMOVAL).
16. Remove the rear jumper seat headrests.
17. Remove the rear jumper seat headrest sleeves from the headliner.
18. Lower the rear of the headliner (7) and disconnect the headliner wire harness connector (1) from the center
high mounted stop lamp.
19. Recline the front seats.
20.
CAUTION: Be careful not to crease the headliner.Lower the front of the headliner and remove the headliner
through the door opening where the seat belt turning loop and height adjuster was disconnected from the
upper roof rail.
Quad Cab
1. Pull the top of each door seal downward slightly.
ND
INTERIOR
23 - 219
Нет комментариевНе стесняйтесь поделиться с нами вашим ценным мнением.
Текст