Dodge Dakota (ND). Manual — part 1202
2. Remove the upper C-pillar trim panels, (Refer to 23
-
BODY/INTERIOR/PANEL-C
PILLAR
UPPER
TRIM - REMOVAL).
3. Remove the upper B-pillar trim panels, (Refer to 23
-
BODY/INTERIOR/PANEL-B
PILLAR
UPPER
TRIM - REMOVAL).
23 - 220
INTERIOR
ND
4. Remove the A-pillar trim panels, (Refer to 23 -
BODY/INTERIOR/PANEL-A
PILLAR
TRIM
-
REMOVAL).
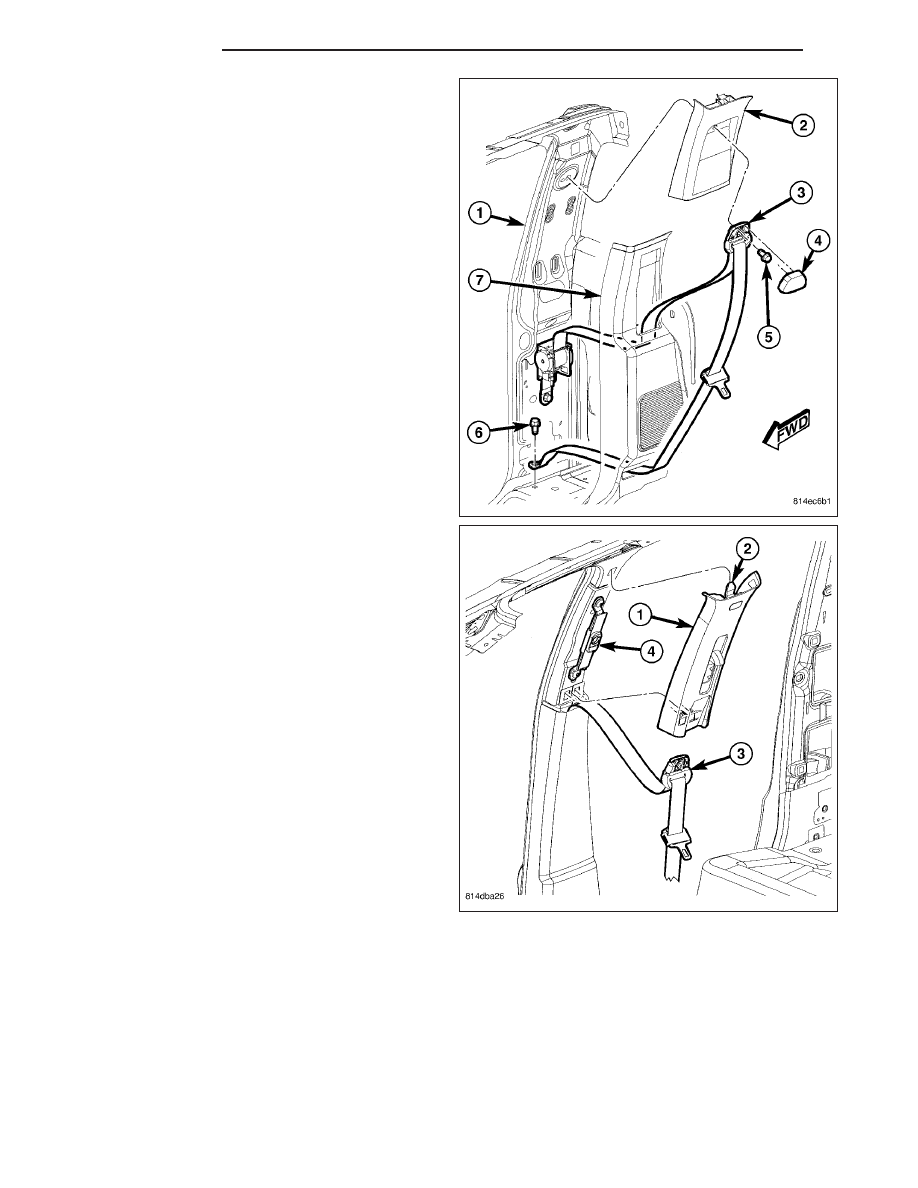
5. Disconnect the wire harness connector (5) located
at the right A-pillar.
6. If equipped, disconnect the headliner wire harness
connector (2) from the inside rear view mirror.
7. If equipped, remove the overhead console, (Refer
to 8 - ELECTRICAL/OVERHEAD CONSOLE -
REMOVAL).
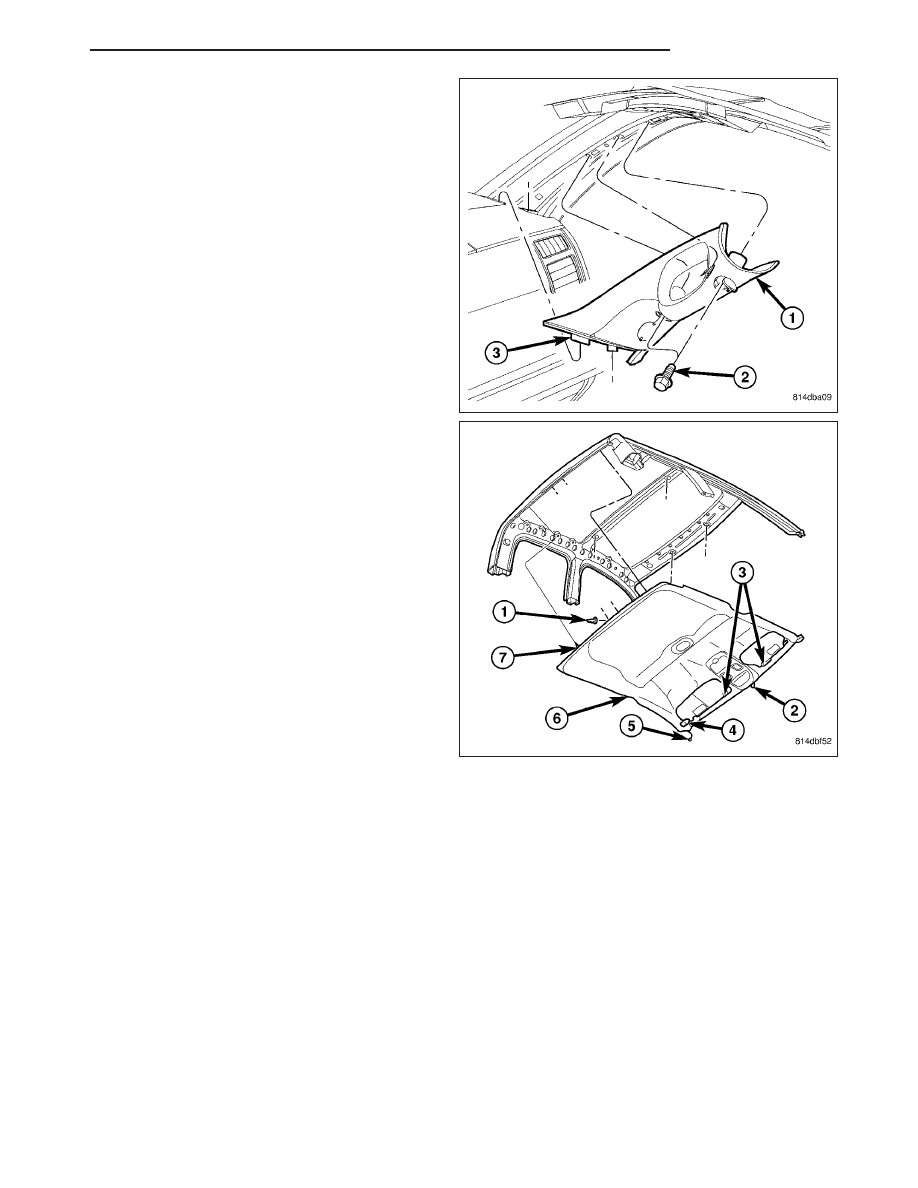
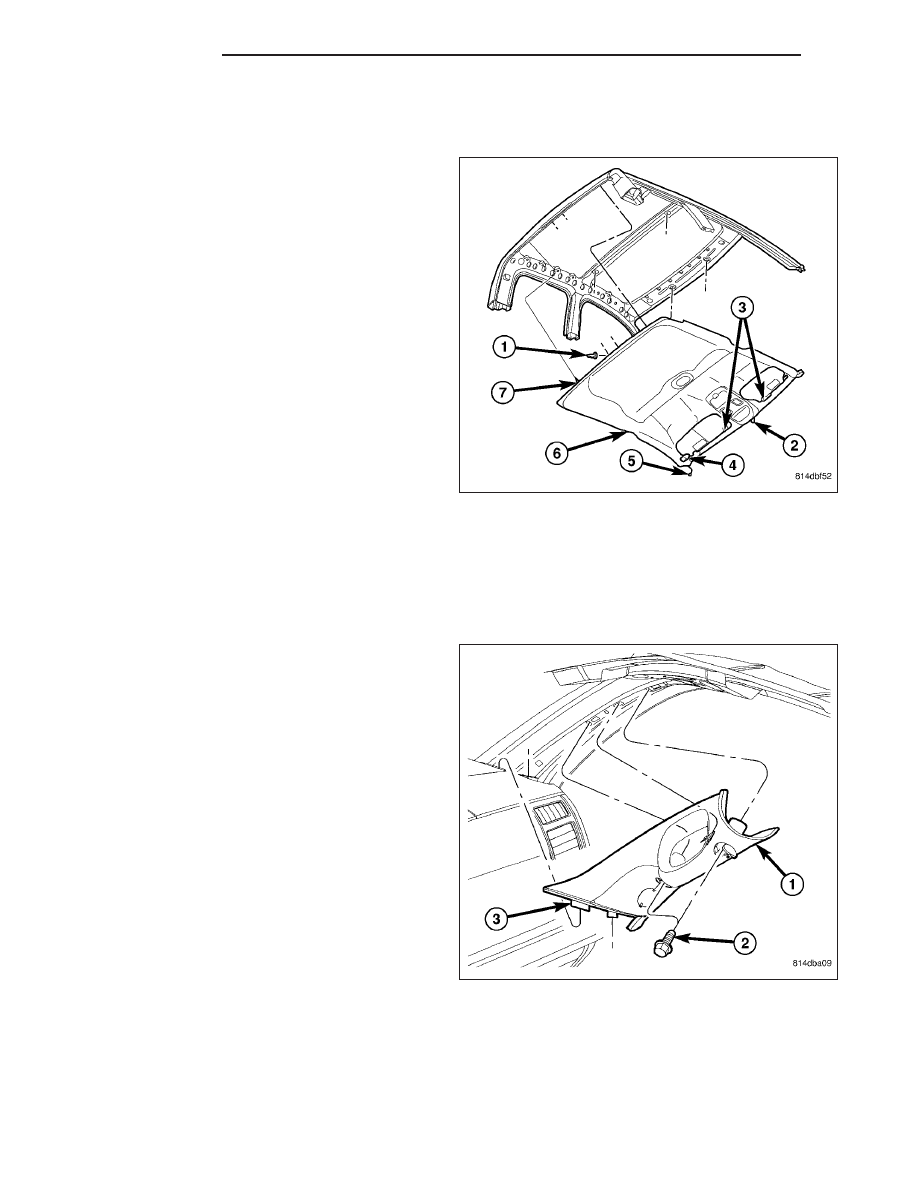
8. Remove the sun visors (4), (Refer to 23 - BODY/
INTERIOR/SUN VISOR - REMOVAL).
9. Remove the sun visor supports (3), (Refer to 23 -
BODY/INTERIOR/SUN
VISOR
SUPPORT
-
REMOVAL).
10. If equipped, remove the front dome lamp, (Refer
to 8 - ELECTRICAL/LAMPS/LIGHTING - INTERI-
OR/FRONT DOME LAMP - REMOVAL).
11. If equipped, remove the rear dome lamp, (Refer to
8 - ELECTRICAL/LAMPS/LIGHTING - INTERIOR/
REAR DOME LAMP - REMOVAL).
12. Remove the two coat hooks, (Refer to 23 - BODY/INTERIOR/COAT HOOK - REMOVAL).
13. Remove the right front seat headrest.
14. Recline the right front seat.
15. Remove the left front seat, (Refer to 23 - BODY/SEATS/SEAT-FRONT - REMOVAL).
16. Lower the rear of the headliner (7) and disconnect the headliner wire harness connector (1) from the center
high mounted stop lamp.
CAUTION: Be careful not to crease the headliner.
17. Lower the front of the headliner and remove the headliner through the left door opening.
ND
INTERIOR
23 - 221
INSTALLATION
Club Cab, Without Rear Jumper Seats
CAUTION: Be careful not to crease the headliner.
NOTE: Headliner for Quad Cab model shown. Club
Cab similar.
1. Position the headliner (6) in the vehicle through the
door opening from which it was removed.
2. Connect the headliner wire harness connector (1)
to the center high mounted stop lamp.
3. Raise the rear of the headliner (7) to the roof panel
and install the two coat hooks, (Refer to 23 -
BODY/INTERIOR/COAT HOOK - INSTALLATION).
4. Raise the front of the headliner to the roof panel
and install the sun visor supports (3), (Refer to 23 -
BODY/INTERIOR/SUN
VISOR
SUPPORT
-
INSTALLATION).
5. Connect the wire harness connector (5) located at
the right A-pillar.
6. If equipped, connect the headliner wire harness connector (2) to the inside rear view mirror.
7. If equipped, install the overhead console, (Refer to 8 - ELECTRICAL/OVERHEAD CONSOLE - INSTALLATION).
8. Install the sun visors (4), (Refer to 23 - BODY/INTERIOR/SUN VISOR - INSTALLATION).
9. If equipped, install the front dome lamp, (Refer to 8 - ELECTRICAL/LAMPS/LIGHTING - INTERIOR/FRONT
DOME LAMP - INSTALLATION).
10. Install the A-pillar trim panels, (Refer to 23 -
BODY/INTERIOR/PANEL-A
PILLAR
TRIM
-
INSTALLATION).
11. If equipped, install the rear dome lamp, (Refer to 8 - ELECTRICAL/LAMPS/LIGHTING - INTERIOR/REAR
DOME LAMP - INSTALLATION).
23 - 222
INTERIOR
ND
12. Install the upper C-pillar trim panels, (Refer to 23
-
BODY/INTERIOR/PANEL-C
PILLAR
UPPER
TRIM - INSTALLATION).
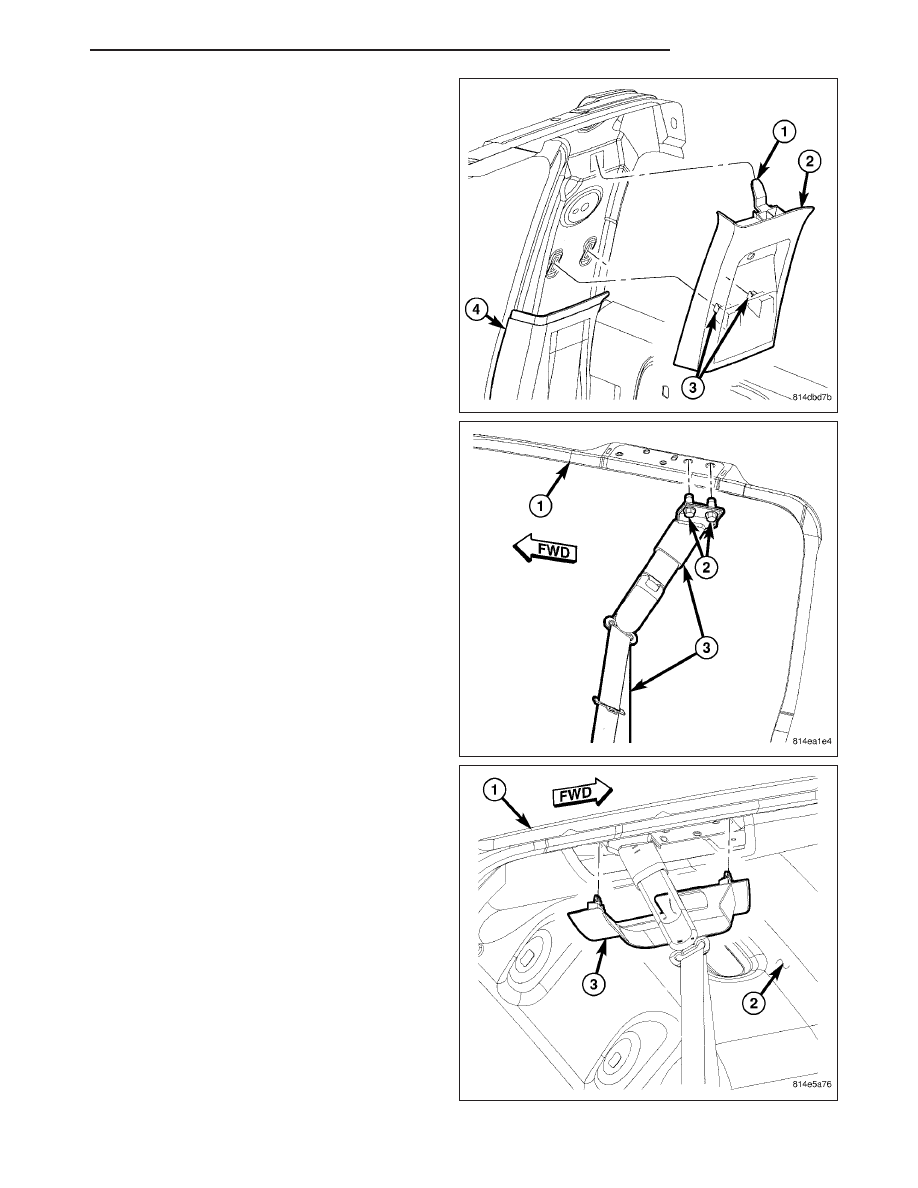
13. Position the seat belt turning loop and height
adjuster (3) bracket to the mounting holes in the
upper roof rail (1) and install the two screws (2)
that secure the bracket to the roof rail. Tighten the
screws to 39 N·m (29 ft. lbs.).
14. Install the upper door striker trim covers (3) as fol-
lows:
•
Position the trim cover (3) to the headliner (2)
opening around the door striker and engage the
retaining tabs that secure the cover to the roof
rail.
15. Install the front seat headrests.
ND
INTERIOR
23 - 223
Нет комментариевНе стесняйтесь поделиться с нами вашим ценным мнением.
Текст