Dodge Dakota (ND). Manual — part 1154
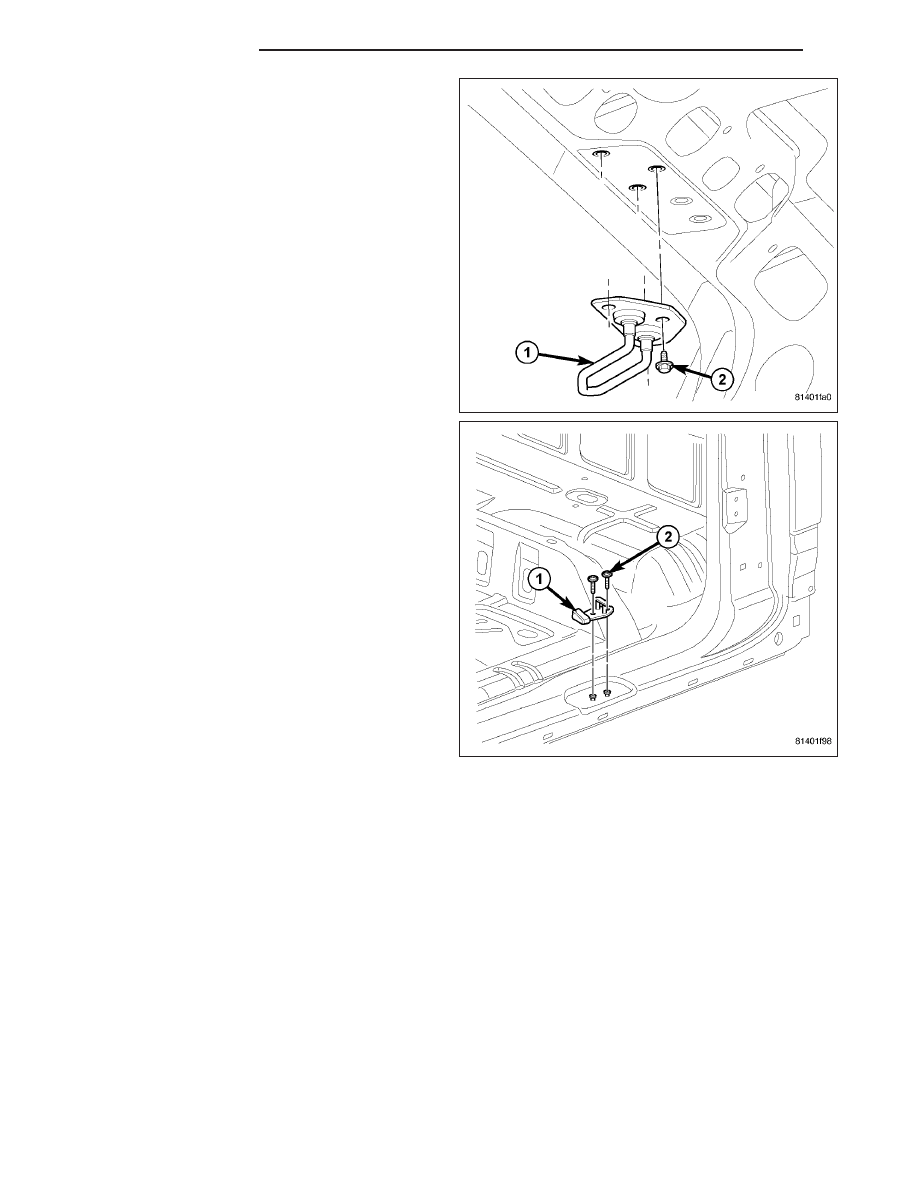
10. Install the upper striker (1). (Refer to 23 - BODY/
DOOR
-
CARGO/STRIKER-UPPER
LATCH
-
INSTALLATION)
11. Install the lower striker (1). (Refer to 23 - BODY/
DOOR - CARGO/STRIKER-LOWER LATCH -
INSTALLATION)
23 - 28
DOOR - CARGO
ND
IN/OUT
NOTE: In/out door adjustment is done by loosen-
ing the hinge to door fasteners one hinge at a time
and moving the door to the correct position.
NOTE: When adjustment of the door requires the
loosening of the door to hinge fasteners, it will be
necessary to separate the epoxy bonded washers
with a chisel or other suitable tool.
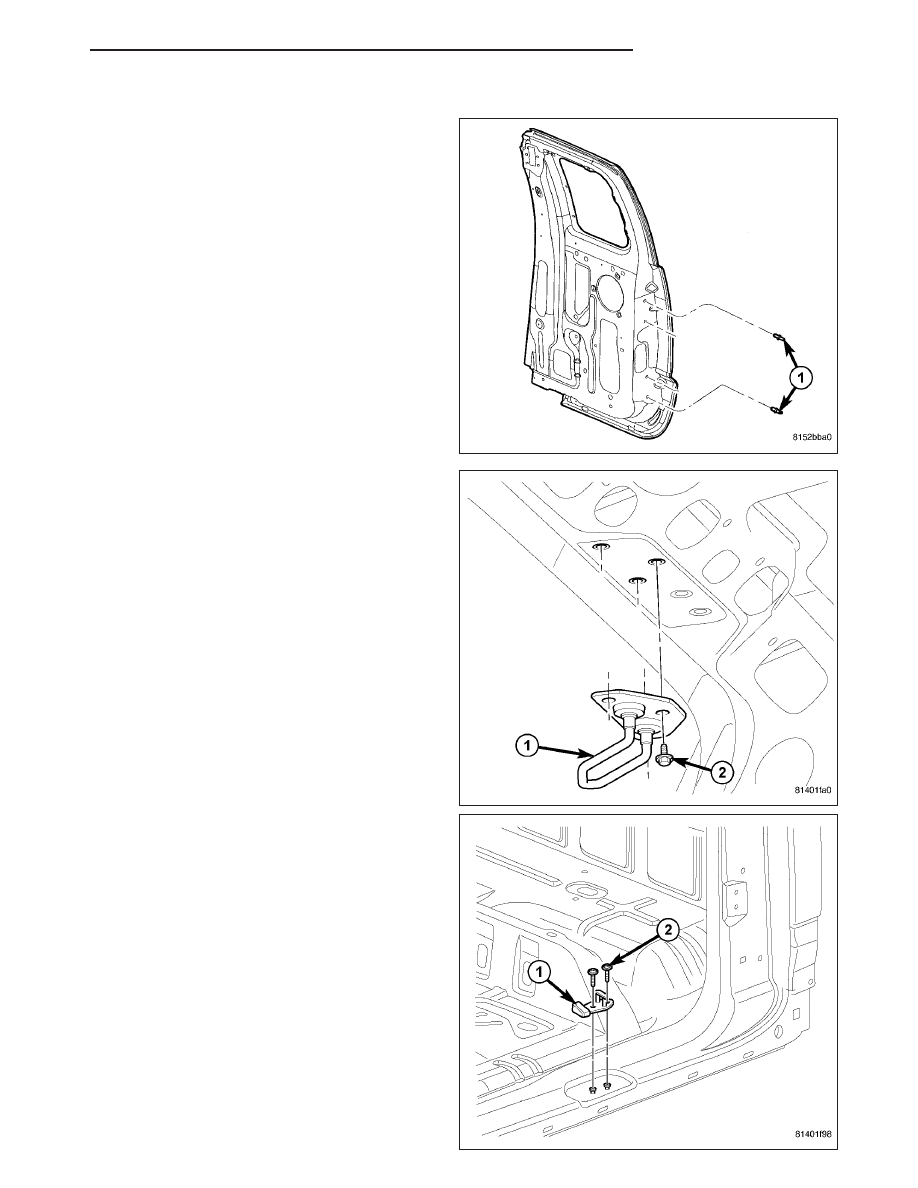
NOTE: When adjusting a door with the door to
hinge fasteners, it will be necessary to replace the
shouldered door studs (1) with service studs with-
out the shoulder in order to achieve correct door
position adjustments.
1. Install the service studs (1) and tighten to 12 N·m
(105 in. lbs.).
2. Remove the upper striker. (Refer to 23 - BODY/
DOOR
-
CARGO/STRIKER-UPPER
LATCH
-
REMOVAL)
3. Remove the lower striker (2). (Refer to 23 - BODY/
DOOR
-
CARGO/STRIKER-LOWER
LATCH
-
REMOVAL)
ND
DOOR - CARGO
23 - 29
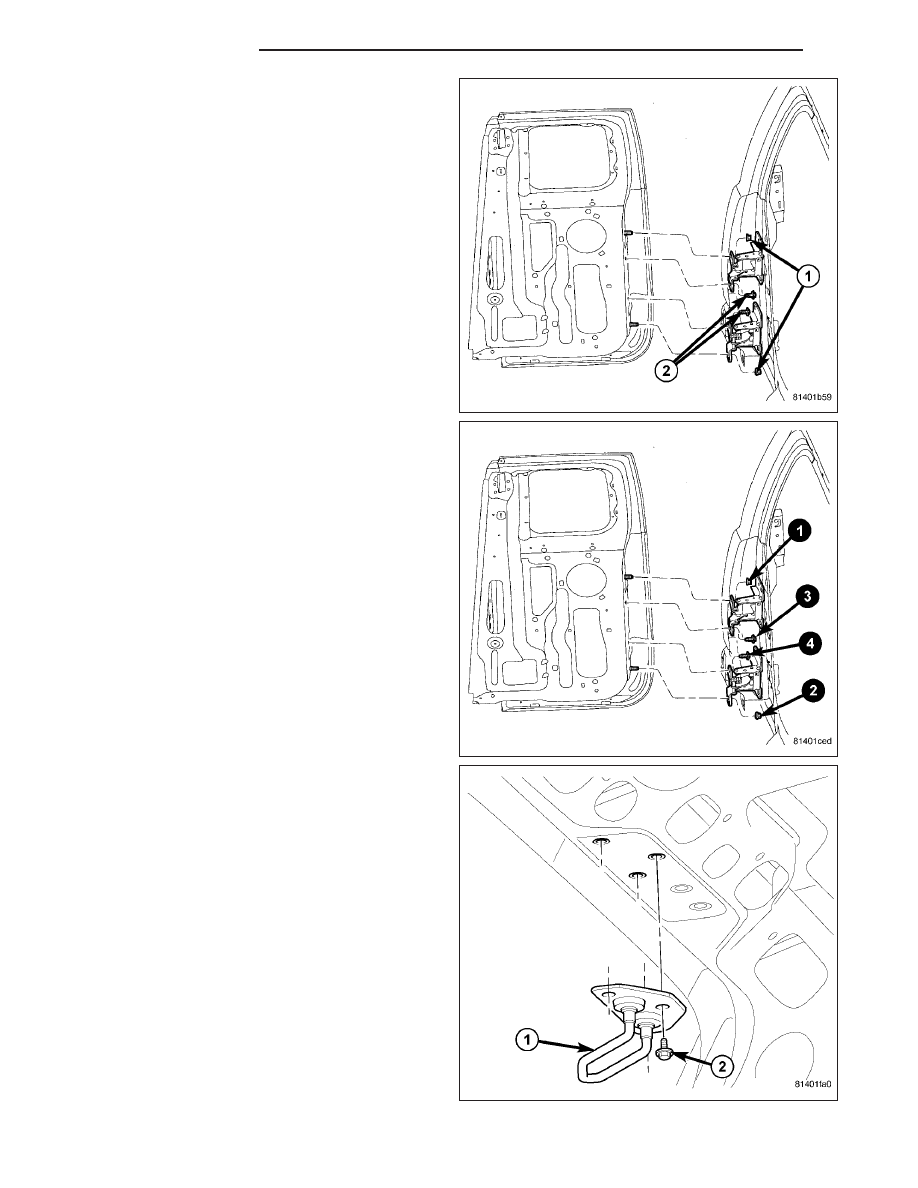
4. Support the door with a suitable lifting device.
5. Loosen the hinge to door fasteners (1) and (2).
(Refer to 23 - BODY/DOORS - REAR/DOOR -
REMOVAL)
6. Adjust the front of the door to the correct position.
(Refer to 23 - BODY/BODY STRUCTURE/GAP
AND FLUSH - SPECIFICATIONS)
7. Tighten the fasteners to 23 N·m (17 ft. lbs.) using
the sequence shown.
8. Install the upper striker (1). (Refer to 23 - BODY/
DOOR
-
CARGO/STRIKER-UPPER
LATCH
-
INSTALLATION)
23 - 30
DOOR - CARGO
ND
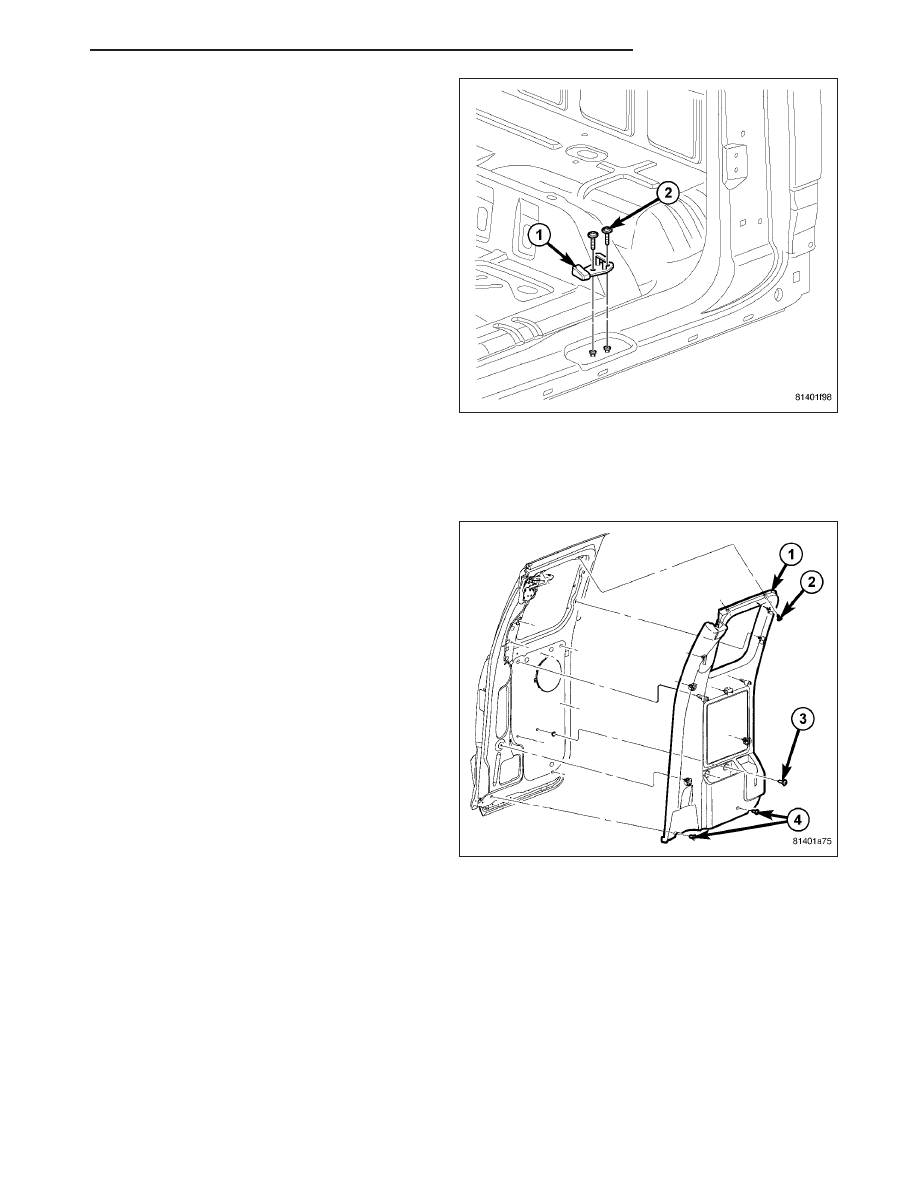
9. Install the lower striker (1). (Refer to 23 - BODY/
DOOR
-
CARGO/STRIKER-LOWER
LATCH
-
INSTALLATION)
GLASS-DOOR
REMOVAL
1. Remove the door trim panel (1). (Refer to 23 -
BODY/DOOR - CARGO/PANEL-TRIM - REMOVAL)
ND
DOOR - CARGO
23 - 31
Нет комментариевНе стесняйтесь поделиться с нами вашим ценным мнением.
Текст