Dodge Dakota (ND). Manual — part 869
INSTALLATION
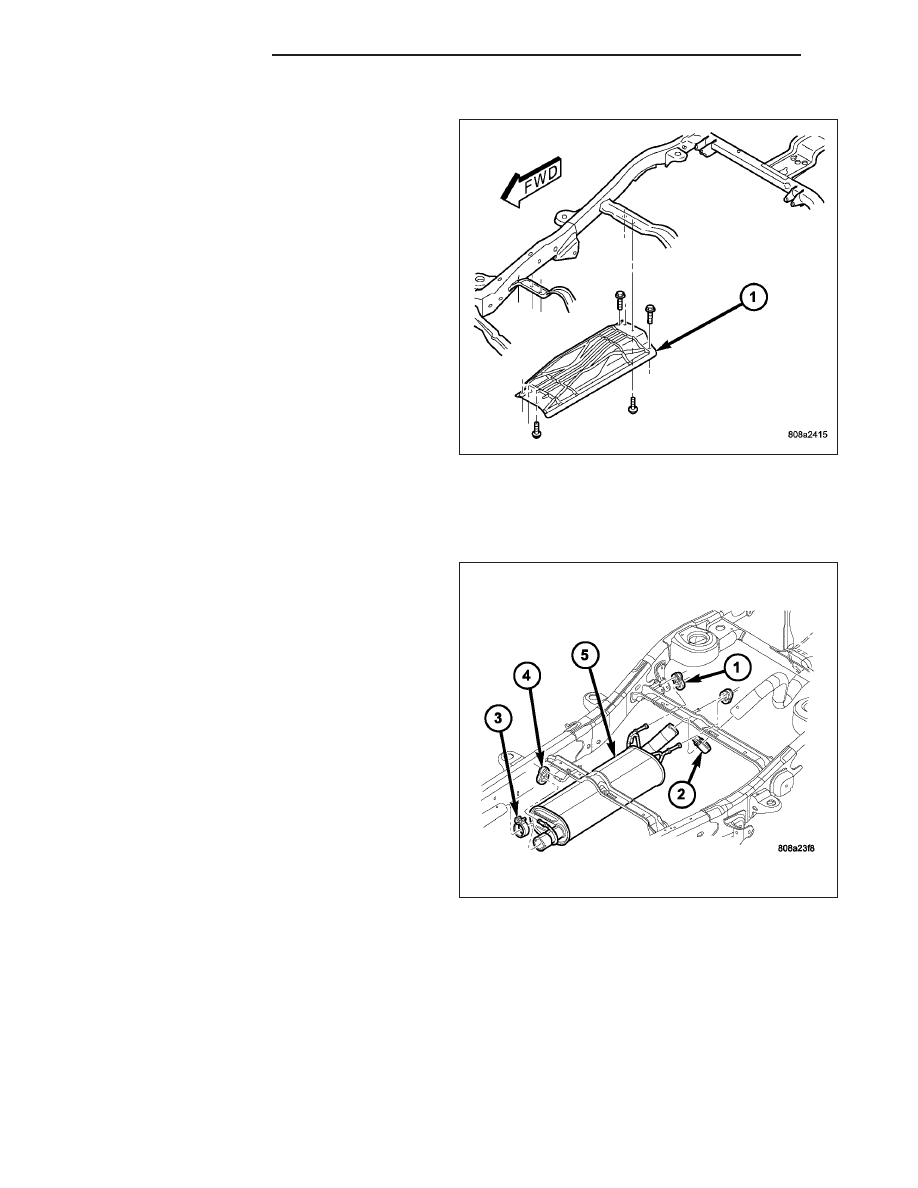
1. Position the heat shields (1) to the floor pan or the
frame and install the screws and nuts.
2. Tighten the screws/nuts to 7 N·m (60 in. lbs.)
torque. Tighten the muffler hangers (2) to 23 N·m
(200 in. lbs.)
3. Lower the vehicle.
MUFFLER
DESCRIPTION
All engines use a stainless steel muffler (1) to control
exhaust noise levels and exhaust back pressure.
OPERATION
The muffler is designed to muffle the sound of the exhaust as it leaves the engine.
11 - 6
EXHAUST SYSTEM
ND
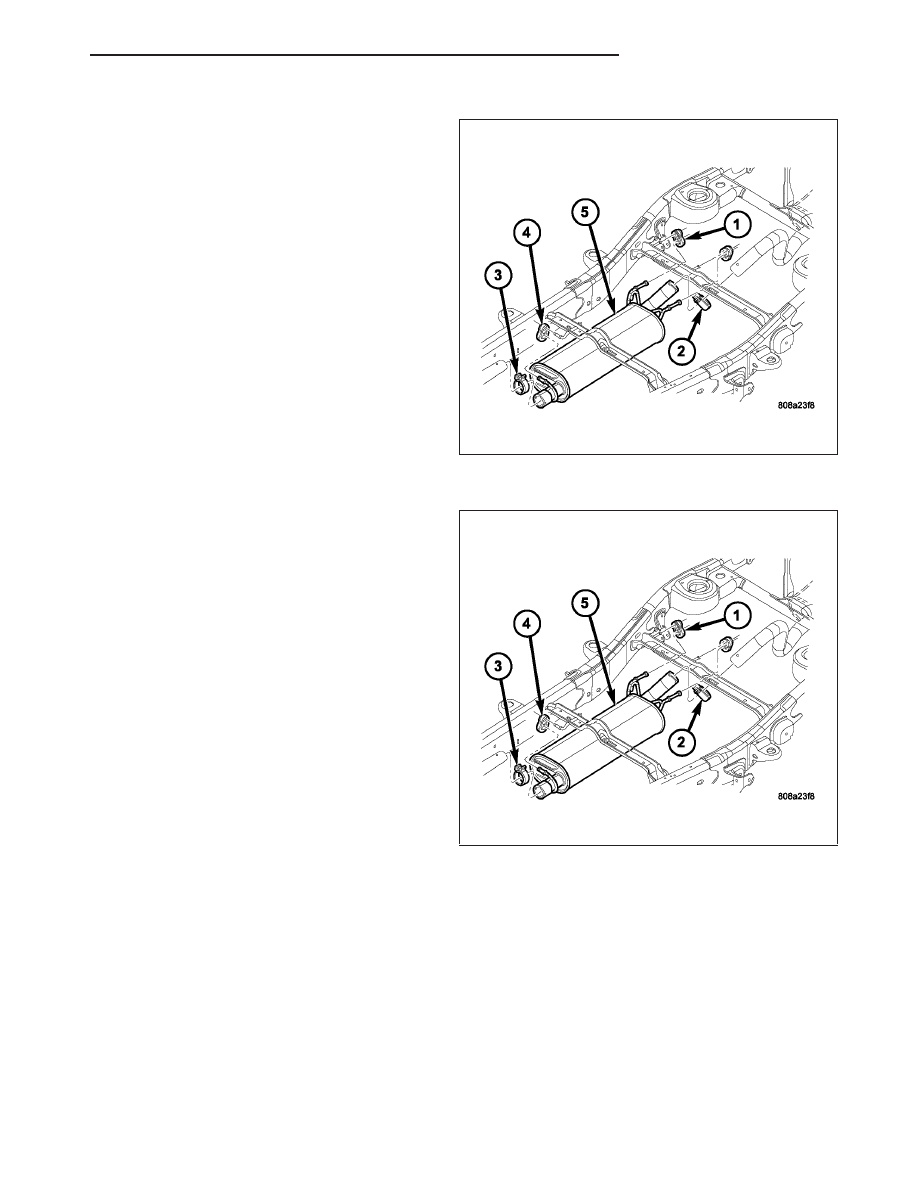
REMOVAL
1. Raise vehicle on hoist.
2. Remove the exhaust pipe (Refer to 11 - EXHAUST
SYSTEM/EXHAUST PIPE - REMOVAL).
3. Remove the muffler-to-catalytic converter clamp
(3).
4. Remove the muffler isolators (1 and 4).
5. Remove the muffler (5) from the catalytic converter.
INSTALLATION
NOTE: The band clamps are not reusable. After
removal, they must be replaced.
1. Install muffler to the catalytic converter (1).
2. Make sure the alignment tang seats in the align-
ment slot.
3. Install new exhaust clamp (4). Do not tighten at this
time.
4. Install muffler isolators.
5. Install exhaust pipe (Refer to 11 - EXHAUST SYS-
TEM/EXHAUST PIPE - INSPECTION).
6. Align muffler and exhaust pipe. Tighten exhaust
clamp nuts to 61 N·m (45 ft. lbs.).
7. Check the exhaust system for contact with the
body panels. A minimum of 25.4 mm (1.0 in.) is
required between the exhaust system components
and body/frame parts. Make the necessary adjust-
ments, if needed.
8. Lower vehicle.
9. Start engine and check for exhaust leaks. Repair exhaust leaks as necessary.
ND
EXHAUST SYSTEM
11 - 7

TAILPIPE
DESCRIPTION
The tailpipe is made of stainless steel and attaches to
the muffler.
OPERATION
The tailpipe channels the exhaust out of the muffler and out from under the vehicle to control noise and prevent
exhaust gas fumes from entering the passenger compartment.
REMOVAL
WARNING: IF TORCHES ARE USED WHEN WORK-
ING ON THE EXHAUST SYSTEM, WEAR PROTEC-
TIVE EYE COVERING AND DO NOT ALLOW THE
FLAME NEAR THE FUEL LINES.
CAUTION: When servicing or replacing exhaust
system components, be sure to disconnect all
oxygen sensor connectors. Allowing the exhaust
system to hang by the harness will damage the
wiring and/or sensor.
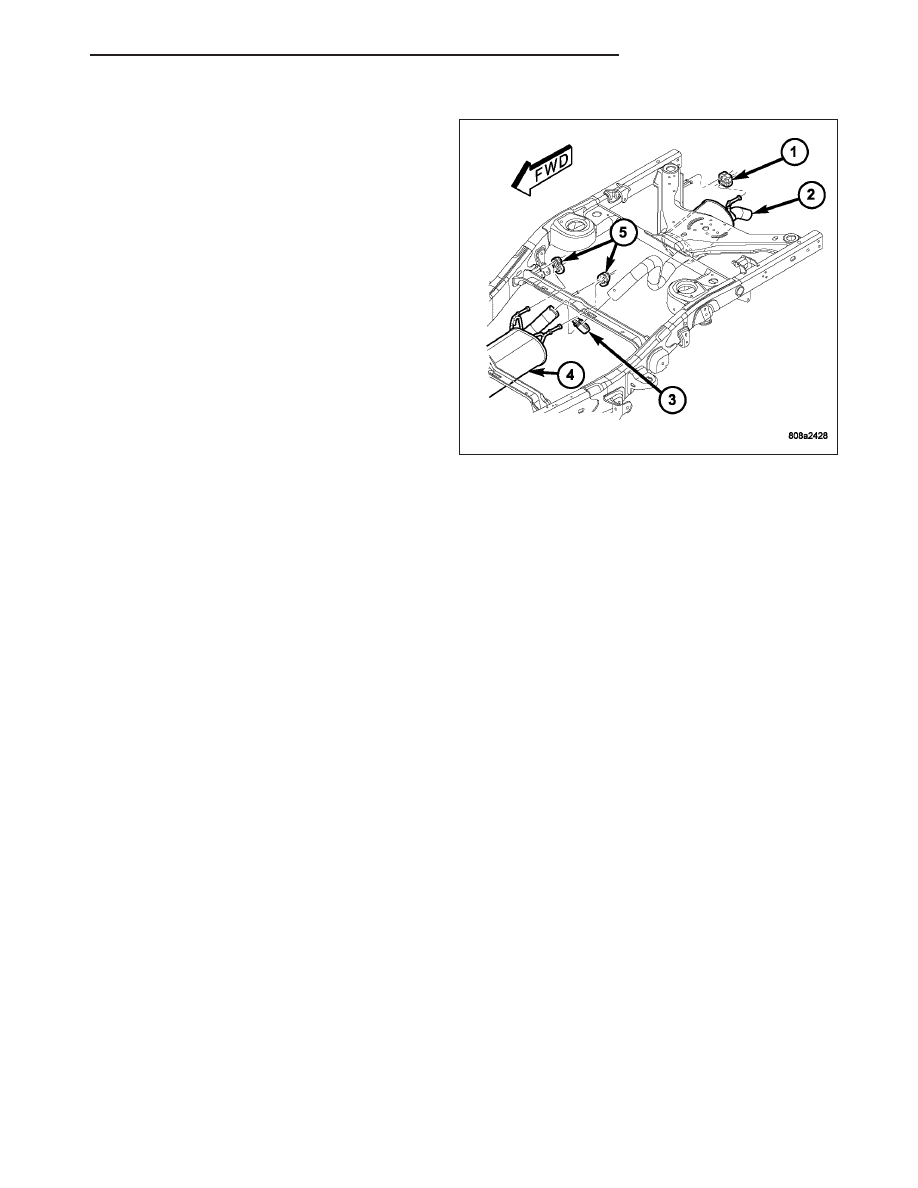
1. Raise and support the vehicle.
2. Saturate the bolts and nuts with Mopar
T
Rust Pen-
etrant. Allow 5 minutes for penetration.
3. Remove the exhaust pipe-to-muffler clamp (3).
4. Grind any tack weld, if present.
5. Remove the exhaust pipe insulators (1).
6. Remove the rear muffler insulators (5) if necessary.
7. If necessary, heat connection with an oxygen/acetylene torch and twist tailpipe out of muffler.
8. Remove the exhaust pipe (2) from the muffler (4).
INSPECTION
Discard rusted clamps, broken or worn supports and attaching parts. Replace a component with original equipment
parts, or equivalent. This will assure proper alignment with other parts in the system and provide acceptable exhaust
noise levels.
11 - 8
EXHAUST SYSTEM
ND
INSTALLATION
NOTE: The band clamps are not reusable. After
removal, they must be replaced.
1. Remove any burrs from the exhaust pipe (2).
2. Connect the exhaust pipe (2) to the muffler (4).
3. Make sure that the alignment tang is seated in the
alignment slot.
4. Install the muffler-to-exhaust pipe clamp. Do not
tighten at this time.
5. Install the rear muffler insulators (5), if removed.
6. Install the tail pipe insulators (1)
7. Check the exhaust system for contact with the
body panels. Make the necessary adjustments, if
necessary.
8. Tighten muffler-to-exhaust pipe clamp to 61 N·m
(45 ft. lbs.).
9. Lower the vehicle.
10. Start the engine, inspect for exhaust leaks. Repair exhaust leaks as necessary.
ND
EXHAUST SYSTEM
11 - 9
Нет комментариевНе стесняйтесь поделиться с нами вашим ценным мнением.
Текст