Infiniti FX35 / FX45. Manual — part 635
FRONT TIMING CHAIN CASE
EM-57
< SERVICE INFORMATION >
[VQ35DE]
C
D
E
F
G
H
I
J
K
L
M
A
EM
N
P
O
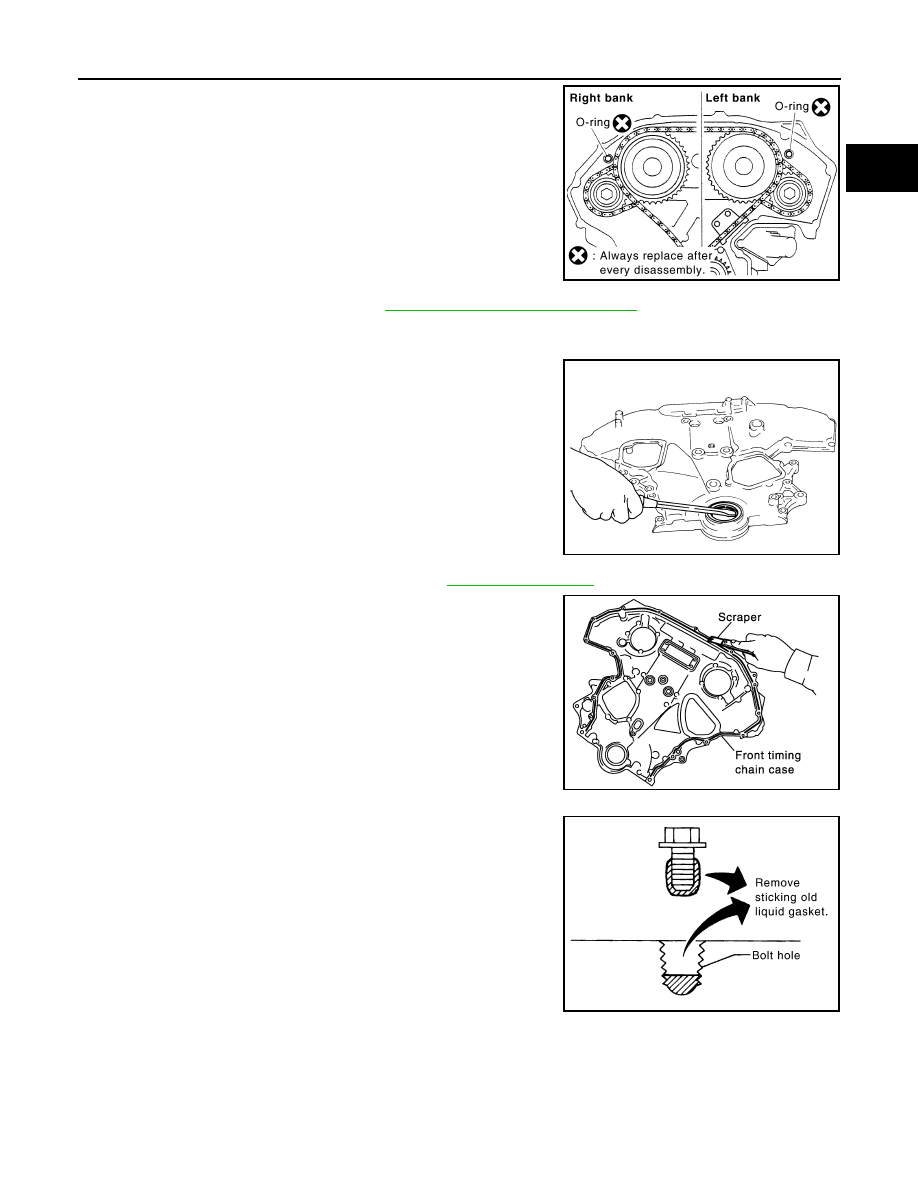
23. Remove O-rings from rear timing chain case.
24. Remove oil pan gasket (front). Refer to
EM-30, "Component (2WD Models)"
25. Remove water pump cover and chain tensioner cover from front timing chain case, if necessary.
• Use the seal cutter [SST: KV10111100 (J37228)] to cut liquid gasket for removal.
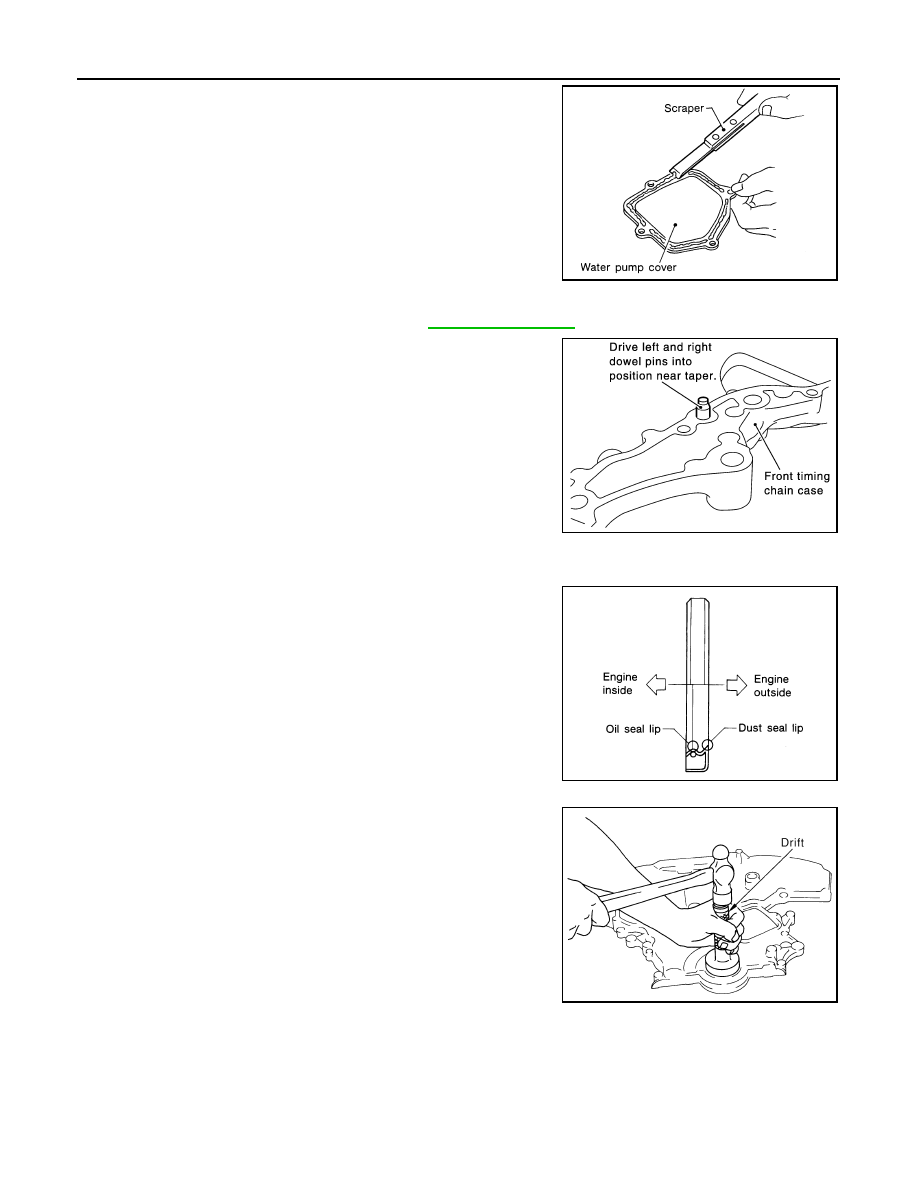
26. Remove front oil seal from front timing chain case using a suit-
able tool.
• Use a screwdriver for removal.
CAUTION:
Exercise care not to damage front timing chain case.
27. Remove timing chain and related parts. Refer to
.
28. Use a scraper to remove all traces of old liquid gasket from front
and rear timing chain cases and oil pan (upper), and liquid gas-
ket mating surfaces.
CAUTION:
Be careful not to allow gasket fragments to enter oil pan.
• Remove old liquid gasket from bolt hole and thread.
PBIC2548E
EMQ0032D
SEM737G
PBIC2084E
EM-58
< SERVICE INFORMATION >
[VQ35DE]
FRONT TIMING CHAIN CASE
29. Use a scraper to remove all traces of liquid gasket from water
pump cover, chain tensioner cover and intake valve timing con-
trol covers.
INSTALLATION
1.
Install timing chain and related parts. Refer to
2.
Hammer dowel pins (right and left) into front timing chain case
up to a point close to taper in order to shorten protrusion length.
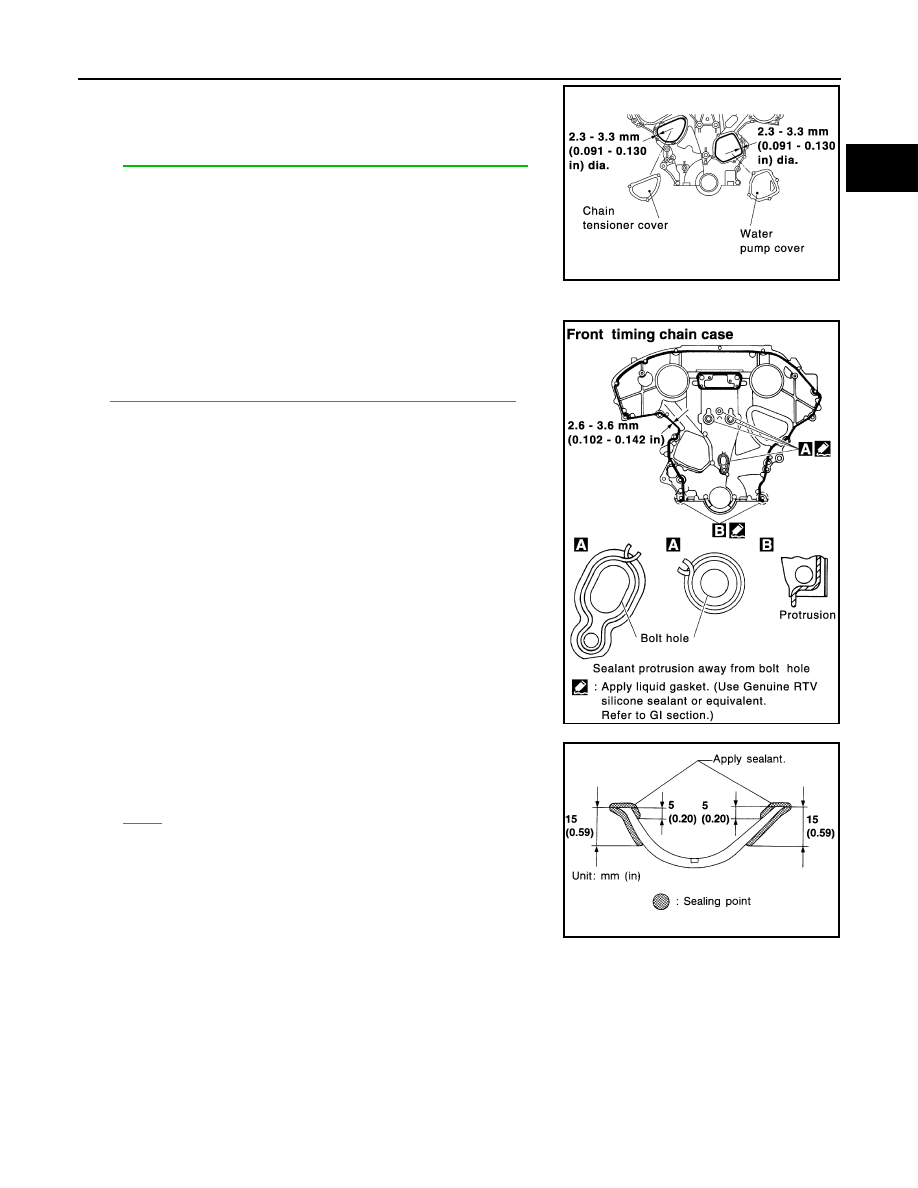
3.
Install front oil seal on front timing chain case.
• Apply new engine oil to the oil seal lip and dust seal lip.
• Install it so that each seal lip is oriented as shown in the figure.
• Using a suitable drift [outer diameter: 60 mm (2.36 in)], press-
fit oil seal until it becomes flush with front timing chain case
end face.
• Make sure the garter spring is in position and seal lip is not
inverted.
4.
Install water pump cover and chain tensioner cover to front timing chain case.
SEM926E
PBIC1101E
SEM715A
PBIC0790E
FRONT TIMING CHAIN CASE
EM-59
< SERVICE INFORMATION >
[VQ35DE]
C
D
E
F
G
H
I
J
K
L
M
A
EM
N
P
O
• Apply a continuous bead of liquid gasket with the tube presser
(commercial service tool) to front timing chain case as shown
in the figure.
Use Genuine RTV Silicone Sealant or equivalent. Refer to
GI-44, "Recommended Chemical Product and Sealant"
.
5.
Install front timing chain case as follows:
a.
Apply a continuous bead of liquid gasket with the tube presser
(commercial service tool) to front timing chain case back side as
shown in the figure.
Use Genuine RTV Silicone Sealant or equivalent. Refer to
GI-44, "Recommended Chemical Product and Sealant"
b.
Install new oil pan gasket (front).
• Apply liquid gasket to oil pan gasket (front) as shown in the fig-
ure.
Use Genuine RTV Silicone Sealant or equivalent. Refer to
SEM744GA
PBIC1133E
SEM964E
EM-60
< SERVICE INFORMATION >
[VQ35DE]
FRONT TIMING CHAIN CASE
• Align notch of front timing chain case with protrusion of oil pan
gasket.
• Apply liquid gasket with the tube presser (commercial service
tool) to top surface of oil pan (upper) as shown in the figure.
Use Genuine RTV Silicone Sealant or equivalent. Refer to
GI-44, "Recommended Chemical Product and Sealant"
c.
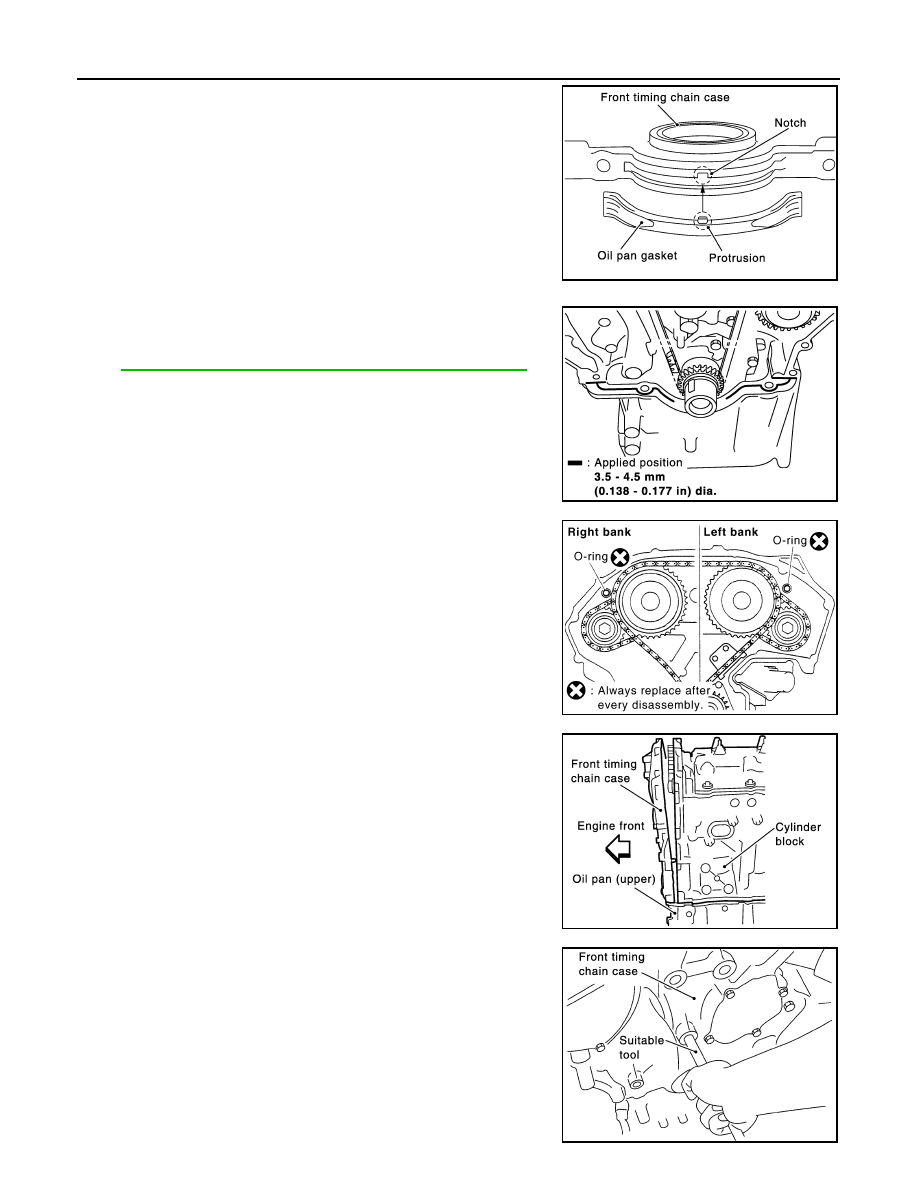
Install new O-rings on rear timing chain case.
d.
Assemble front timing chain case as follows:
i.
Fit lower end of front timing chain case tightly onto top face of oil
pan (upper). From the fitting point, make entire front timing chain
case contact rear timing chain case completely.
CAUTION:
Be careful that oil pan gasket is in place.
ii.
Since front timing chain case is offset for difference of bolt holes,
tighten bolts temporarily with holding front timing chain case
from front and top as shown in the figure.
For bolt length and positions, refer to the step e.
iii.
Same as the step ii, insert dowel pin with holding front timing
chain case from front and top completely.
PBIC1114E
PBIC1099E
PBIC2548E
PBIC1100E
PBIC1115E
Нет комментариевНе стесняйтесь поделиться с нами вашим ценным мнением.
Текст