Infiniti FX35 / FX45. Manual — part 981
WW-46
< SERVICE INFORMATION >
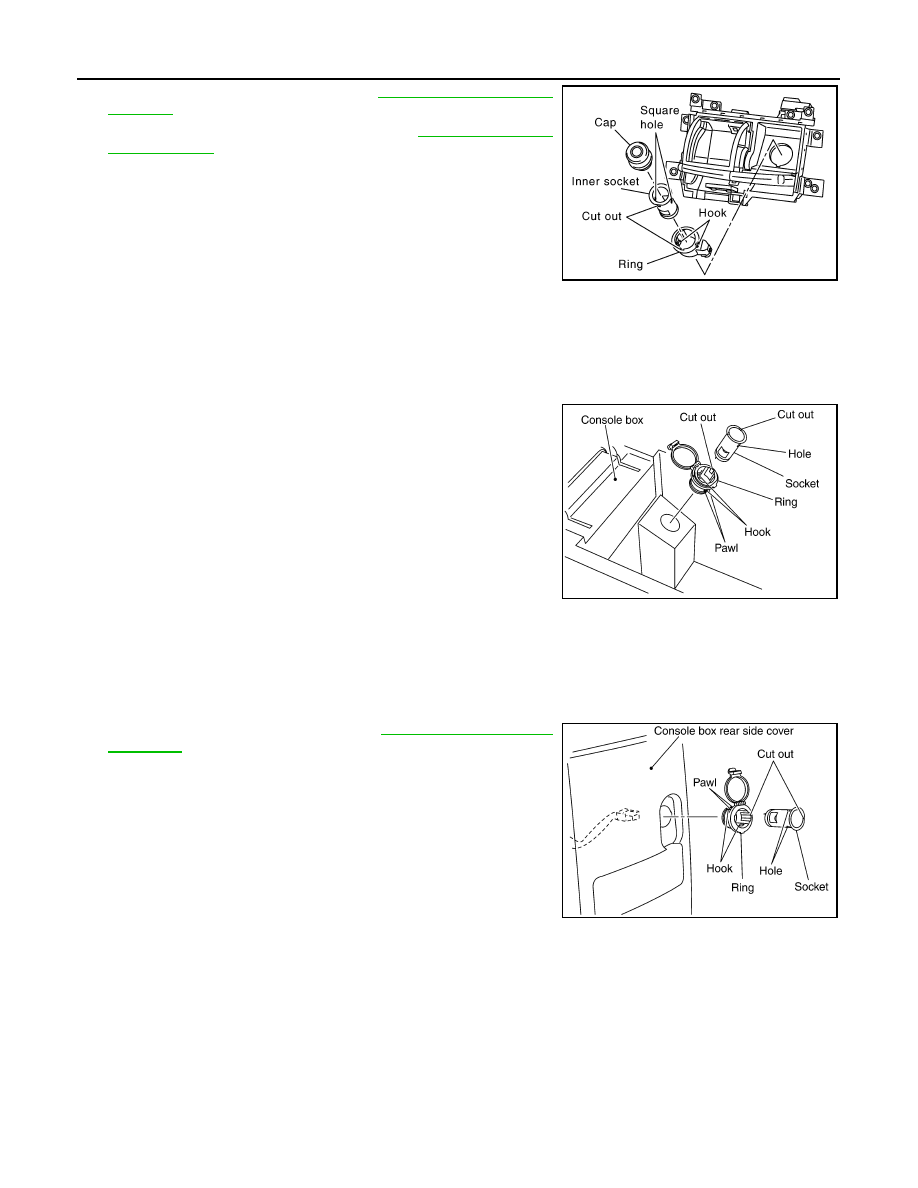
POWER SOCKET
1.
Remove A/T console finisher. Refer to
2.
Remove instrument clock finisher. Refer to
3.
Disconnect power socket connector.
4.
Remove inner socket from the ring while pressing the hook on
the ring out from square hole.
5.
Remove ring from ashtray while pressing pawls.
INSTALLATION
Installation is the reverse order of removal.
Removal and Installation of Front Power Socket - 2
INFOID:0000000001328602
REMOVAL
1.
Remove inner socket from the ring. While pressing the hook on
the ring out from square hole.
2.
Remove ring from power socket finisher while pressing pawls.
3.
Disconnect power socket connector.
INSTALLATION
Installation is the reverse order of removal.
Removal and Installation of Rear Power Socket
INFOID:0000000001328603
REMOVAL
1.
Remove console rear finisher. Refer to
2.
Disconnect power socket connector.
3.
Remove inner socket from the ring. While pressing the hook on
the ring out from square hole.
4.
Remove ring from power socket finisher while pressing pawls.
INSTALLATION
Installation is the reverse order of removal.
Removal and Installation of Luggage Room Power Socket
INFOID:0000000001328604
REMOVAL
PKIC9710E
SKIA5096E
SKIA5094E

POWER SOCKET
WW-47
< SERVICE INFORMATION >
C
D
E
F
G
H
I
J
L
M
A
B
WW
N
O
P
1.
Remove inner socket from the ring. While pressing the hook on
the ring out from square hole.
2.
Remove ring from power socket finisher while pressing pawls.
3.
Disconnect power socket connector.
INSTALLATION
Installation is the reverse order of removal.
SKIA5097E
WW-48
< SERVICE INFORMATION >
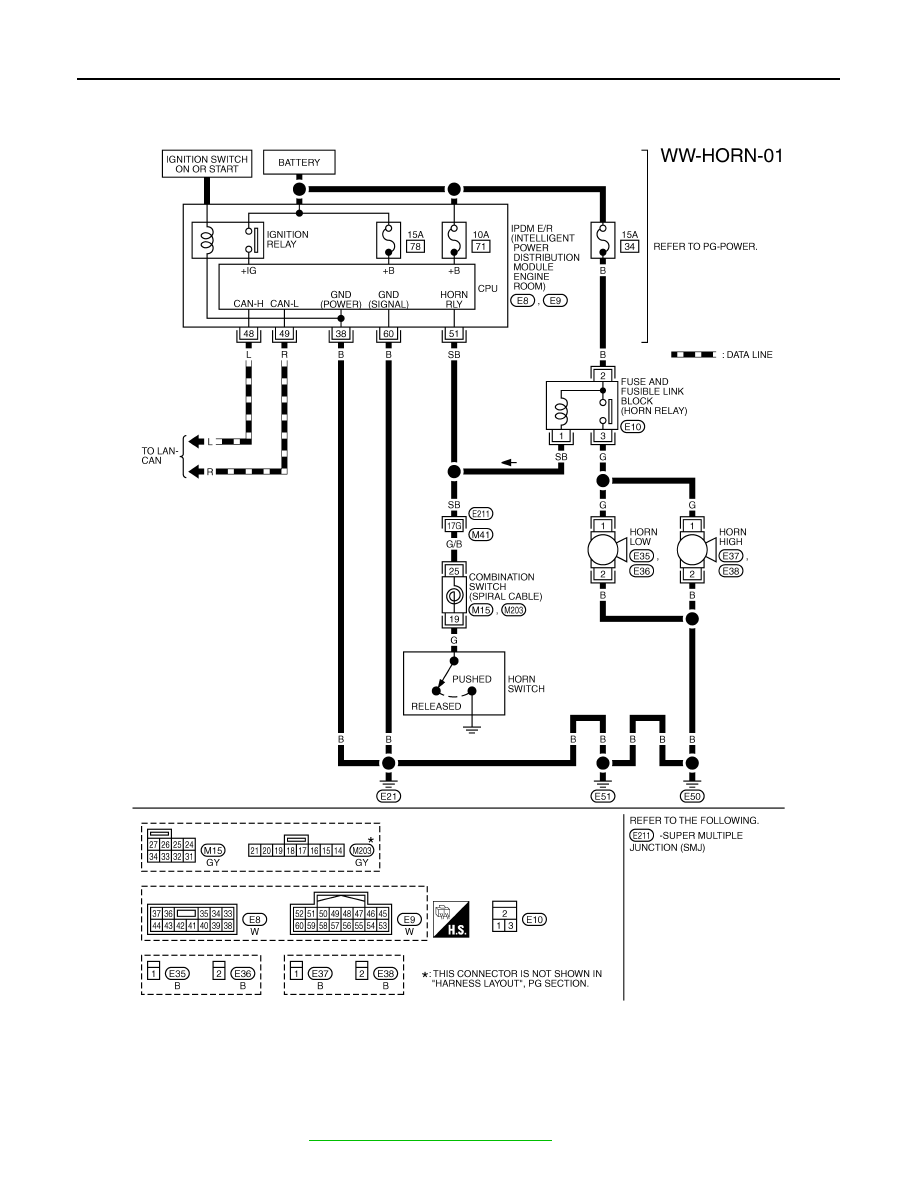
HORN
HORN
Wiring Diagram - HORN -
INFOID:0000000001328605
Removal and Installation
INFOID:0000000001328606
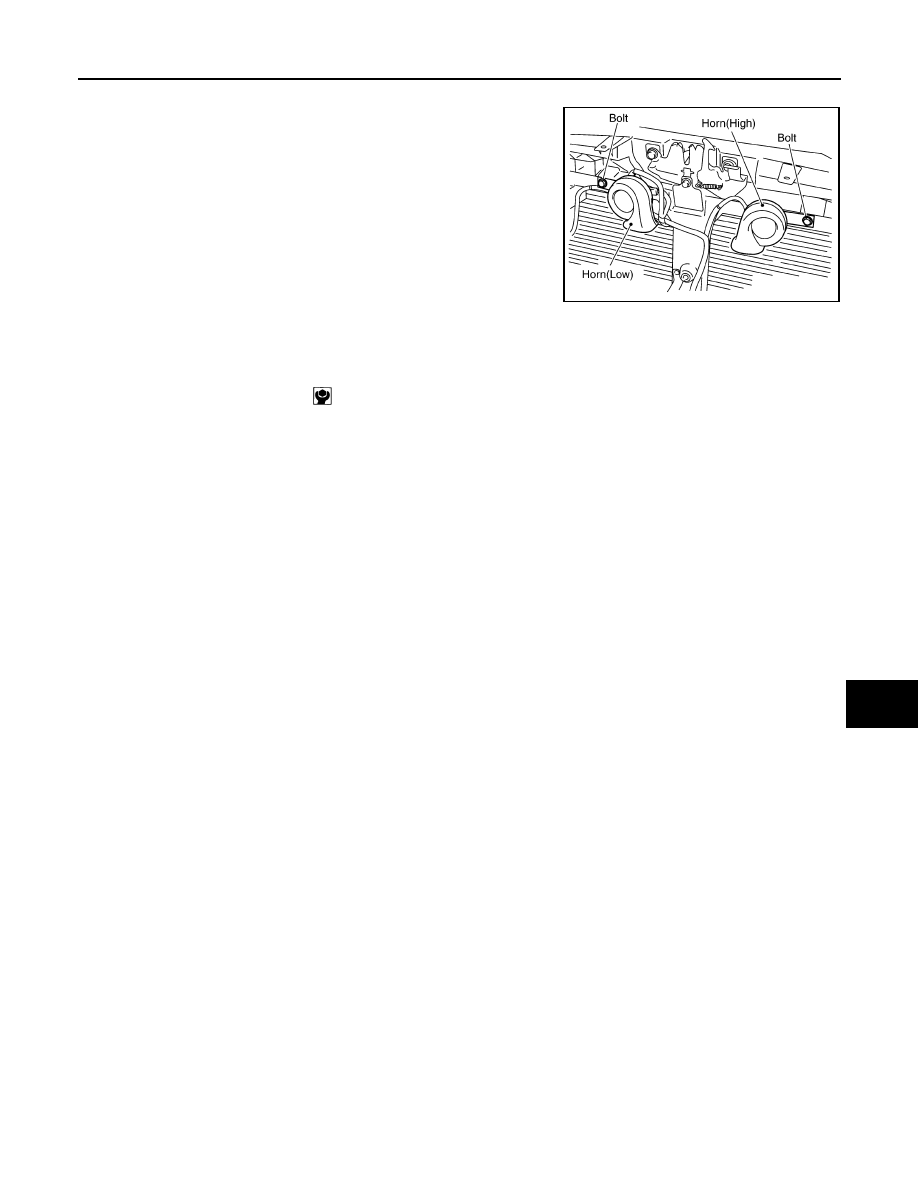
REMOVAL
1.
Remove front grille. Refer to
EI-22, "Component Parts Location"
TKWM4378E
HORN
WW-49
< SERVICE INFORMATION >
C
D
E
F
G
H
I
J
L
M
A
B
WW
N
O
P
2.
Disconnect all horn connectors.
3.
Remove horn mounting bolt and remove horn from vehicle.
INSTALLATION
Installation is the reverse order of removal.
• Tighten horn bolt to specified torque.
SKIA5093E
Horn mounting bolt
: 5.8 N·m (0.59 kg-m, 51 in-lb)
Нет комментариевНе стесняйтесь поделиться с нами вашим ценным мнением.
Текст