Infiniti FX35 / FX45. Manual — part 613

EI-16
< SERVICE INFORMATION >
FRONT BUMPER
12. Remove nuts of bumper stay, and remove bumper stay. Remove
nuts with power tool.
13. Remove nuts of front bumper guard bar, and remove front
bumper guard bar. Remove nuts with power tool.
14. Remove fog lamps located in bumper fascia. Refer to
INSTALLATION
Install in the reverse order of removal.
NOTE:
After installation, adjust the clearance.
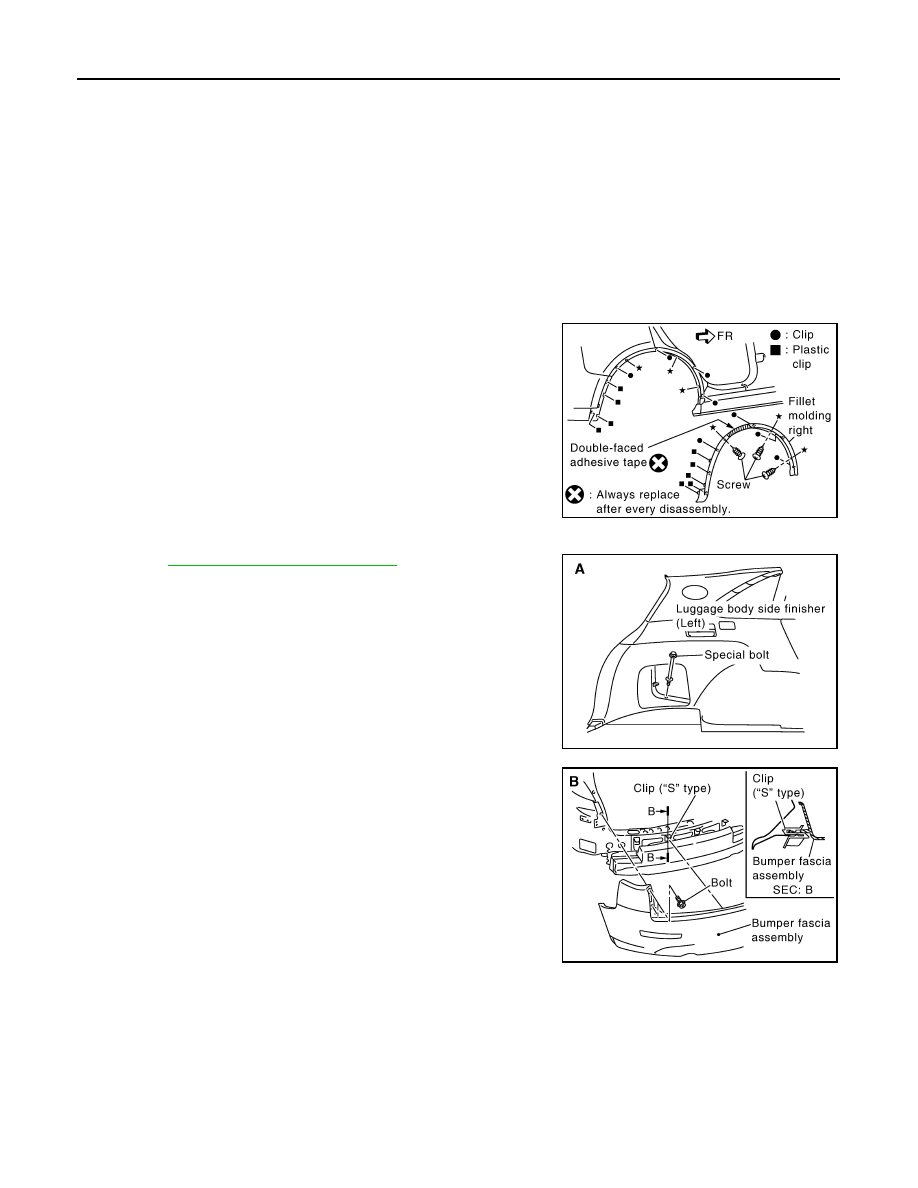
REMOVAL AND INSTALLATION OF FILLET MOLDING
Removal
1.
Remove screws of fillet molding.
2.
Remove clips of fillet molding.
3.
Remove fillet molding.
Installation
1.
Clean adhesive portion of front fender with white gasoline.
2.
Strip pattern from the new double adhesive tape and paste on front fender.
3.
Fillet molding assembly hold with front fender.
REMOVAL AND INSTALLATION OF BUMPER CENTER MOLDING
Removal
1.
Remove front bumper fascia. Refer to
EI-15, "Removal and Installation"
.
2.
Remove bumper center molding mounting nuts.
3.
Disengage plastic pawls from bumper fascia.
4.
Remove bumper center molding.
Installation
Install in the reverse order of removal.
PIIA4339E
Portion
Clearance
Front bumper – Front grille
A – A
0.5 – 3.5 mm (0.020 – 0.138 in)
Front bumper – Headlamp
B – B
1.5 – 4.5 mm (0.059 – 0.177 in)
Front bumper – Front fender
C – C
0.0 – 0.5 mm (0.000 – 0.020 in)
PIIA4350E
REAR BUMPER
EI-17
< SERVICE INFORMATION >
C
D
E
F
G
H
J
K
L
M
A
B
EI
N
O
P
REAR BUMPER
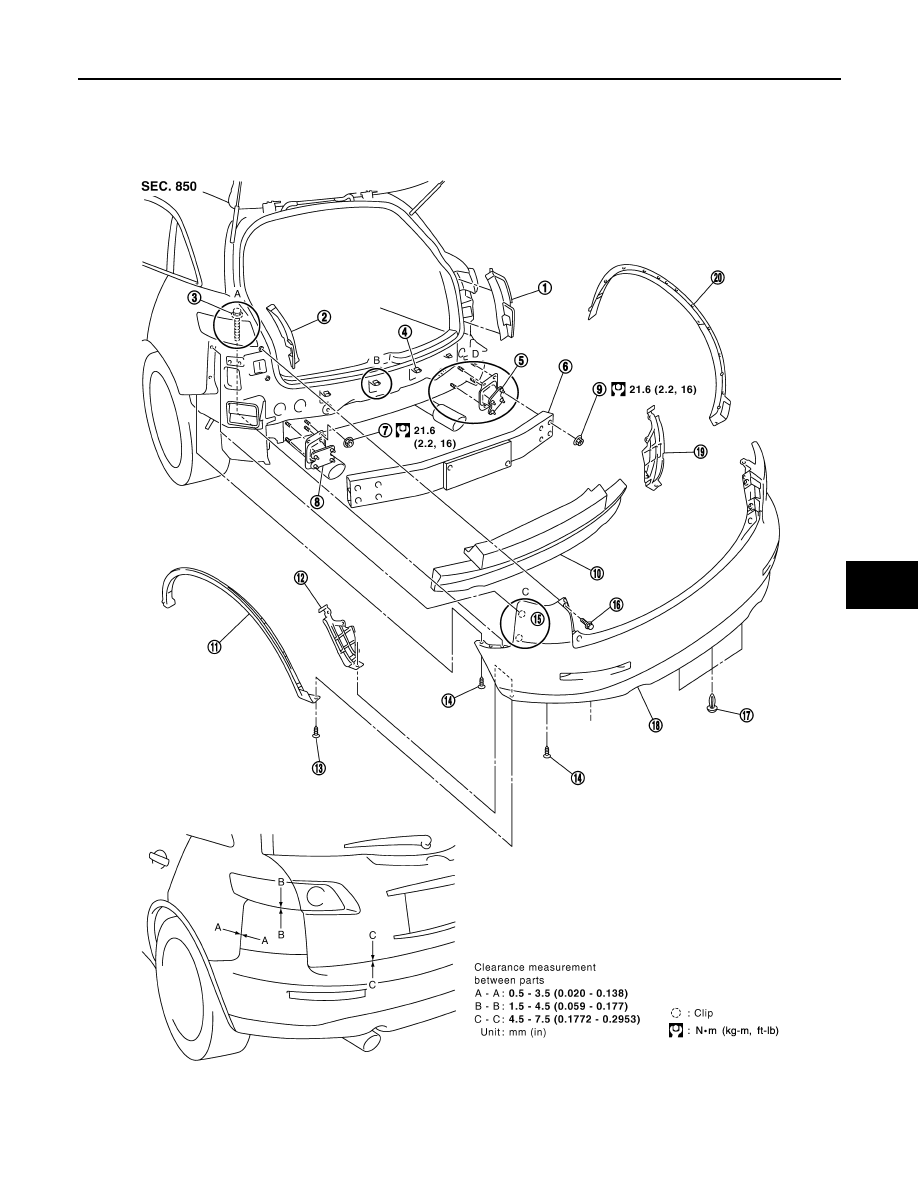
Component Parts Location
INFOID:0000000001328061
1.
Bumper side cover A (RH)
2.
Bumper side cover A (LH)
3.
Special bolt
4.
Clip (“S” type)
5.
Bumper stay (RH)
6.
Bumper reinforcement
7.
Nut
8.
Bumper stay (LH)
9.
Nut
PIIA4333E
EI-18
< SERVICE INFORMATION >
REAR BUMPER
Removal and Installation
INFOID:0000000001529396
CAUTION:
Bumper fascia is made of resin. Do not apply strong force to it, and be careful to prevent contact with
oil.
REMOVAL
1.
Remove bumper side cover A (RH/LH).
2.
Remove fillet molding assembly. Only the place connected with
a rear bumper fascia is removed.
3.
Remove luggage finisher mask (RH/LH).
Refer to
EI-46, "Removal and Installation"
.
4.
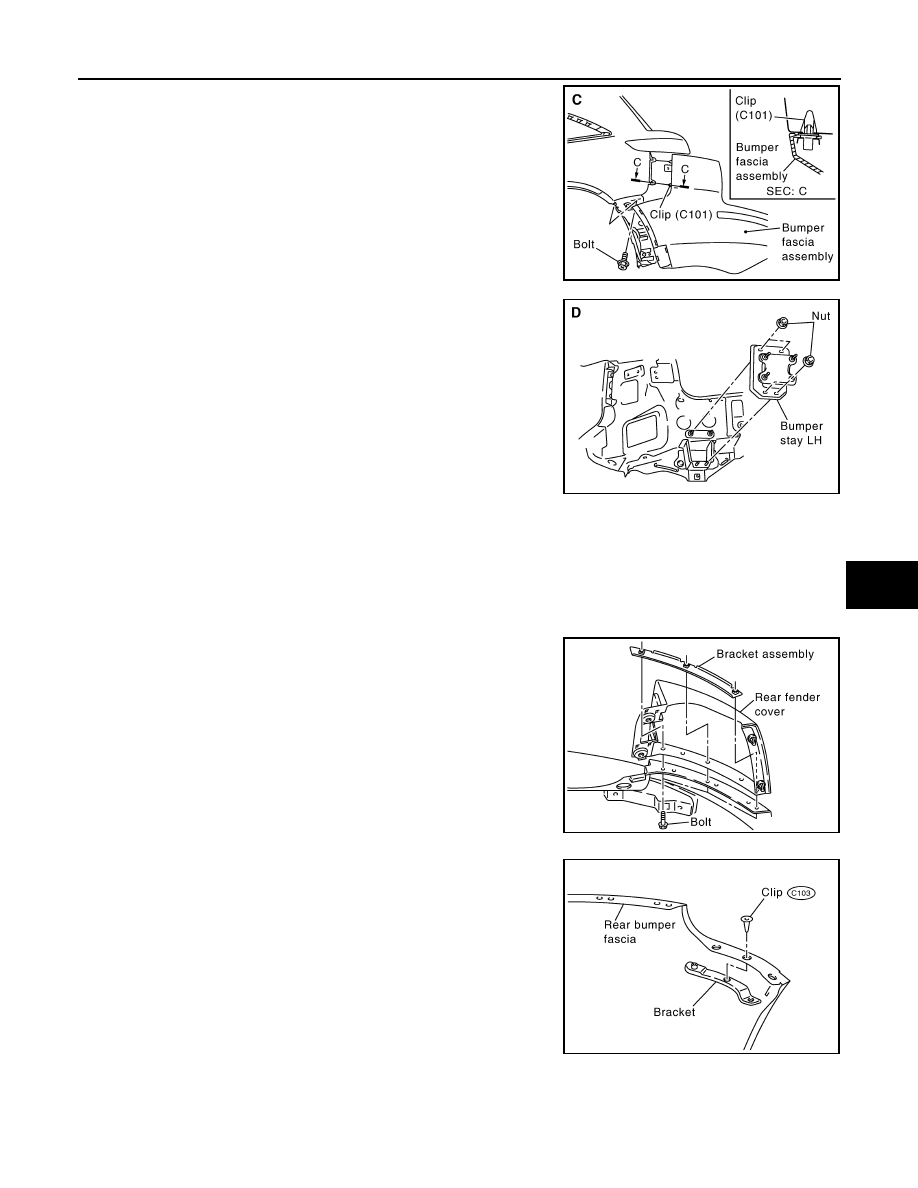
Remove bumper fascia special bolts from rear fender (RH/LH).
5.
Remove bumper fascia bolts from rear fender (RH/LH).
6.
Remove lower portion of bumper fascia bolts.
7.
Insert driver rolled with cloth between bumper fascia and “S”
type clips, and remove bumper fascia.
10. Energy absorber
11.
Fillet molding (LH)
12. Bumper closing (LH)
13. Bolt
14. Bolt
15. Clip (C101)
16. Bolt
17. Clip (C205)
18. Bumper fascia assembly
19. Bumper closing (RH)
20. Fillet molding (RH)
PIIA4347E
PIIA4334E
PIIA4335E
REAR BUMPER
EI-19
< SERVICE INFORMATION >
C
D
E
F
G
H
J
K
L
M
A
B
EI
N
O
P
8.
Remove bumper fascia assembly.
CAUTION:
When removing bumper fascia, 2 workers are required so
as to prevent it from dropping.
9.
Remove bumper energy absorber.
10. Remove bumper reinforcement nuts and remove bumper rein-
force assembly. Remove nuts with power tool.
11. Remove bumper nuts and remove bumper stay. Remove nuts
with power tool.
INSTALLATION
Install in the reverse order of removal.
NOTE:
After installation, adjust the clearance.
DISASSEMBLY AND ASSEMBLY OF REAR BUMPER FASCIA
Disassembly
1.
Remove rear fender cover bolt and remove rear fender.
2.
Remove bracket clips and remove bracket.
PIIA4336E
PIIA4337E
PIIA4960E
PIIA6416E
Нет комментариевНе стесняйтесь поделиться с нами вашим ценным мнением.
Текст