Infiniti FX35 / FX45. Manual — part 614
EI-20
< SERVICE INFORMATION >
REAR BUMPER
3.
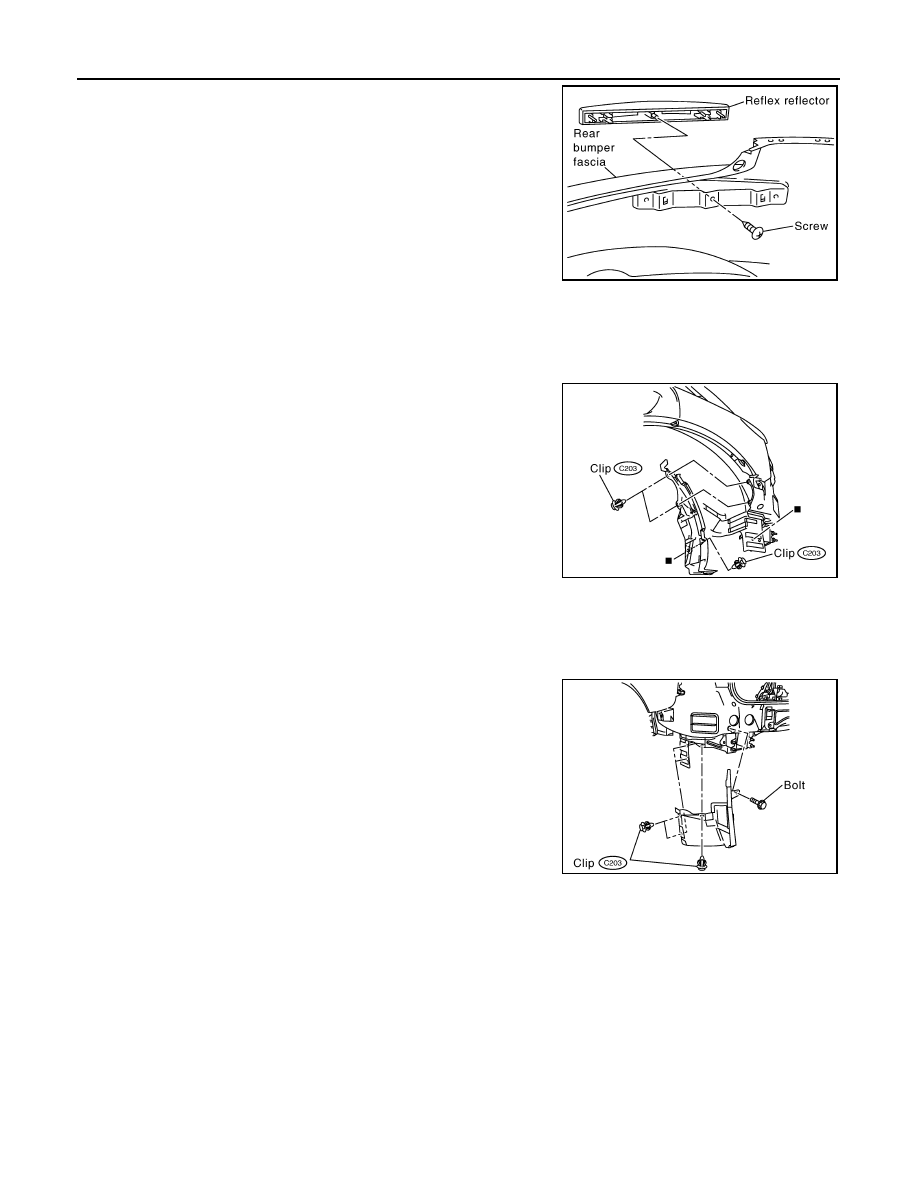
Remove rear reflex reflector assembly screw and remove rear
reflex reflector assembly.
Assembly
Assemble in the reverse order of disassembly.
REMOVAL AND INSTALLATION OF REAR BUMPER CLOSING
Removal
Remove clips of bumper closing and remove rear bumper closing.
Installation
Install in the reverse order of removal.
REMOVAL AND INSTALLATION OF DRAFTER GUARD
Removal
Remove clips and bolt of drafter guard and remove drafter guard.
Installation
Install in the reverse order of removal.
REMOVAL AND INSTALLATION OF REAR FILLET MOLDING ASSEMBLY
Removal
PIIA6417E
PIIA4954E
PIIA4955E
REAR BUMPER
EI-21
< SERVICE INFORMATION >
C
D
E
F
G
H
J
K
L
M
A
B
EI
N
O
P
1.
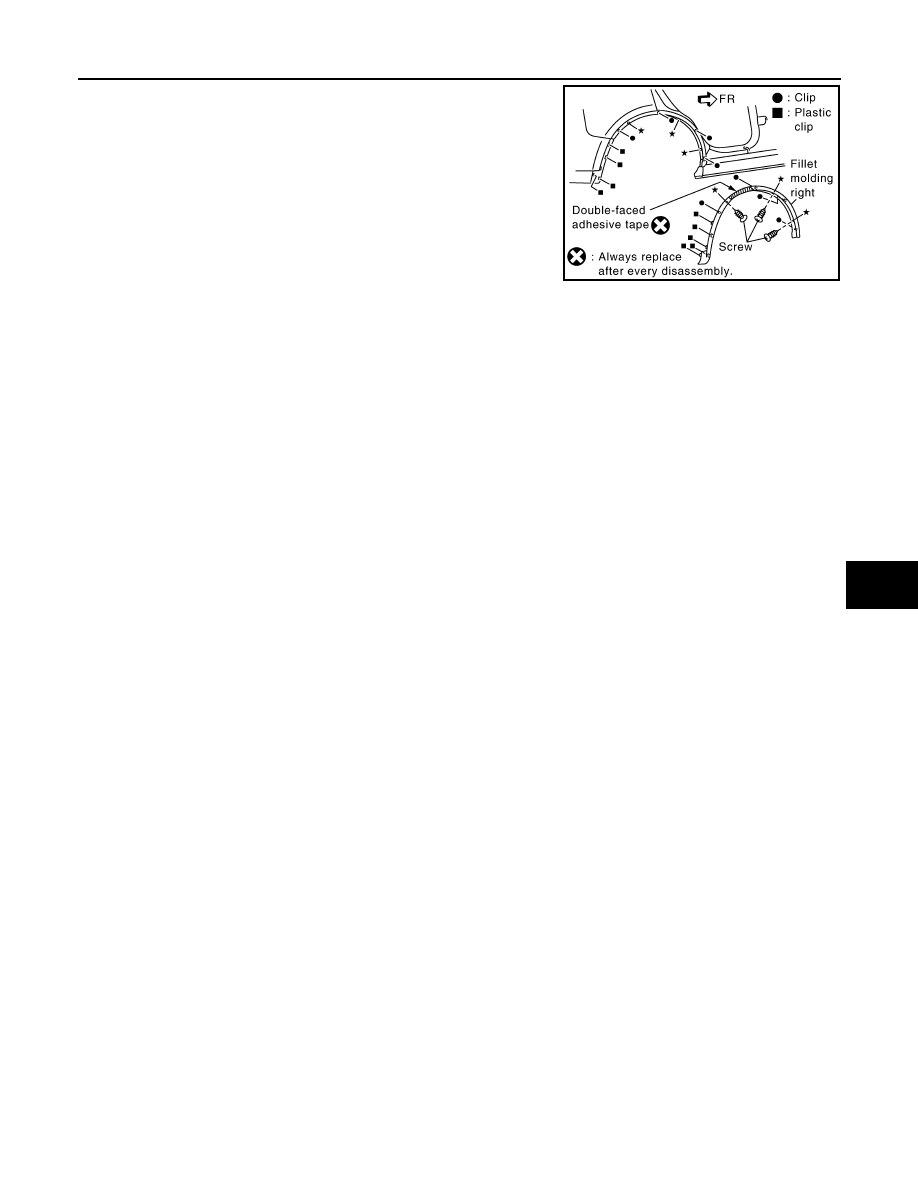
Remove bolts of fillet molding assembly.
2.
Remove clips of fillet molding assembly.
3.
Remove fillet molding assembly.
Installation
1.
Clean adhesive portion of rear fender with white gasoline.
2.
Strip pattern from the new double adhesive tape and paste on rear fender.
3.
Fillet molding assembly hold with rear fender.
PIIA4347E
EI-22
< SERVICE INFORMATION >
FRONT GRILLE
FRONT GRILLE
Component Parts Location
INFOID:0000000001328062
Removal and Installation
INFOID:0000000001529397
CAUTION:
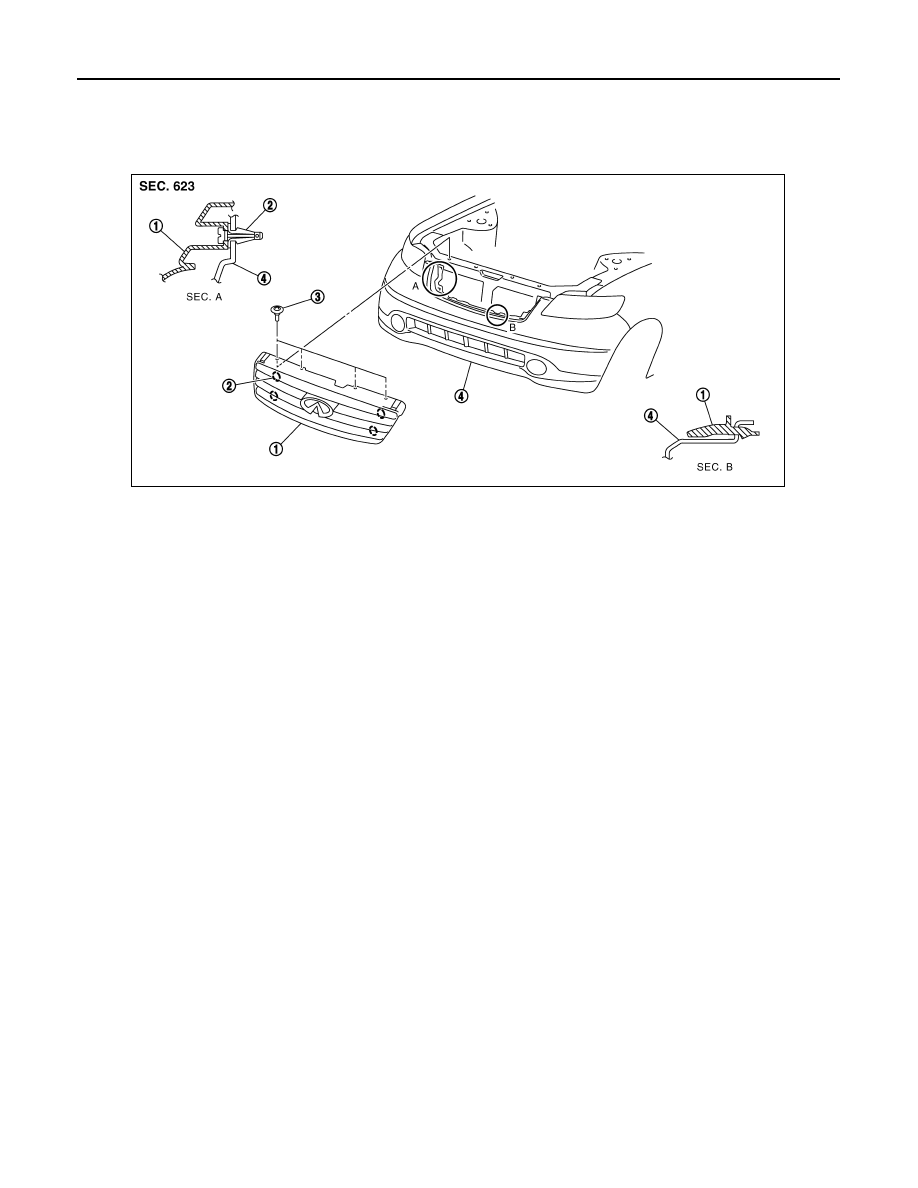
Apply protection tape around outer circumference of front grille (bumper fascia side).
REMOVAL
1.
Remove turn fastener of grille.
2.
Remove clips on upper side of grille.
3.
Pull out grille pawls, and remove grille assembly.
INSTALLATION
Install in the reverse order of removal.
1.
Front grille
2.
Turn fastener (CG101)
3.
Clip (C205)
4.
Front bumper fascia
PIIA4349E
COWL TOP
EI-23
< SERVICE INFORMATION >
C
D
E
F
G
H
J
K
L
M
A
B
EI
N
O
P
COWL TOP
Component Parts Location
INFOID:0000000001328063
Removal and Installation
INFOID:0000000001529398
REMOVAL
1.
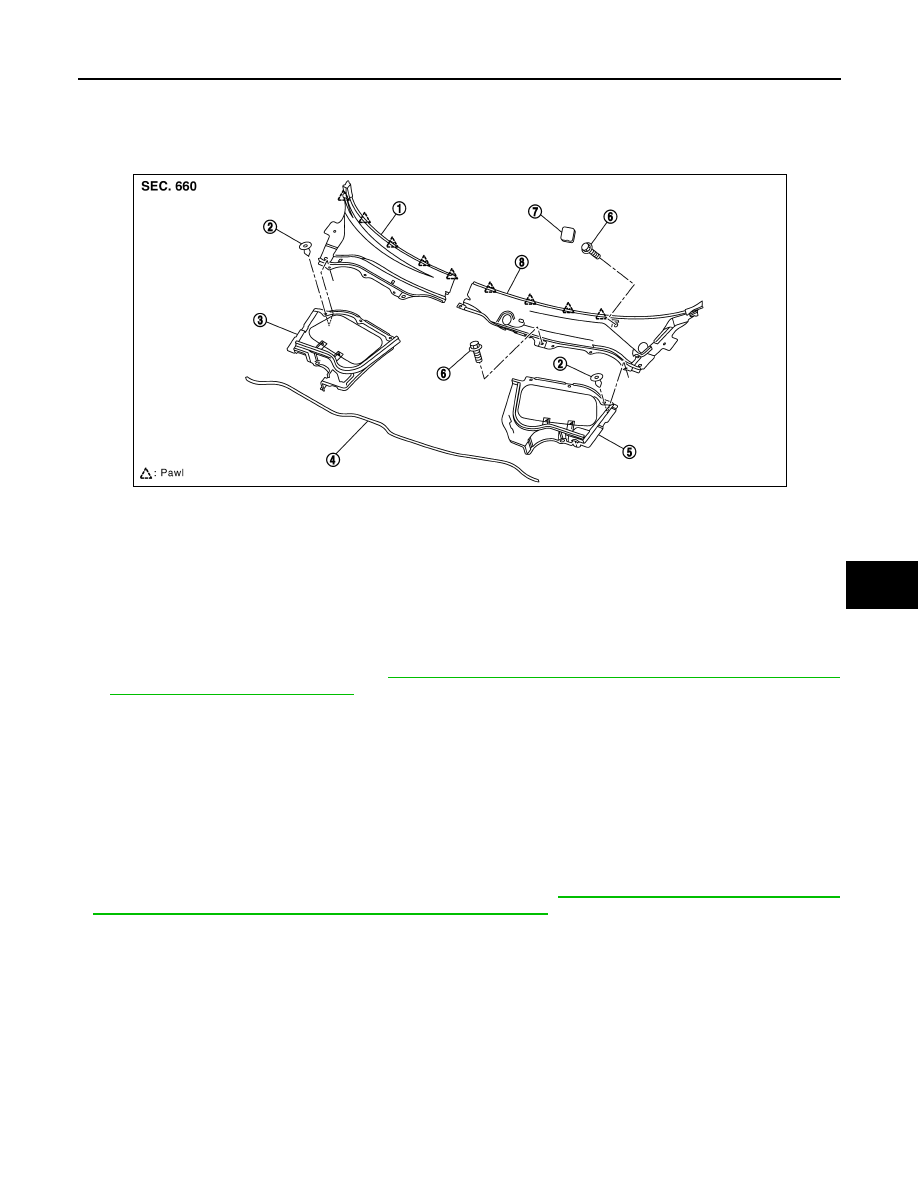
Remove clips of hood ledge cover and remove hood ledge cover.
2.
Remove wiper arms (RH/LH). Refer to
WW-23, "Removal and Installation of Front Wiper Arms, Adjust-
ment of Wiper Arms Stop Location"
3.
Remove cowl top seal rubber.
4.
Remove clips of cowl top cover (RH) and remove cowl top cover (RH).
5.
Remove clips, cap and bolts and remove cowl top cover (LH).
6.
Remove washer hose from cowl top cover.
INSTALLATION
Install in the reverse order of removal.
CAUTION:
• When installing cowl top cover, make sure that blind clips are securely fitted in panel holes on body,
and then press them in.
• After installing, perform adjustment of wiper arms. Refer to
WW-23, "Removal and Installation of
Front Wiper Arms, Adjustment of Wiper Arms Stop Location"
.
1.
Cowl top cover (RH)
2.
Clip (C205)
3.
Hood ledge cover (RH)
4.
Cowl top seal rubber
5.
Hood ledge cover (LH)
6.
Bolt
7.
Cap
8.
Cowl top cover (LH)
PIIA4946E
Нет комментариевНе стесняйтесь поделиться с нами вашим ценным мнением.
Текст