Infiniti FX35, FX50 (S51). Manual — part 1976
REAR WIPER ARM
WW-127
< REMOVAL AND INSTALLATION >
C
D
E
F
G
H
I
J
K
M
A
B
WW
N
O
P
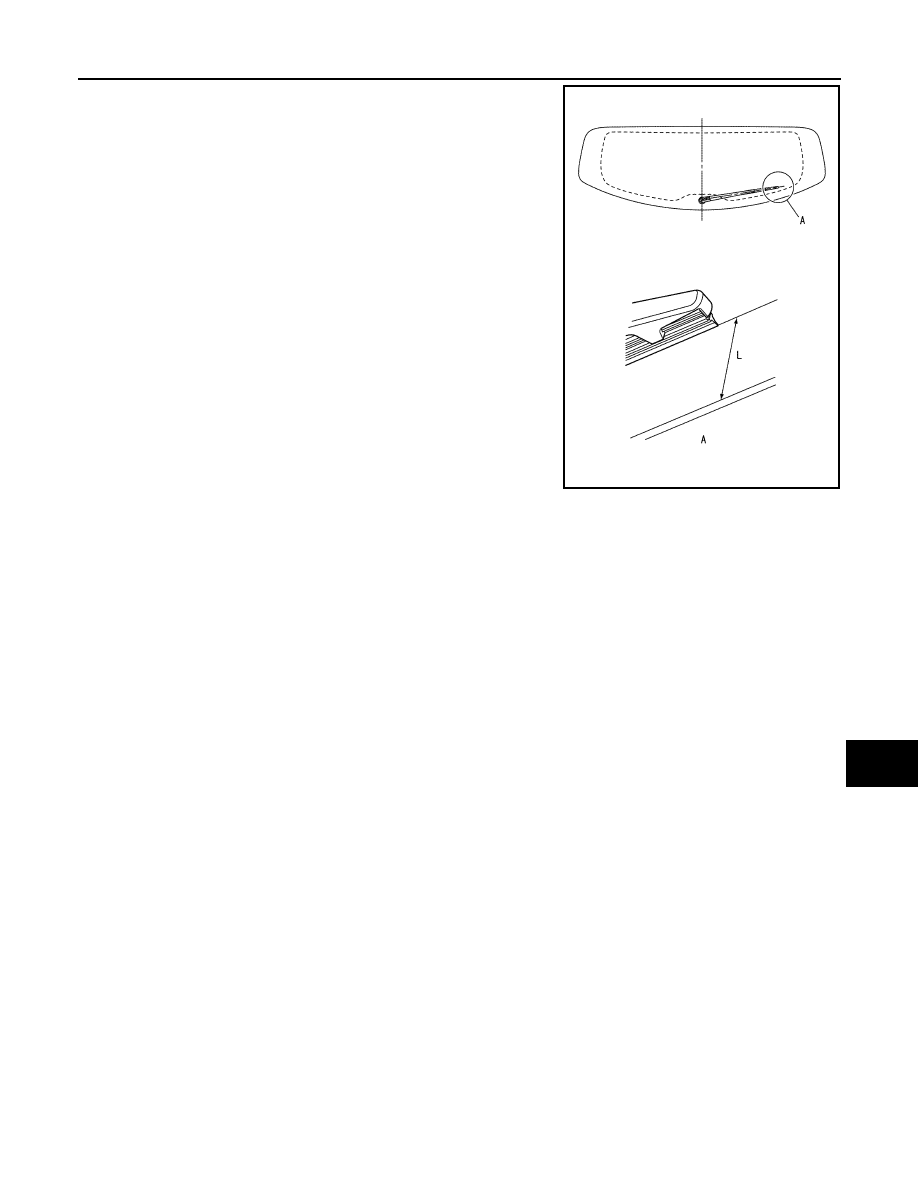
Standard clearance
L
: 51.5
±
7.5 mm (2.028
±
0.295 in)
JPLIA1236ZZ
WW-128
< REMOVAL AND INSTALLATION >
REAR WIPER MOTOR
REAR WIPER MOTOR
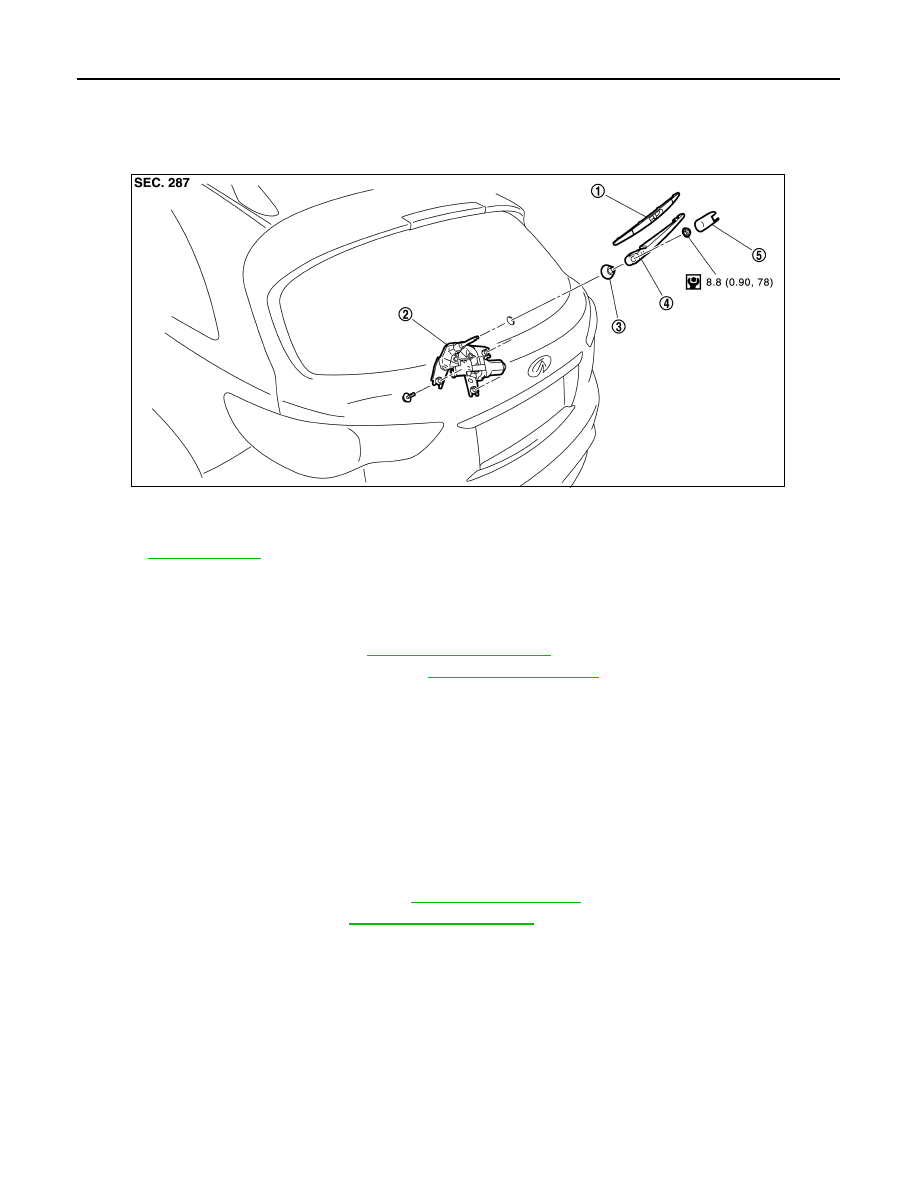
Exploded View
INFOID:0000000005234809
Removal and Installation
INFOID:0000000005234810
REMOVAL
1.
Remove the rear wiper arm. Refer to
.
2.
Remove the back door finisher inner. Refer to
3.
Disconnect the rear wiper motor connector.
4.
Remove the rear wiper motor mounting bolts.
5.
Remove the rear wiper motor from the vehicle.
6.
Remove the pivot seal.
INSTALLATION
1.
Install the pivot seal.
2.
Install the rear wiper motor to the vehicle.
3.
Connect the rear wiper motor connector.
4.
Operate the rear wiper to the auto stop position.
5.
Install the back door finisher inner. Refer to
.
6.
Install the rear wiper arm. Refer to
1.
Rear wiper blade
2.
Rear wiper motor
3.
Pivot seal
4.
Rear wiper arm
5.
Rear wiper arm cover
Refer to
for symbols in the figure.
JPLIA1235GB
REAR WASHER NOZZLE AND TUBE
WW-129
< REMOVAL AND INSTALLATION >
C
D
E
F
G
H
I
J
K
M
A
B
WW
N
O
P
REAR WASHER NOZZLE AND TUBE
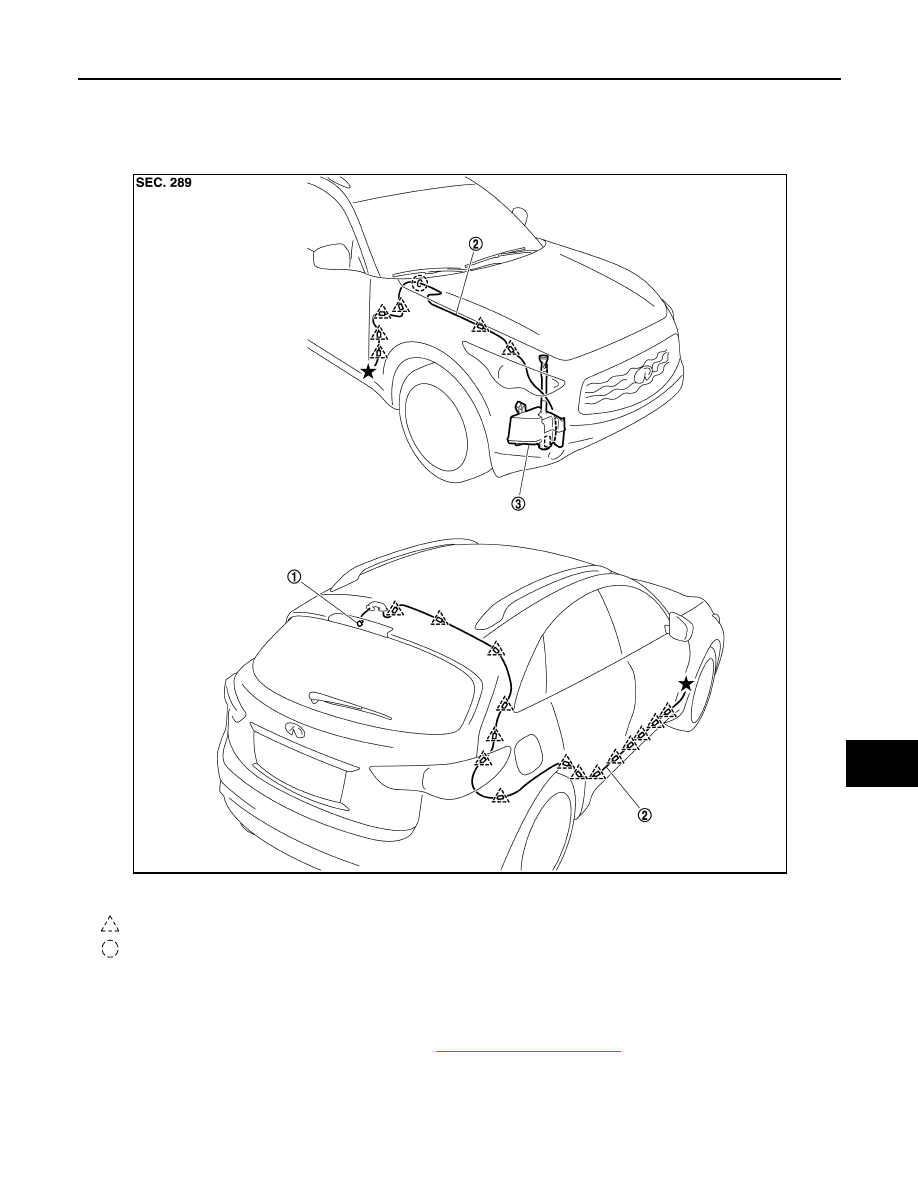
Hydraulic Layout
INFOID:0000000005234811
Removal and Installation
INFOID:0000000005234812
REMOVAL
1.
Remove the high-mounted stop lamp. Refer to
1.
Rear washer nozzle
2.
Rear washer tube
3.
Washer tank
: Clip
: Grommet
JPLIA1237ZZ
WW-130
< REMOVAL AND INSTALLATION >
REAR WASHER NOZZLE AND TUBE
2.
Push pawl (A), and remove the rear washer nozzle (1) from the
back door.
3.
Disconnect the rear washer tube from the rear washer nozzle.
INSTALLATION
Install in the reverse order of removal.
Inspection and Adjustment
INFOID:0000000005234813
INSPECTION
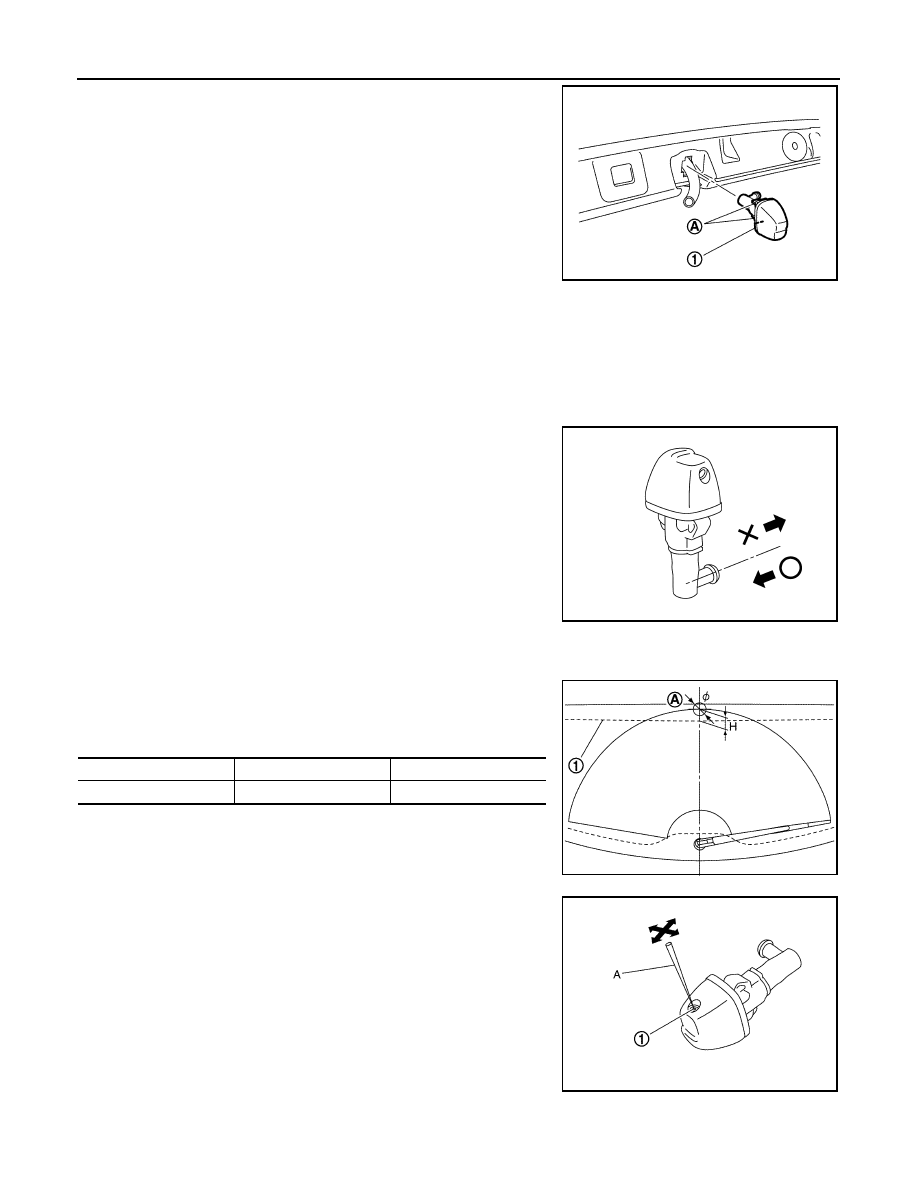
Washer Nozzle Inspection
Check that air can pass through the hose by blowing forward (toward
the nozzle), and check that air cannot pass through by sucking.
ADJUSTMENT
Washer Nozzle Spray Position adjustment
Adjust spray positions to match the positions shown in the figure.
Unit: mm (in)
Insert a needle or similar object (A) into the spray opening (1) and
move up/down and left/right to adjust the spray position.
NOTE:
If wax or dust gets into the nozzle, remove wax or dust with a needle
or small pin.
JPLIA1238ZZ
JPLIA1239ZZ
1
: Black printed frame line
Spray position
H : Height
φ
: Spray position area
A
23.1 (0.91)
30 (1.18)
JPLIA1240ZZ
JPLIA1241ZZ
Нет комментариевНе стесняйтесь поделиться с нами вашим ценным мнением.
Текст