Infiniti FX35, FX50 (S51). Manual — part 1974
FRONT WASHER NOZZLE AND TUBE
WW-119
< REMOVAL AND INSTALLATION >
C
D
E
F
G
H
I
J
K
M
A
B
WW
N
O
P
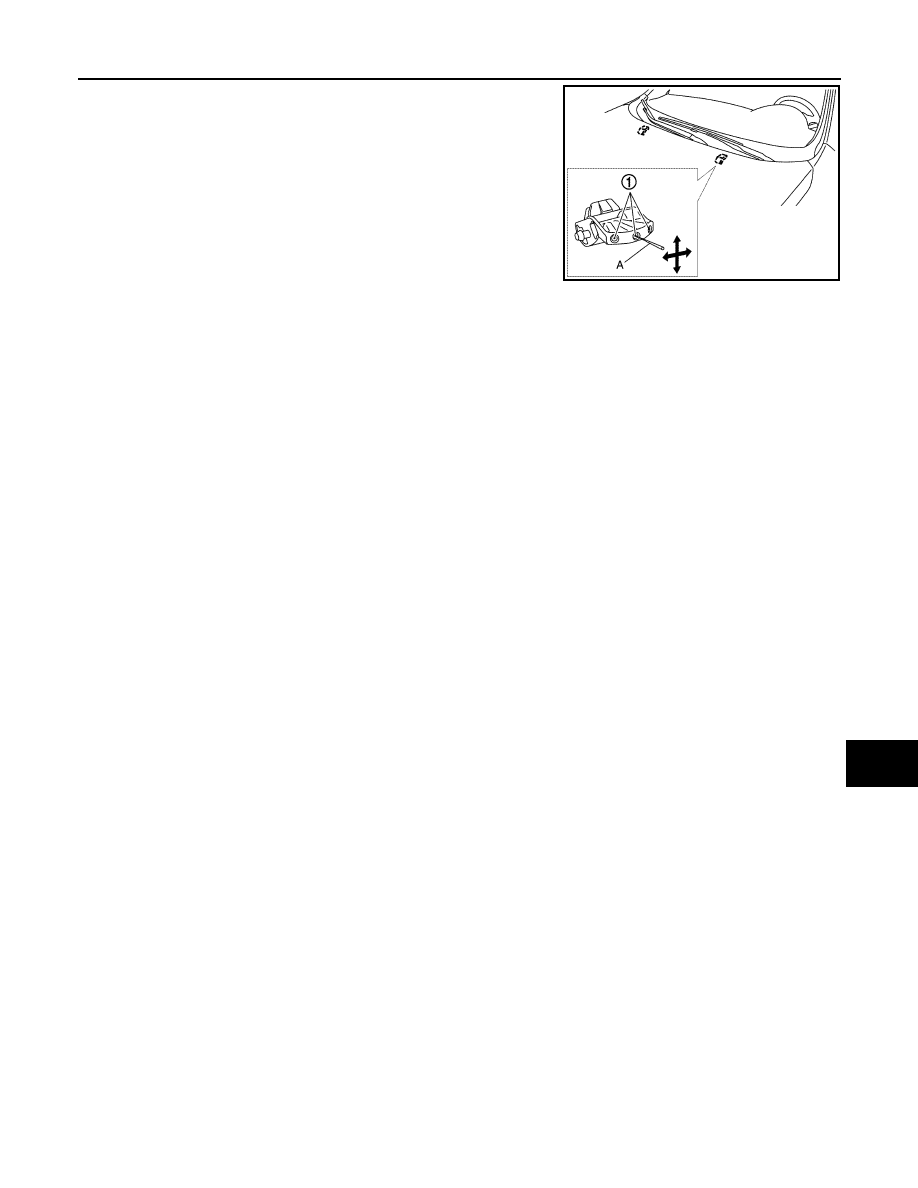
Insert a needle or similar object (A) into the spray opening (1) and
move up/down and left/right to adjust the spray position.
NOTE:
If wax or dust gets into the nozzle, remove wax or dust with a needle
or small pin.
JPLIA1230ZZ

WW-120
< REMOVAL AND INSTALLATION >
FRONT WIPER ARM AND BLADE
FRONT WIPER ARM AND BLADE
Exploded View
INFOID:0000000005234796
Removal and Installation
INFOID:0000000005234797
REMOVAL
1.
Operate the front wiper to move it to the auto stop position.
2.
Open the hood.
3.
Remove the front wiper arm caps.
4.
Remove the front wiper arm mounting nuts.
5.
Raise front wiper arm, and remove front wiper arm from the vehicle.
INSTALLATION
1.
Clean wiper arm mount as shown in the figure to prevent nuts
from being loosened.
2.
Operate the front wiper motor to move the front wiper to the auto
stop position.
3.
Adjust the front wiper blade position. Refer to
4.
Install the front wiper arm by tightening the mounting nuts.
5.
Inject the washer fluid.
6.
Operate the front wiper to move it to the auto stop position.
7.
Check that the front wiper blades stop at the specified position.
8.
Install the front wiper arm caps.
Adjustment
INFOID:0000000005234798
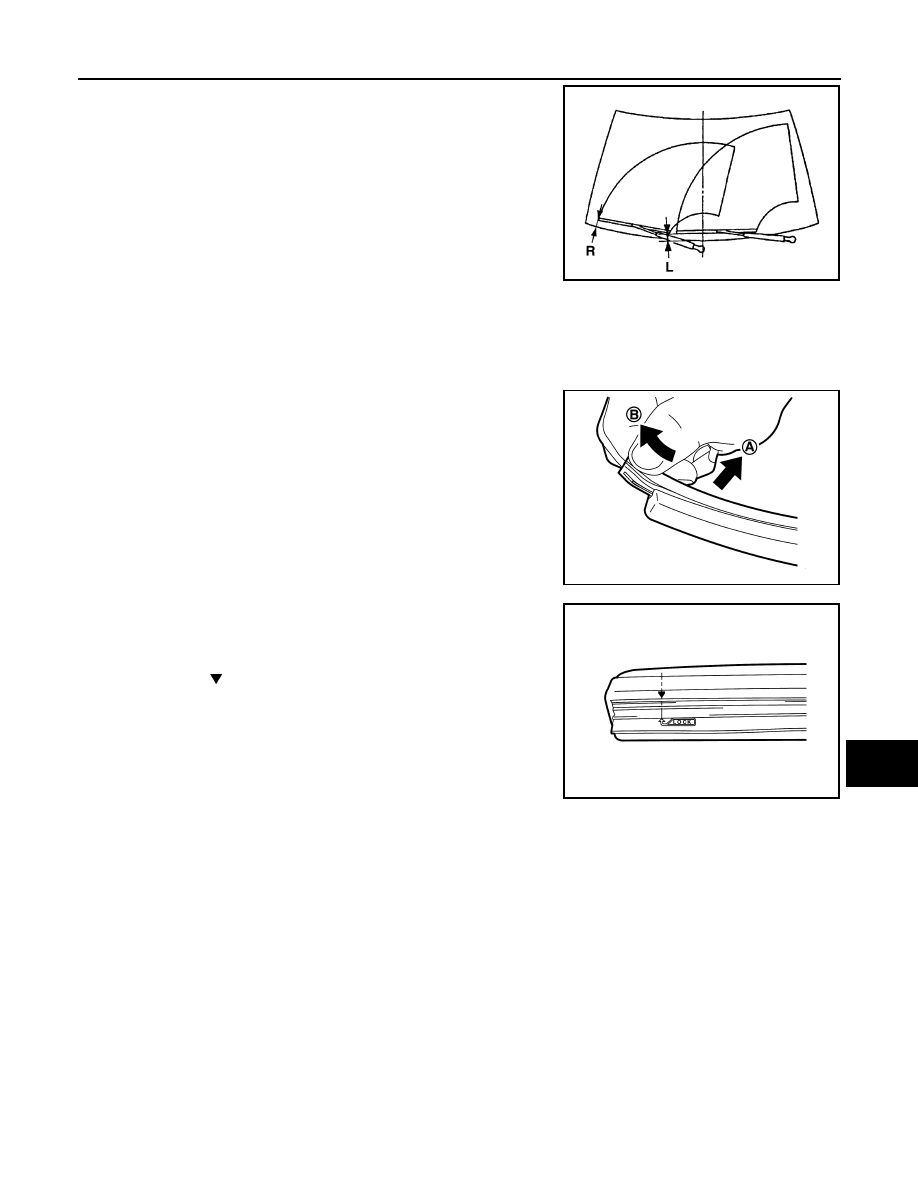
WIPER BLADE POSITION ADJUSTMENT
Clearance between the end of cowl top cover and the top of wiper blade center
1.
Front wiper blade (RH)
2.
Front wiper arm (RH)
3.
Front wiper blade (LH)
4.
Front wiper arm (LH)
5.
Front wiper arm cap
Refer to
for symbols in the figure.
JPLIA1231GB
ELH0717D
FRONT WIPER ARM AND BLADE
WW-121
< REMOVAL AND INSTALLATION >
C
D
E
F
G
H
I
J
K
M
A
B
WW
N
O
P
Standard clearance
Replacement
INFOID:0000000005234799
FLAT BLADE REFILL
1.
Remove the wiper blade from wiper arm.
2.
Pick up the blade refill rear end to direction (A), pull out the
wiper blade refill to direction (B).
CAUTION:
Never use excessive force to pull the blade refill out. The
blade refill may be torn.
3.
Insert a tip of new blade refill (“LOCK” mark is blade refill rear
end) from the wiper blade rear end. And then slide until the hole
of the blade refill fits in the tab of the wiper blade.
NOTE:
Confirm that “ ” mark (Wiper blade side) fits to “LOCK” mark
(Blade refill side).
4.
Confirm that an installation condition of the blade refill.
5.
Install the wiper blade to the wiper arm.
R
: 72.2
±
7.5 mm (2.843
±
0.295 in)
L
: 60.6
±
7.5 mm (2.386
±
0.295 in)
JPLIA0082ZZ
JSLIA0145ZZ
JSLIA0146ZZ
WW-122
< REMOVAL AND INSTALLATION >
FRONT WIPER DRIVE ASSEMBLY
FRONT WIPER DRIVE ASSEMBLY
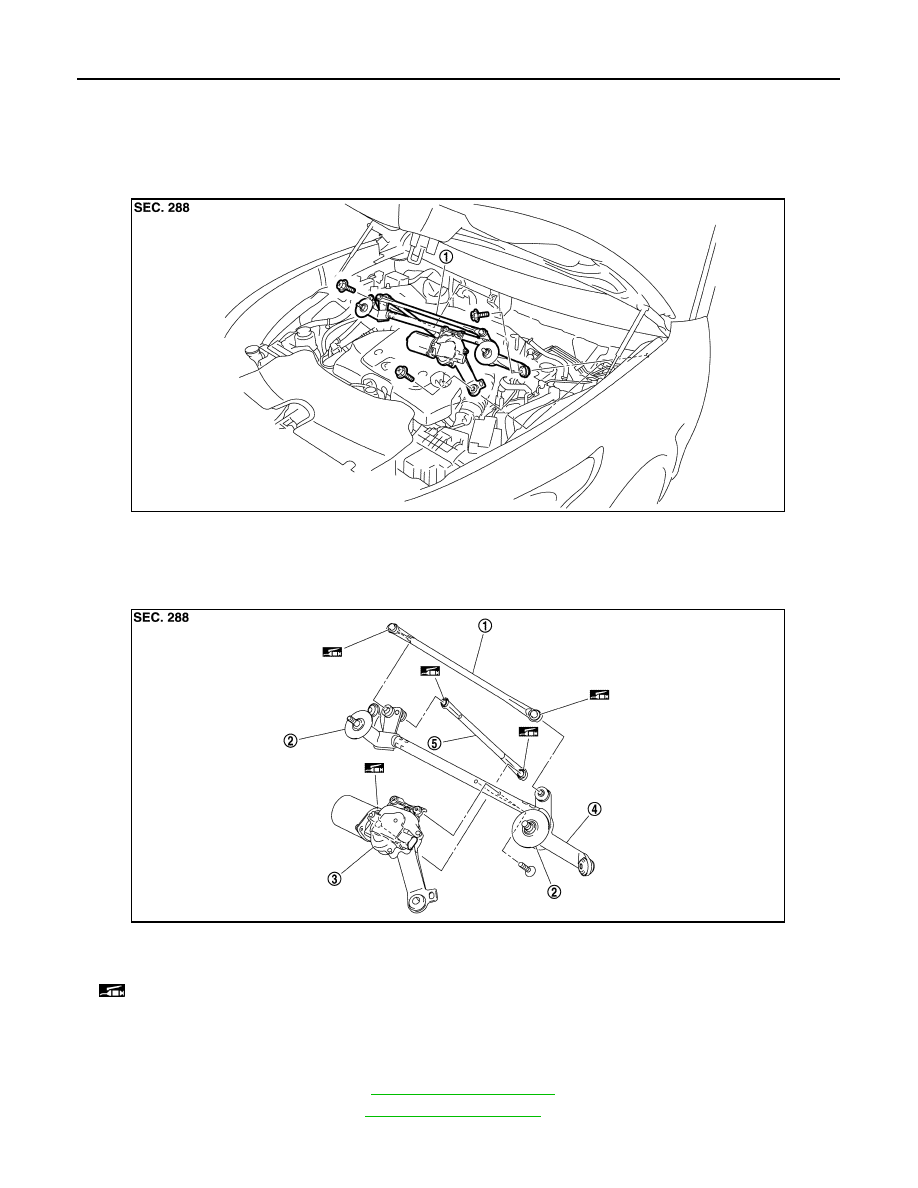
Exploded View
INFOID:0000000005234800
REMOVAL
DISASSEMBLY
Removal and Installation
INFOID:0000000005234801
REMOVAL
1.
Remove the front wiper arm. Refer to
2.
Remove the cowl top cover. Refer to
.
3.
Remove the bolts from the front wiper drive assembly.
1.
Front wiper drive assembly
JPLIA1232ZZ
1.
Front wiper linkage 1
2.
Shaft seal
3.
Front wiper motor
4.
Front wiper frame
5.
Front wiper linkage 2
: Multi
−
purpose grease or an equivalent.
JPLIA1233ZZ
Нет комментариевНе стесняйтесь поделиться с нами вашим ценным мнением.
Текст