Infiniti EX35. Manual — part 1465

TM-248
< DISASSEMBLY AND ASSEMBLY >
[5AT: RE5R05A]
TRANSMISSION ASSEMBLY
74. Install oil pan gasket to transmission case.
CAUTION:
• Do not reuse oil pan gasket.
• Install it in the direction to align hole positions.
• Completely remove all moisture, oil and old gasket, etc. from oil pan gasket mounting surface.
75. Install oil pan (2) and clips (1) to transmission case.
CAUTION:
• Install it so that drain plug (3) comes to the position as
shown in the figure.
• Be careful not to pinch harnesses.
• Completely remove all moisture, oil and old gasket, etc.
from oil pan mounting surface.
76. Tighten oil pan mounting bolts to the specified torque in numeri-
cal order shown in the figure after temporarily tightening them.
Tighten oil pan mounting bolts to the specified torque.
CAUTION:
Do not reuse oil pan mounting bolts.
77. Install drain plug to oil pan. Tighten drain plug to the specified
torque.
CAUTION:
Do not reuse drain plug gasket.
78. Pour ATF into torque converter.
• Approximately 2 liter (2-1/8 US qt, 1-3/4 Imp qt) of ATF is
required for a new torque converter.
• When reusing old torque converter, add the same amount
of ATF as was drained.
79. Install torque converter while aligning notches of torque con-
verter with notches of oil pump.
CAUTION:
Install torque converter while rotating it.
: Front
: Oil pan mounting bolt
SCIA8117E
: Front
JPDIA0021ZZ
SAT428DA
SCIA5010E
TRANSMISSION ASSEMBLY
TM-249
< DISASSEMBLY AND ASSEMBLY >
[5AT: RE5R05A]
C
E
F
G
H
I
J
K
L
M
A
B
TM
N
O
P
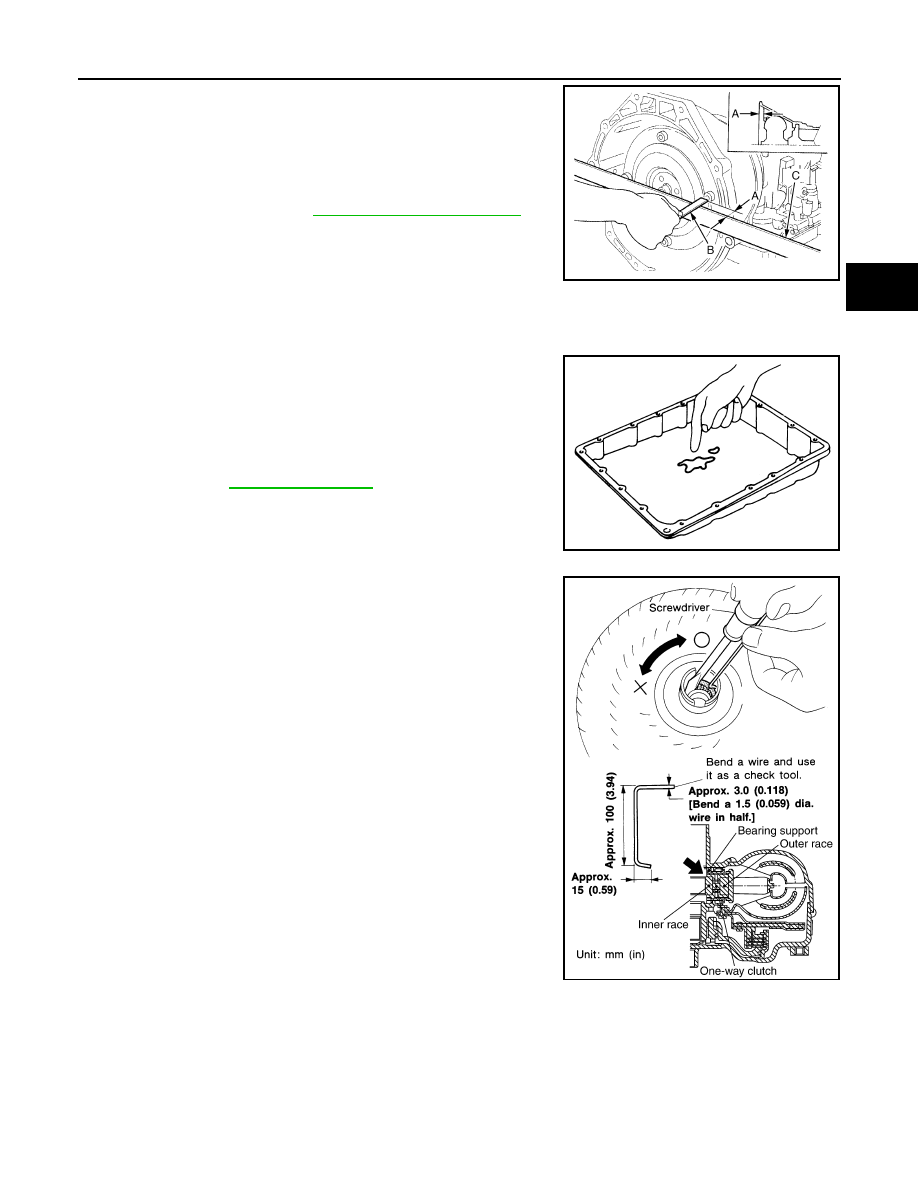
80. Measure distance (A) to make sure that torque converter is in
proper position.
Inspection
INFOID:0000000003130650
INSPECTION AFTER REMOVAL
• Check foreign materials in oil pan to help determine causes of mal-
function. If the ATF is very dark, smells burned, or contains foreign
particles, the frictional material (clutches, band) may need replace-
ment. A tacky film that will not wipe clean indicates varnish build
up. Varnish can cause valves, servo, and clutches to stick and can
inhibit pump pressure.
- If frictional material is detected, perform A/T fluid cooler
cleaning. Refer to
.
• Check torque converter one-way clutch using a check tool as
shown at figure.
1.
Insert a check tool into the groove of bearing support built into
one-way clutch outer race.
2.
When fixing bearing support with a check tool, rotate one-way
clutch spline using a screwdriver.
3.
Make sure that inner race rotates clockwise only. If not, replace
torque converter assembly.
B
: Scale
C
: Straightedge
Distance (A)
: Refer to
.
JPDIA0042ZZ
SCIA5199E
SCIA3171E
TM-250
< DISASSEMBLY AND ASSEMBLY >
[5AT: RE5R05A]
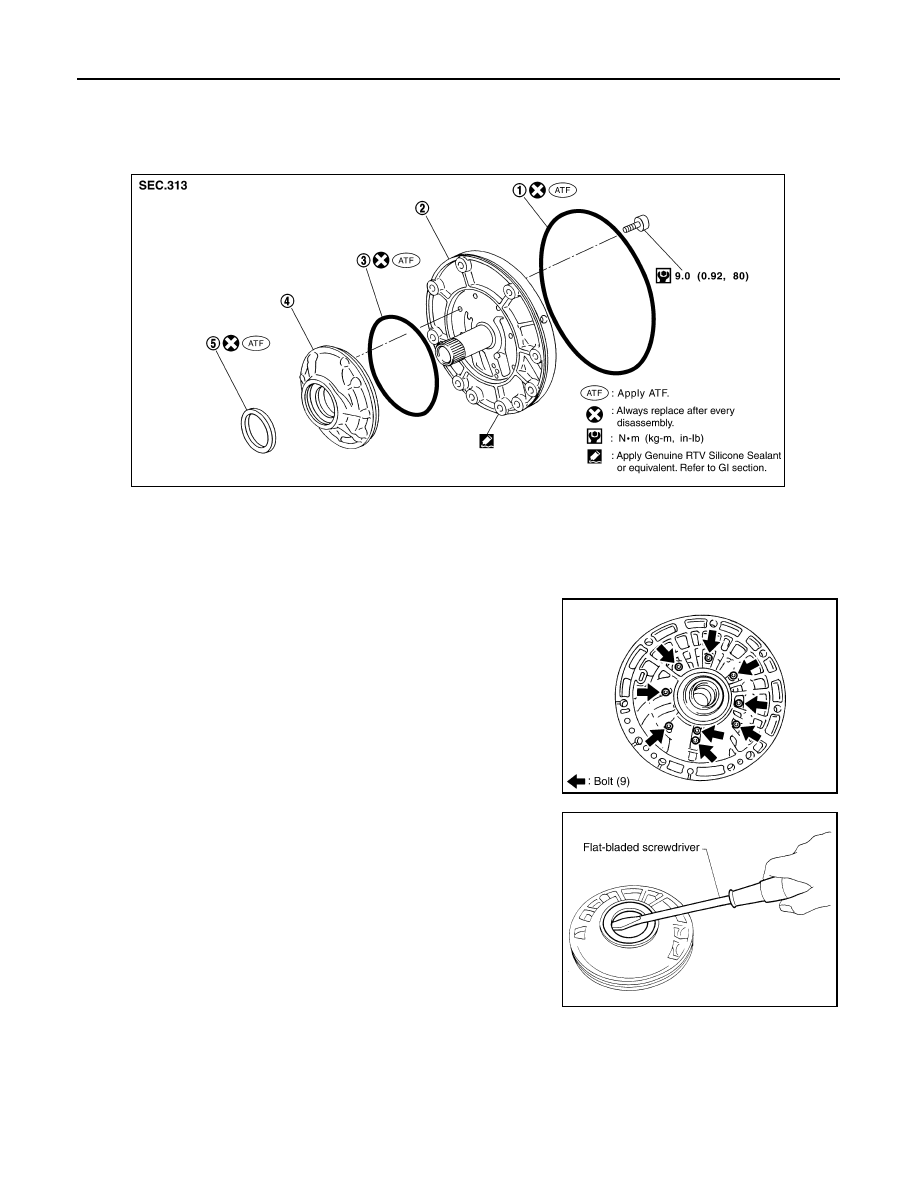
OIL PUMP
OIL PUMP
Exploded View
INFOID:0000000003130651
Disassembly
INFOID:0000000003130652
1.
Remove oil pump housing from oil pump cover.
2.
Remove oil pump housing oil seal using a flat-bladed screw-
driver.
CAUTION:
Be careful not to scratch oil pump housing.
1.
O-ring
2.
Oil pump cover
3.
O-ring
4.
Oil pump housing
5.
Oil pump housing oil seal
SCIA5227E
SCIA5228E
SCIA2840E
OIL PUMP
TM-251
< DISASSEMBLY AND ASSEMBLY >
[5AT: RE5R05A]
C
E
F
G
H
I
J
K
L
M
A
B
TM
N
O
P
3.
Remove O-ring from oil pump housing.
4.
Remove O-ring from oil pump cover.
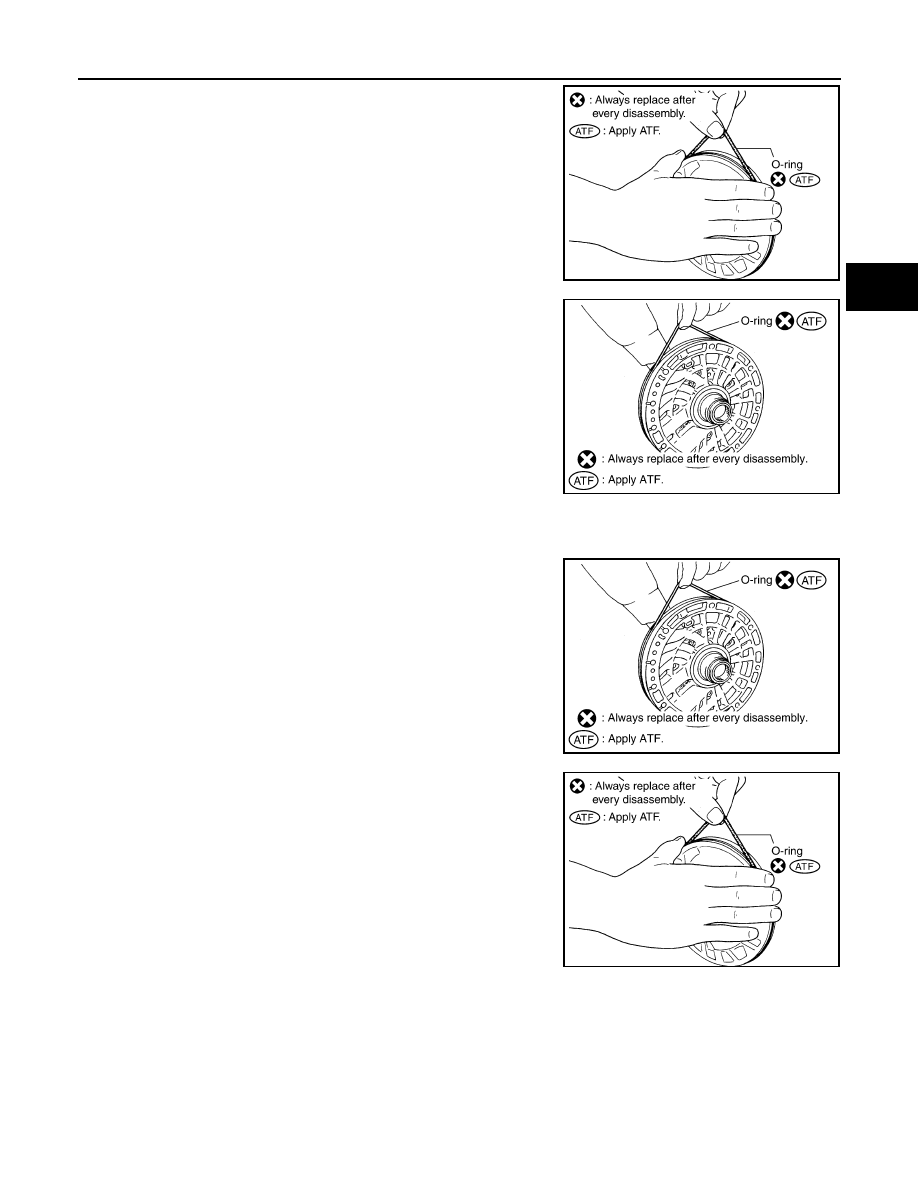
Assembly
INFOID:0000000003130653
1.
Install O-ring to oil pump cover.
2.
Install O-ring to oil pump housing.
SCIA2841E
SCIA5230E
SCIA5230E
SCIA2841E
Нет комментариевНе стесняйтесь поделиться с нами вашим ценным мнением.
Текст