Infiniti EX35. Manual — part 838
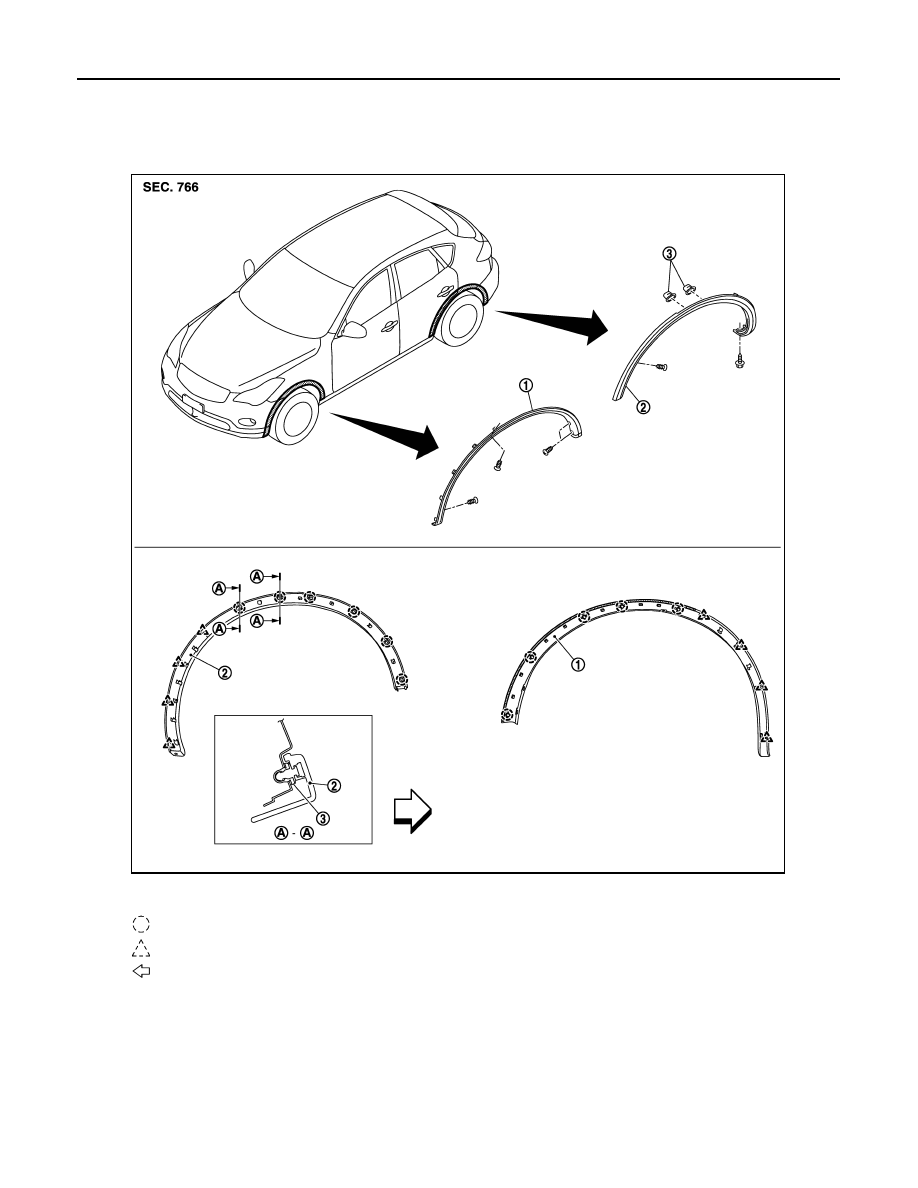
FLOOR SIDE FAIRING
EXT-31
< ON-VEHICLE REPAIR >
C
D
E
F
G
H
I
J
L
M
A
B
EXT
N
O
P
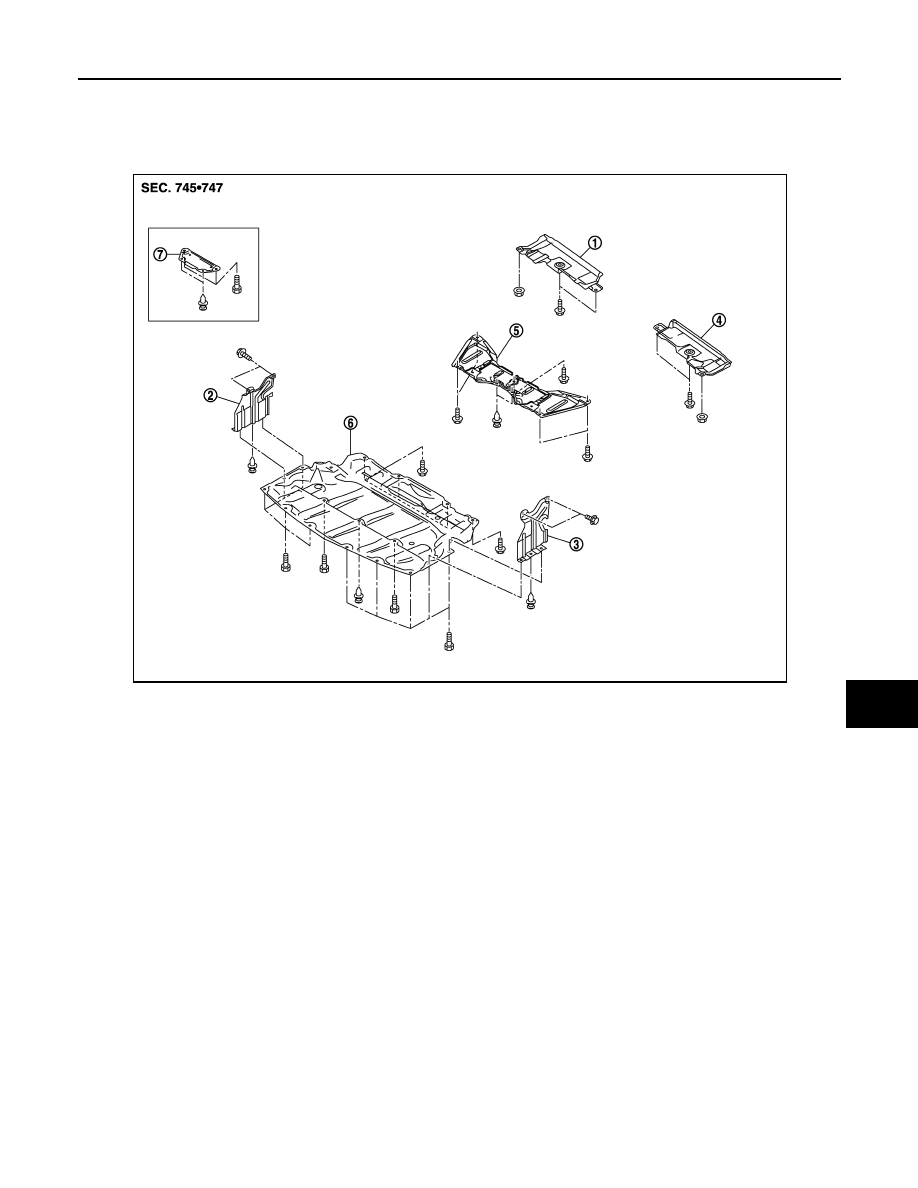
FLOOR SIDE FAIRING
Exploded View
INFOID:0000000003671416
Removal and Installation
INFOID:0000000003671417
REMOVAL
ENGINE LOWER COVER
1.
Remove engine lower cover fixing clip.
2.
Remove engine lower cover fixing bolts with power tool.
3.
Remove engine lower cover.
FRONT UNDER SIDE COVER (LH/RH)
1.
Remove engine lower cover.
2.
Remove front under side cover fixing clips.
3.
Remove front under side cover.
FLOOR UNDER COVER (LH/RH)
1.
Remove floor under cover fixing bolt and nuts with power tool.
2.
Remove floor under cover.
INSTALLATION
Install in the reverse order of removal.
1.
Floor under cover RH
2.
Front under side cover RH
3.
Front under side cover LH
4.
Floor under cover LH
5.
Front under cover (AWD models) 6.
Engine lower cover
7.
Front under cover (2WD models)
JMKIA2195ZZ
EXT-32
< ON-VEHICLE REPAIR >
FILLET MOLDING
FILLET MOLDING
Exploded View
INFOID:0000000003698490
Removal and Installation
INFOID:0000000003698491
REMOVAL
FRONT FILLET MOLDING
1.
Remove front fillet molding fixing screws.
1.
Front fillet molding
2.
Rear fillet molding
3.
Grommet
: Clip
: Pawl
: Vehicle front
JMKIA2232ZZ
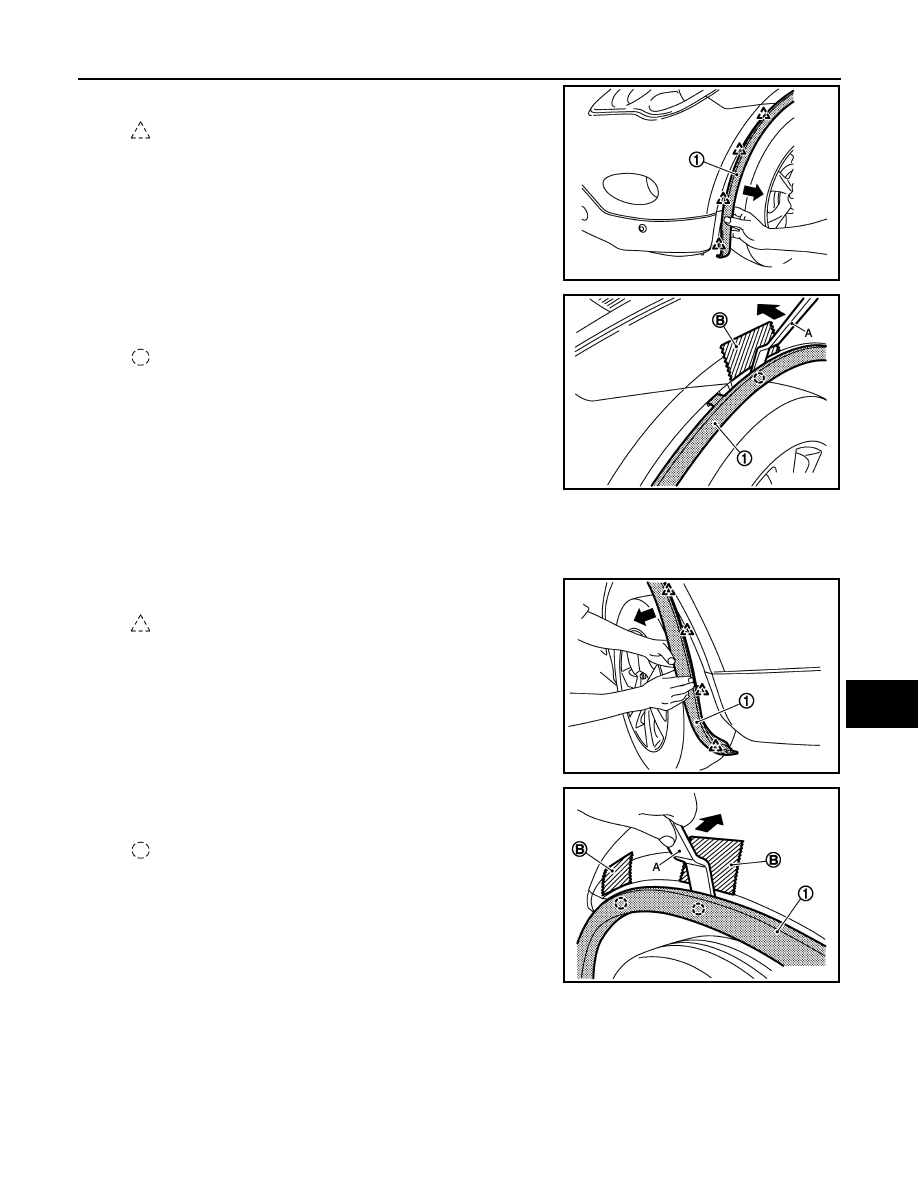
FILLET MOLDING
EXT-33
< ON-VEHICLE REPAIR >
C
D
E
F
G
H
I
J
L
M
A
B
EXT
N
O
P
2.
Disengage the pawls from the front fillet molding (1) frontal part.
3.
Using a remover tool (A), disengage the clips from the front fillet
molding (1) by starting from the front.
CAUTION:
• Apply a protective tape (B) on the body to protect the
painted surface from damage.
• Disengage the clips slowly and carefully.
• Do not pull the front fillet molding (1) strongly.
REAR FILLET MOLDING
1.
Remove rear mud guard fixing screws, and then remove rear mud guard.
2.
Remove rear fillet molding fixing screws.
3.
Disengage the pawls from the rear fillet molding (1) rear side.
4.
Using a remover tool (A), disengage the clips from the rear fillet
molding (1) by starting from the rear.
CAUTION:
• Apply a protective tape (B) on the body to protect the
painted surface from damage.
• Disengage the clips slowly and carefully.
• Do not pull the rear fillet molding (1) strongly.
INSTALLATION
Install in the reverse order of removal.
CAUTION:
• When installing, check visually the fillet molding and the clips, then replace them with new parts if
they have been damaged.
• When installing fillet molding, check that blind clips are securely fitted in panel holes on body, and
then press them in.
: Pawl
JMKIA2233ZZ
: Clip
JMKIA2234ZZ
: Pawl
JMKIA2235ZZ
: Clip
JMKIA2236ZZ
EXT-34
< ON-VEHICLE REPAIR >
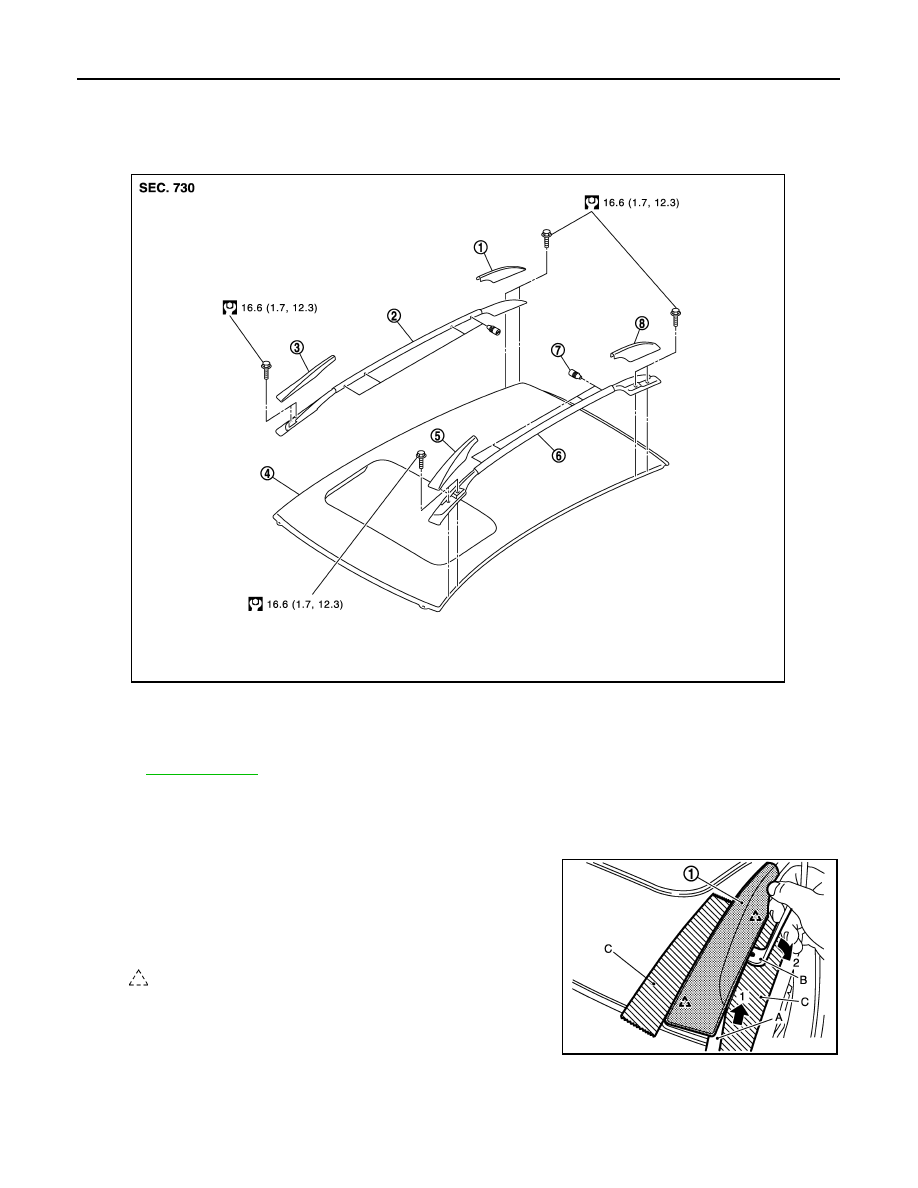
ROOF RAIL
ROOF RAIL
Exploded View
INFOID:0000000003671436
Removal and Installation
INFOID:0000000003671437
REMOVAL
1.
Insert a remover tool (A) into front space.
2.
Remove front roof rail cover (1) outside pawls with remover tool
(B).
CAUTION:
Apply protective tape (C) around the roof rail.
1.
Rear roof rail cover RH
2.
Roof rail assembly RH
3.
Front roof rail cover RH
4.
Roof panel
5.
Front roof rail cover LH
6.
Roof rail assembly LH
7.
Roof rack cap
8.
Rear roof rail cover LH
Refer to
of symbols in the figure.
JMKIA2196GB
: Pawl
JMKIA2197ZZ
Нет комментариевНе стесняйтесь поделиться с нами вашим ценным мнением.
Текст