Infiniti EX35. Manual — part 976
HEADLINING
INT-29
< ON-VEHICLE REPAIR >
C
D
E
F
G
H
I
K
L
M
A
B
INT
N
O
P
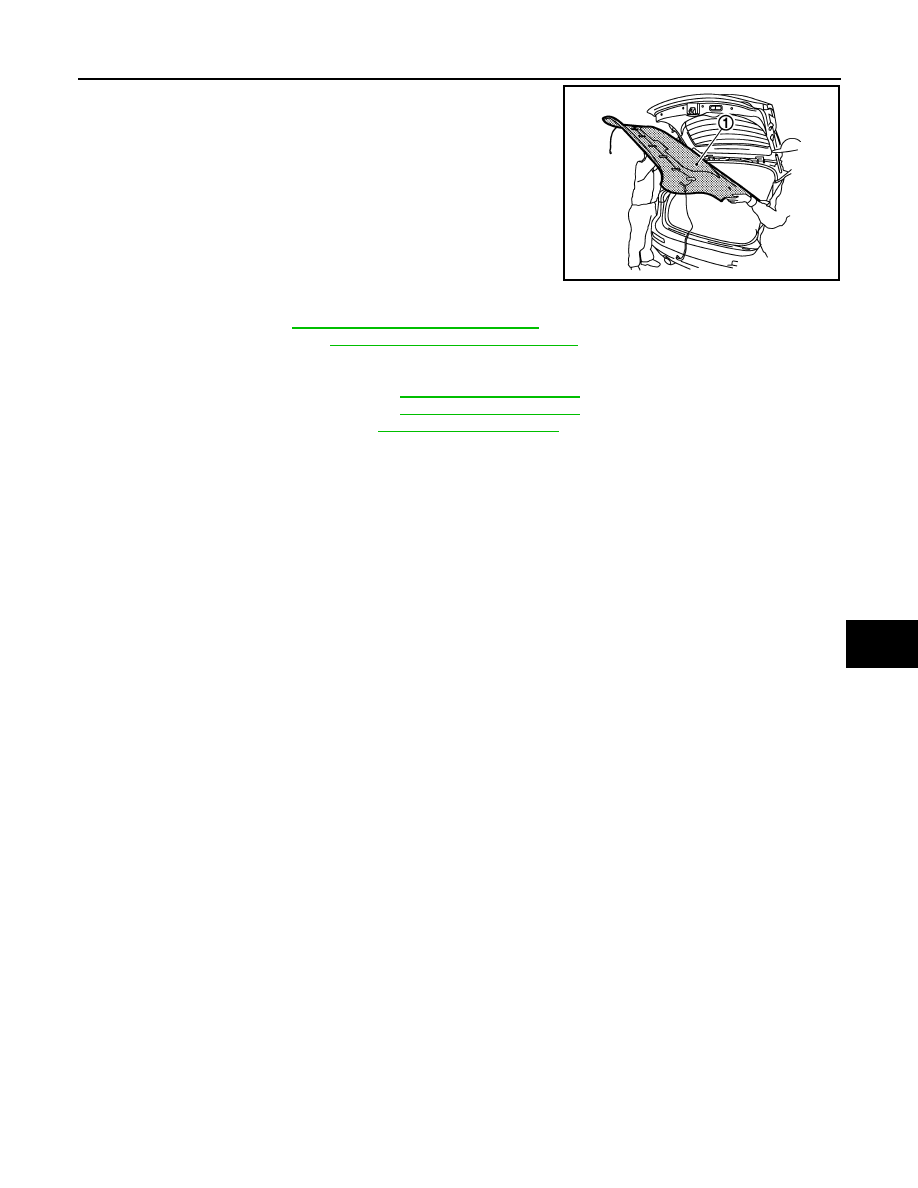
17. Remove headlining (1) from back door.
CAUTION:
• When removing, 2 workers are required.
• Never bend headlining when removing.
• Be careful not to scratch or damage any part of the body
while taking out the headlining.
18. Remove the following parts after removing headlining.
• Personal lamp. Refer to
INL-107, "Removal and Installation"
.
• Map lamp assembly. Refer to
INL-100, "Removal and Installation"
• Over-head console assembly.
• Antenna feeder harness. Refer to the following below.
- Base audio without navigation. Refer to
.
- Bose audio without navigation. Refer to
.
- Bose audio with navigation. Refer to
INSTALLATION
Install in the reverse order of removal.
CAUTION:
• As for guide, install first sun-visor holder (LH/RH) and then the rear hidden clips at the back side of
headlining.
• Be careful not to bend the headlining when installing.
SUNROOF
JMJIA1566ZZ
INT-30
< ON-VEHICLE REPAIR >
HEADLINING
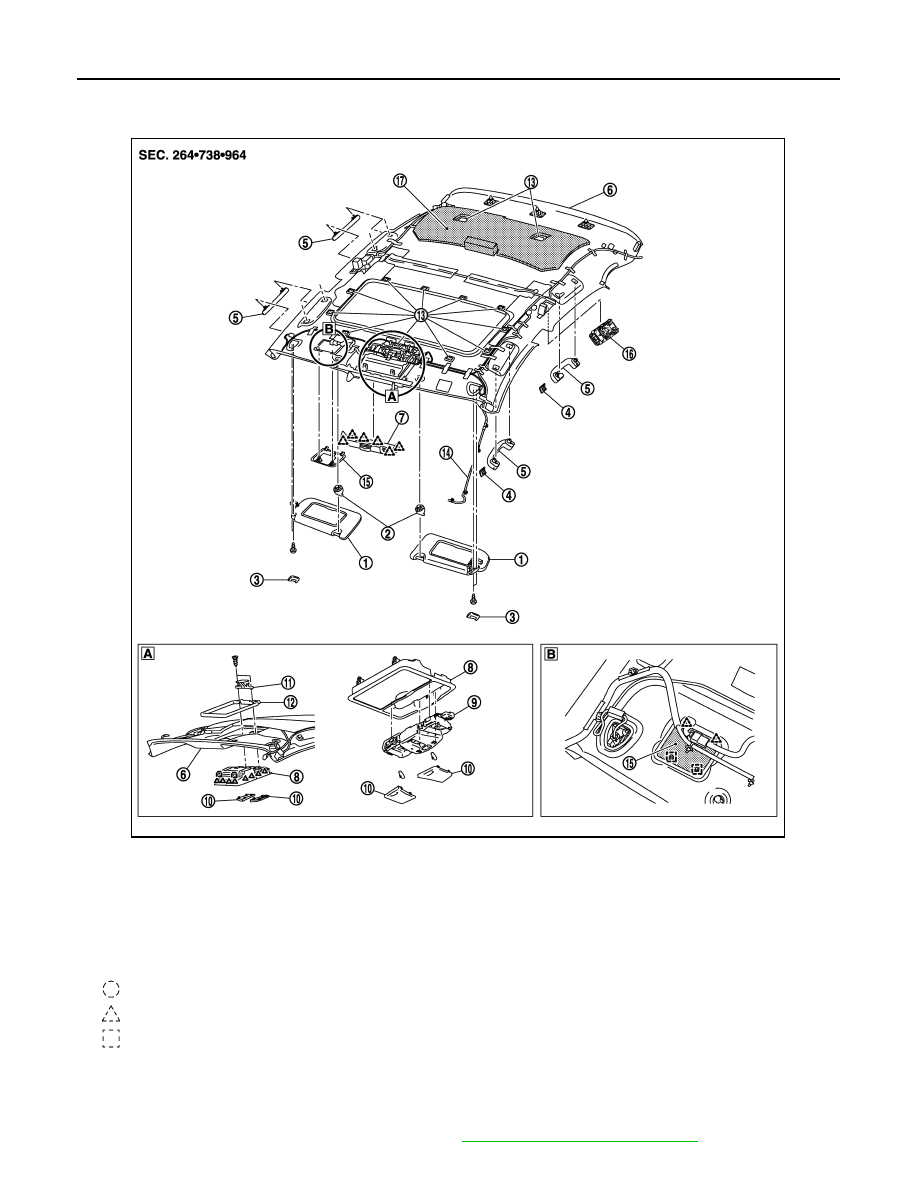
SUNROOF : Exploded View
INFOID:0000000003664586
SUNROOF : Removal and Installation
INFOID:0000000003664587
REMOVAL
1.
Remove rear seat cushion and seat back. Refer to
SE-99, "Removal and Installation"
1.
Sun-visor assembly
2.
Sun-visor holder
3.
Sun-visor cover
4.
Assist grip cap
5.
Assist grip
6.
Headlining assembly
7.
Front camera finisher
8.
Over head console
9.
Map lamp assembly
10. Map lamp lens
11. Bracket map lamp
12. Roof plate assembly
13. Dual lock fastener
14. Antenna feeder harness
15. Front roof finisher
16. Personal lamp assembly
17. Insulator roof
: Clip
: Pawl
: Metal clip
JMJIA1563ZZ
HEADLINING
INT-31
< ON-VEHICLE REPAIR >
C
D
E
F
G
H
I
K
L
M
A
B
INT
N
O
P
2.
Remove front seat belt anchor bolt (LH/RH). Refer to
SB-7, "SEAT BELT BUCKLE : Removal and Installa-
3.
Remove rear seat belt anchor bolt (LH/RH). Refer to
SB-12, "SEAT BELT BUCKLE : Removal and Instal-
.
4.
Remove luggage side lower finisher (LH/RH), luggage side upper finisher (LH/RH). Refer to
5.
Remove front pillar garnish (LH/RH), front kicking plate (LH/RH), center pillar lower garnish (LH/RH), cen-
ter pillar upper garnish (LH/RH), front body side welt (LH/RH), rear body side welt (LH/RH), rear kicking
plate (LH/RH). Refer to
INT-20, "Removal and Installation"
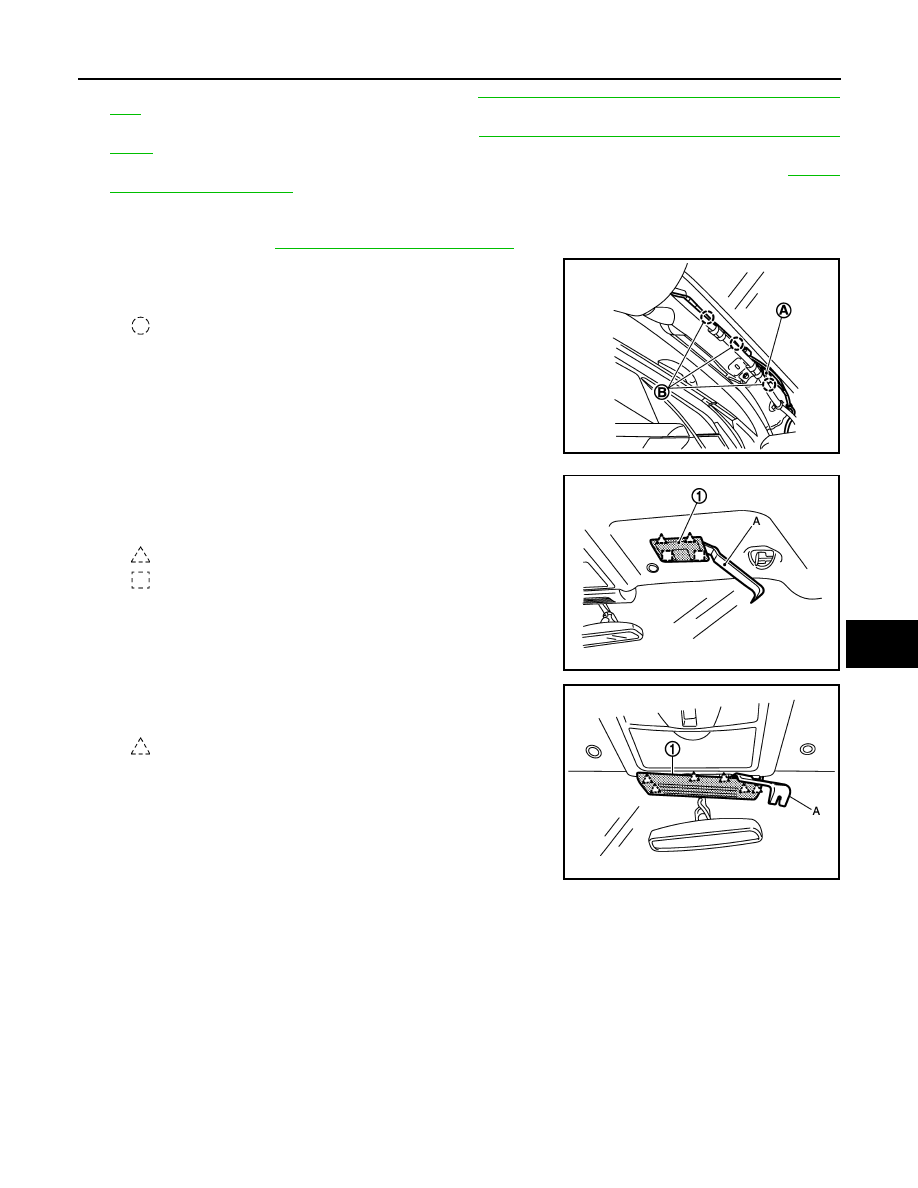
6.
Disconnect roof harness connectors (A) and clips (B), then
remove the roof harness (1).
7.
Remove front roof finisher mounting pawls with remover tool (A),
disconnect the harness connector and then remove front roof
finisher (1).
8.
Remove the front camera finisher mounting pawls with a
remover tool (A), then remove the front camera finisher.
9.
Remove sun-visor (LH/RH).
• Remove sun-visor cap.
• Remove mounting screws.
• Disconnect vanity mirror lamp harness connector (With vanity mirror lamp)
10. Disconnect inside mirror harness connector.
: Clip
JMJIA1565ZZ
: Pawl
: Metal clip
JMJIA1564ZZ
: Pawl
JMJIA1567ZZ
INT-32
< ON-VEHICLE REPAIR >
HEADLINING
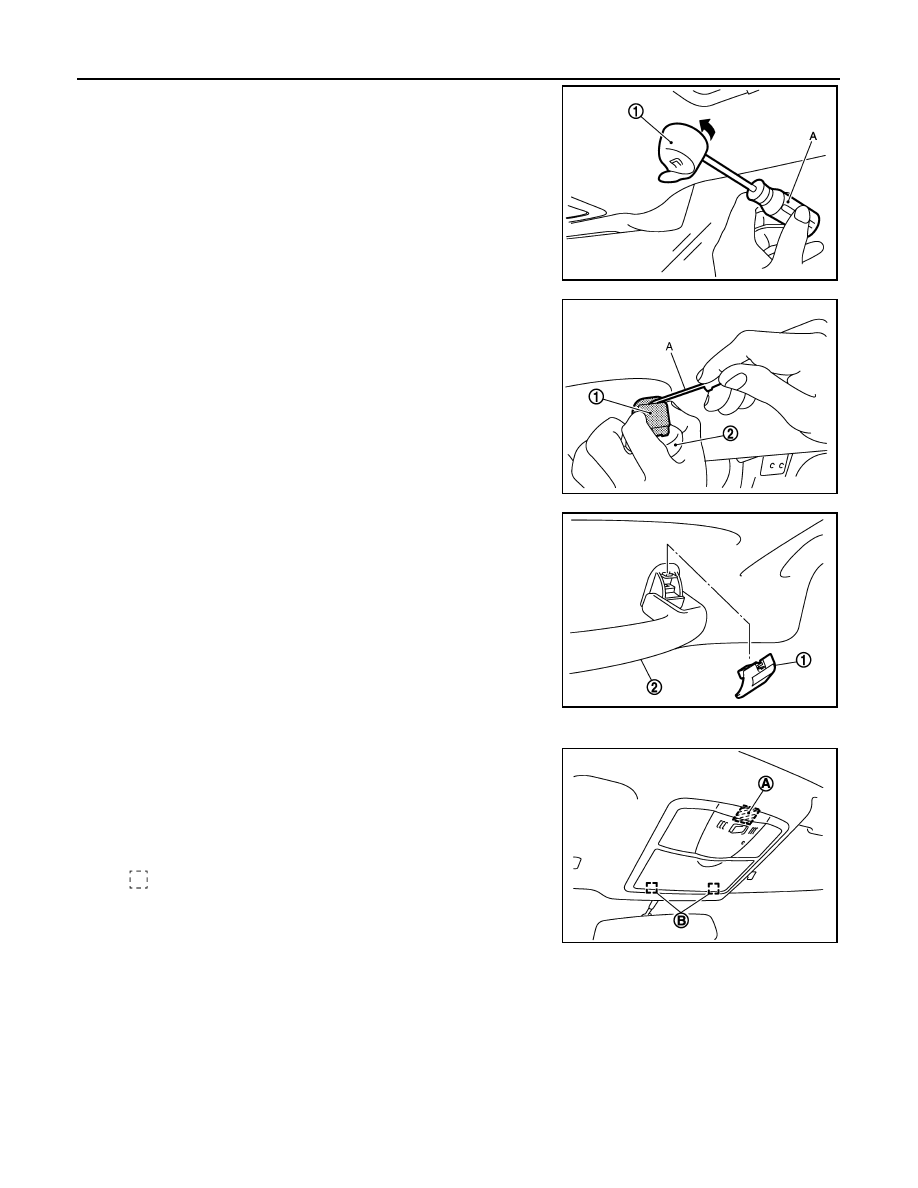
11. Insert a small flatted-blade screwdriver (A) into the hole of the
sun-visor holder (1), press while rotating approximately 90
degrees to remove.
12. With a small flatted-blade screwdriver (A), press the upper side
mounting plastic clip (1) and pull up to remove the mounting
plastic clip (1) from assist grip (2).
•
13. Once the mounting plastic clip (1) is removed, pull out the assist
grip (2) to remove.
14. Recline front seat back to facilitate the headlining removal.
15. Pull map lamp assembly toward and disengage metal clips (B)
and dual-lock fastener (A).
CAUTION:
Map lamp assembly is crimped from the back of headlining.
Remove it by disengaging the crimped area of back of map
lamp assembly after removing headlining from the vehicle.
16. Using remover tool, remove headlining hidden clip at the back side of headlining.
JMJIA1706ZZ
JMJIA1379ZZ
JMJIA1380ZZ
: Metal clip
JMJIA1008ZZ
Нет комментариевНе стесняйтесь поделиться с нами вашим ценным мнением.
Текст