Isuzu KB P190. Manual — part 886
Engine Management – V6 – Service Operations
Page 6C1-3–20
Reinstall
Reinstallation of the engine control module (ECM) is the reverse of the removal procedure, noting the following:
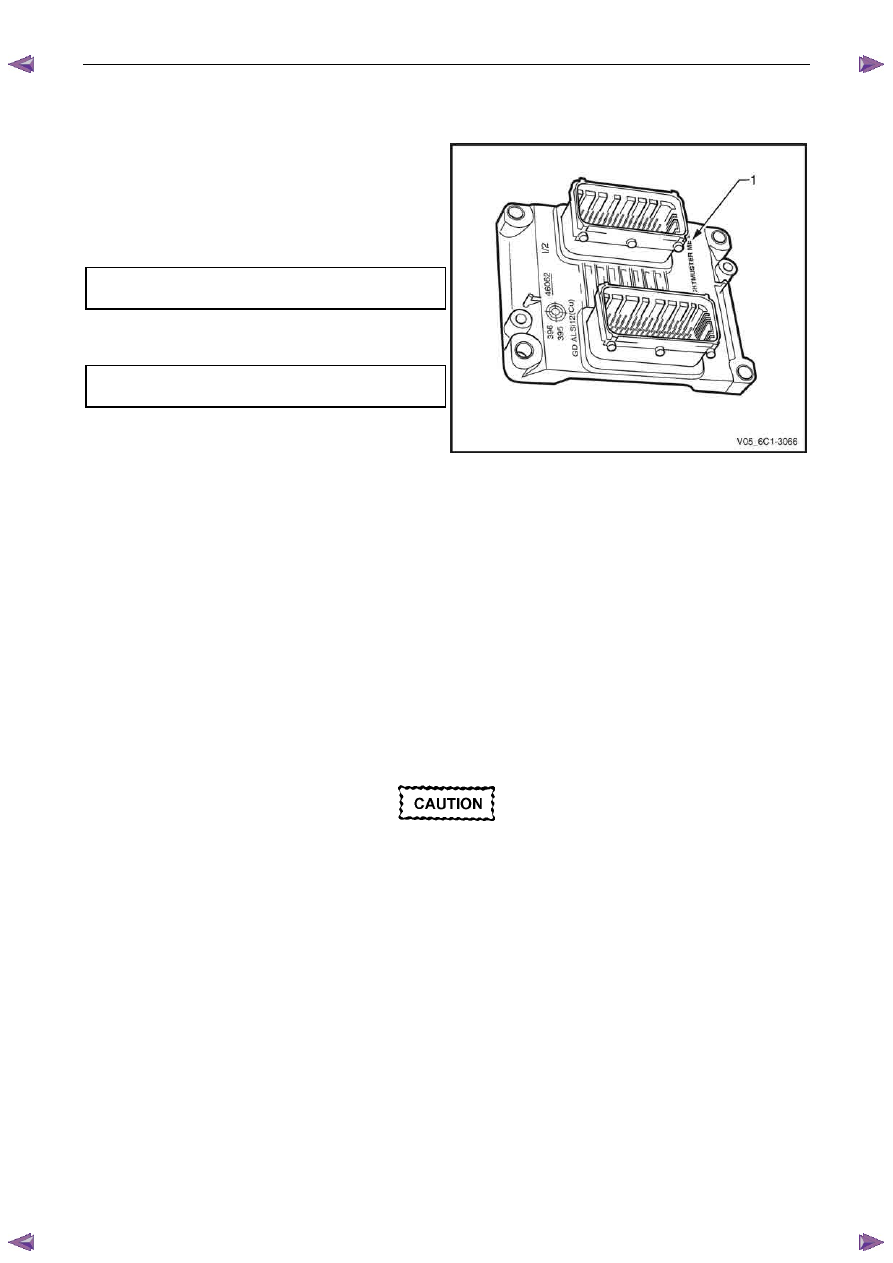
N O T E
During installation of the ECM, the
SICHTMUSTER ME 9.6 label (1) is positioned at
the top right-hand corner.
1
Reinstall ECM attaching bolts and tighten to the
correct torque specification.
Engine control module attaching bolt
torque specification . . . . . . . . ...8.0 – 12.0 Nm
2
Reinstall the ground terminal screw and tighten to the
correct torque specification.
Ground terminal attaching screw
torque specification . . . . . . . . . . . ..4.5 Nm
Figure 6C1-3 – 17
3
Reinstall the main vehicle wiring harness connector, and engine wiring harness connector, ensuring the connector
locking lever is fully seated, refer to Figure 6C1-3 – 15.
4
If the ECM has been replaced, perform the following procedures:
•
ECM service programming, 6E1 Powertrain Interface Module – V6.
•
ECM / PIM / ICU security link, refer to 6E1 Powertrain Interface Module – V6.
•
Main diagnostic table functional check, refer to 6C1-2 Engine Management – V6 – Diagnostics.
5
If the ECM has been removed, but not replaced, perform the main diagnostic table functional check, refer to
6C1-2 Engine Management – V6 – Diagnostics.
6
Start the vehicle and allow to idle.
ECM Reset
Do not perform the reset procedure within
sixty seconds of turning the ignition on.
Failure to comply may result in the ECM
failing to reset.
When an ECM is installed onto a vehicle, it is security linked to the Immobiliser Control Unit (ICU) and powertrain
interface module (PIM). Once this linking has been performed, the ECM cannot be installed in any other vehicle unless
the security linking between the ICU and the PIM has been reset using the following procedure.
N O T E
Prior to resetting the ECM, obtain the Security
Code. This information is found on the vehicle
security card issued with the vehicle when new.
For further information on the vehicle security
card, refer to 6E1 Powertrain Interface Module –
V6.
1
Connect Tech 2 to the data link connector (DLC) and turn the ignition on.
2
On Tech 2 select Engine / V6 Engine / Programming / Reset ECU.
Engine Management – V6 – Service Operations
Page 6C1-3–21
N O T E
When Tech 2 requests programming approval,
obtain TIS approval.
3
When Tech 2 displays Enter Security Code, enter the security code, press the Enter key and then the Okay soft
key.
The engine will not start after the ECM has
been reset.
4
When Tech 2 displays Do you really want to Reset?, press the Reset soft key.
5
When Tech 2 displays Stop Engine - Turn Off Ignition, turn the ignition off and press the Confirm soft key.
6
When Tech 2 displays Turn Ignition On, turn the ignition on and press the Confirm soft key.
7
When Tech 2 displays Reset Completed Successfully, press the Confirm soft key to return to the Tech 2
Programming screen.
2.8
Engine Control Module Bracket
Assembly
Remove
1
Remove the engine control module (ECM), refer to 2.7
Engine Control Module.
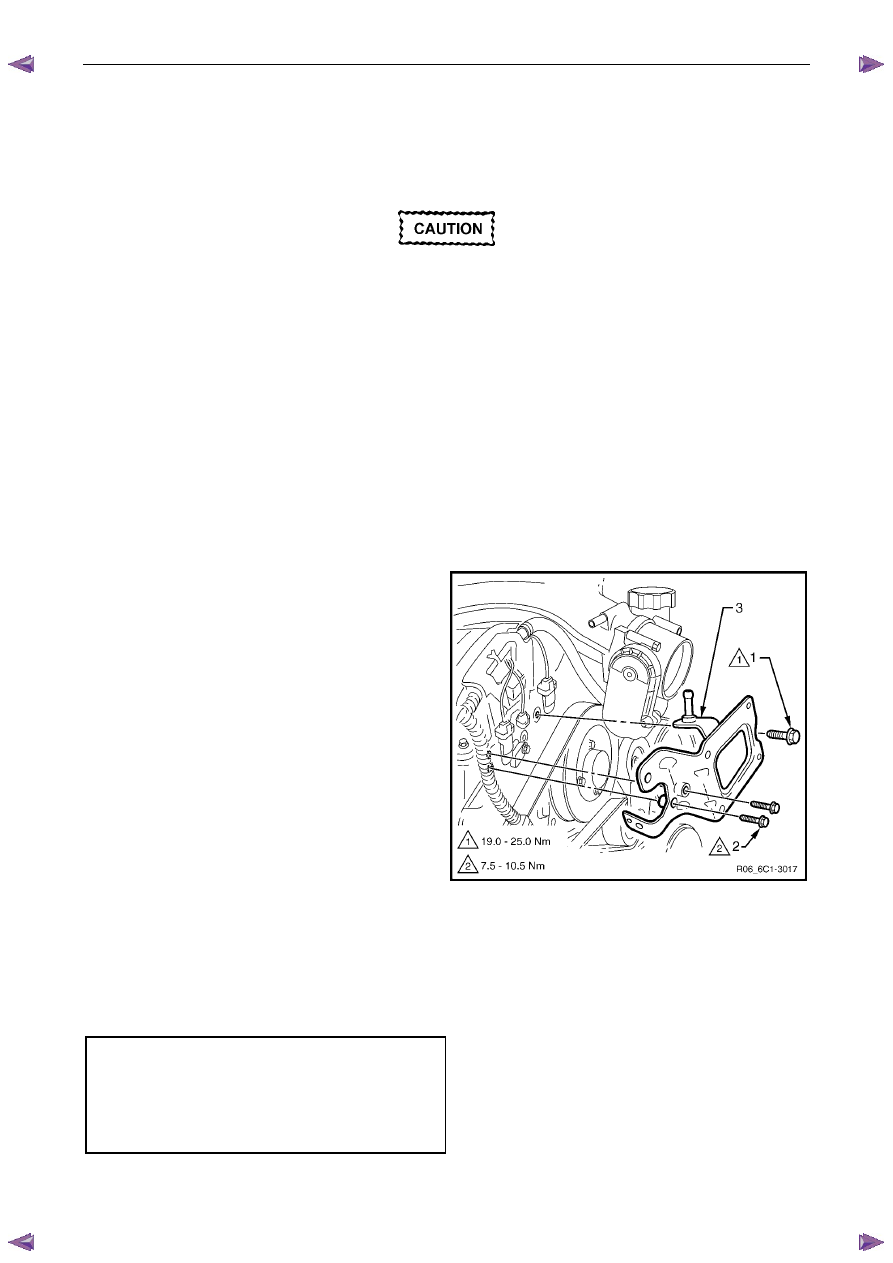
2
Remove the bolt (1) and the two bolts (2), attaching
the ECM bracket assembly (3) to the front engine
cover and remove.
Figure 6C1-3 – 18
Reinstall
Reinstallation of the engine control module (ECM) bracket assembly is the reverse of the removal procedure, noting the
following:
1
Tighten the ECM bracket assembly bolts to the correct torque specification.
Engine control module bracket
assembly attaching bolt
torque specification (6mm). . . . . . 7.5 – 10.5 Nm
Engine control module bracket
assembly attaching bolt
bolt torque specification (8mm) . . . ...19.0 – 25.0 Nm
2
Perform the main diagnostic table functional check, refer to 6C1-2 Engine Management – V6 – Diagnostics.

Engine Management – V6 – Service Operations
Page 6C1-3–22
3
Road test the vehicle and check for correct operation.
2.9
Engine Oil Level and Temperature
Sensor
To avoid personal injury, take care when
draining the engine oil or removing the engine
oil level and temperature sensor whilst the
engine is hot. Allow the engine to cool before
performing this procedure.
Remove
1
Turn the ignition switch off.
2
Raise the front and rear of the vehicle and support on safety stands, refer to 0A General Information for location of
the jacking points.
3
Drain the engine oil, refer to 6A1 Engine Mechanical – V6.
Clean the area around the engine oil level
and temperature sensor (1) before removal to
avoid debris from entering the engine.
4
Disconnect the wiring harness connector (2) from the
engine oil level and temperature sensor.
Figure 6C1-3 – 19
5
Using a 11/8" deep socket and socket bar, remove the
engine oil level and temperature sensor (1).
6
If required, test the Engine Oil Level and Temperature
sensor as follows, refer to the Test in this Section.
Figure 6C1-3 – 20

Engine Management – V6 – Service Operations
Page 6C1-3–23
Test
Engine Oil Level Sensor Check
1
With the aid of an assistant, perform the following:
a
Whilst holding the engine oil level and temperature sensor (1) in a level position, connect a digital ohmmeter
using connector test adaptor kit J 35616-A to terminals A and C, refer to Figure 6C1-3 – 21.
b
With the flat surface of the float (2) positioned at the bottom, ensure continuity does not exist.
c
Push the float upwards so the magnetic pin (3), on the inside of the float (the side of the float with the flat
side) contacts the engine oil level sensor. Check for continuity whilst holding the float in this position.
Figure 6C1-3 – 21
2
If any of the above tests fail, replace the engine oil level sensor.
Reinstall
Reinstallation of the engine oil level and temperature sensor is the reverse of the removal procedure, noting the
following:
1
Lubricate the O-ring and threaded portion of the sensor with clean engine oil.
2
Tighten the engine oil level and temperature sensor to the correct torque specification.
Engine oil level and temperature sensor
torque specification – wet. . . . . . 11.0 – 15.0 Nm
3
Refill the engine with engine oil, refer to 6A1 Engine Mechanical – V6.
4
Road test the vehicle and check for correct operation, taking particular note there is no engine oil leakage from the
oil level and temperature sensor.
2.10 Engine Oil Pressure Sensor
To avoid personal injury, take care when
removing the engine oil pressure sensor
when the engine is hot. Allow the engine to
cool before performing this procedure.
Remove
1
Turn the ignition switch off.
Нет комментариевНе стесняйтесь поделиться с нами вашим ценным мнением.
Текст