Isuzu KB P190. Manual — part 760

Engine Mechanical – V6
Page 6A1–263
Page 6A1–263
6
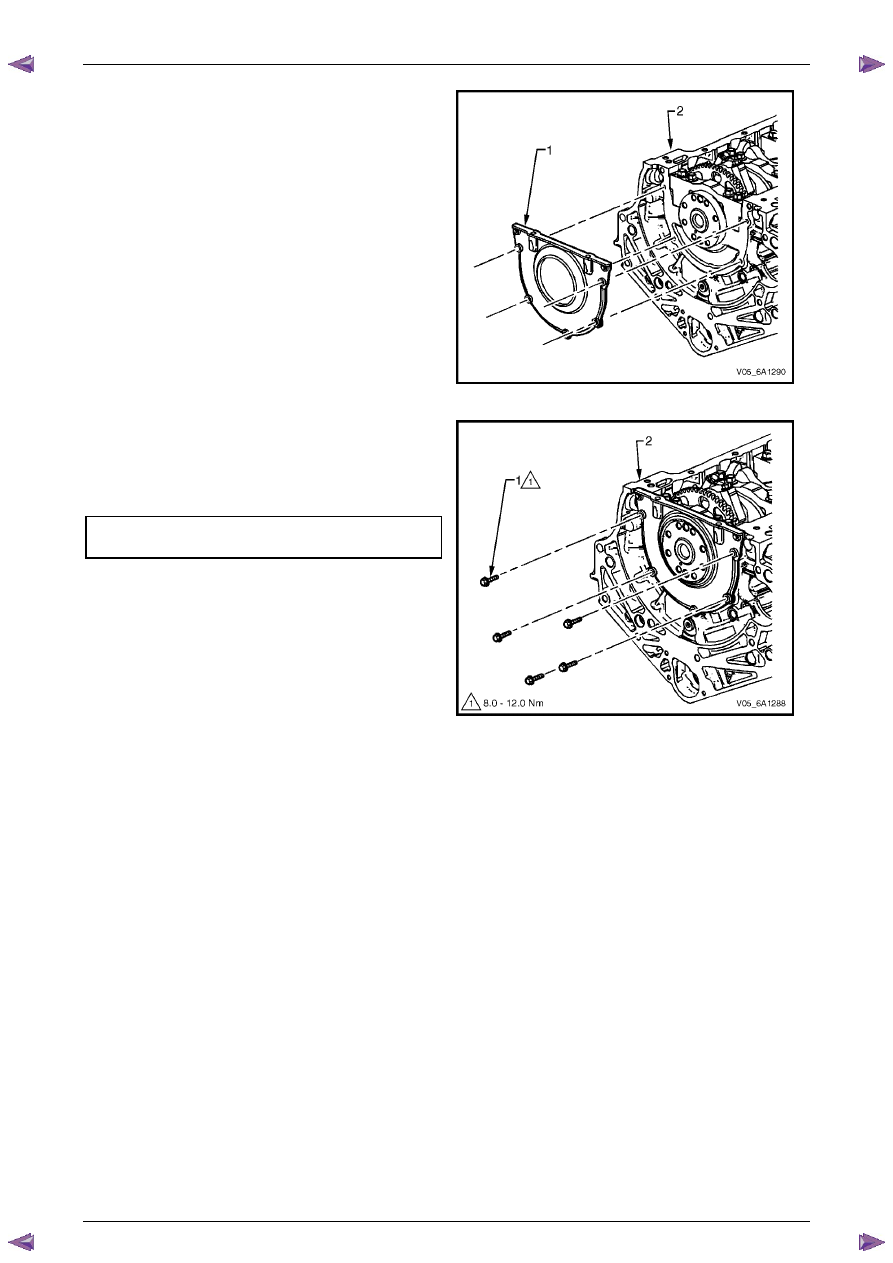
Remove the crankshaft rear oil seal housing (1) from
the cylinder block (2).
Figure 6A1 – 459
Reinstall
1
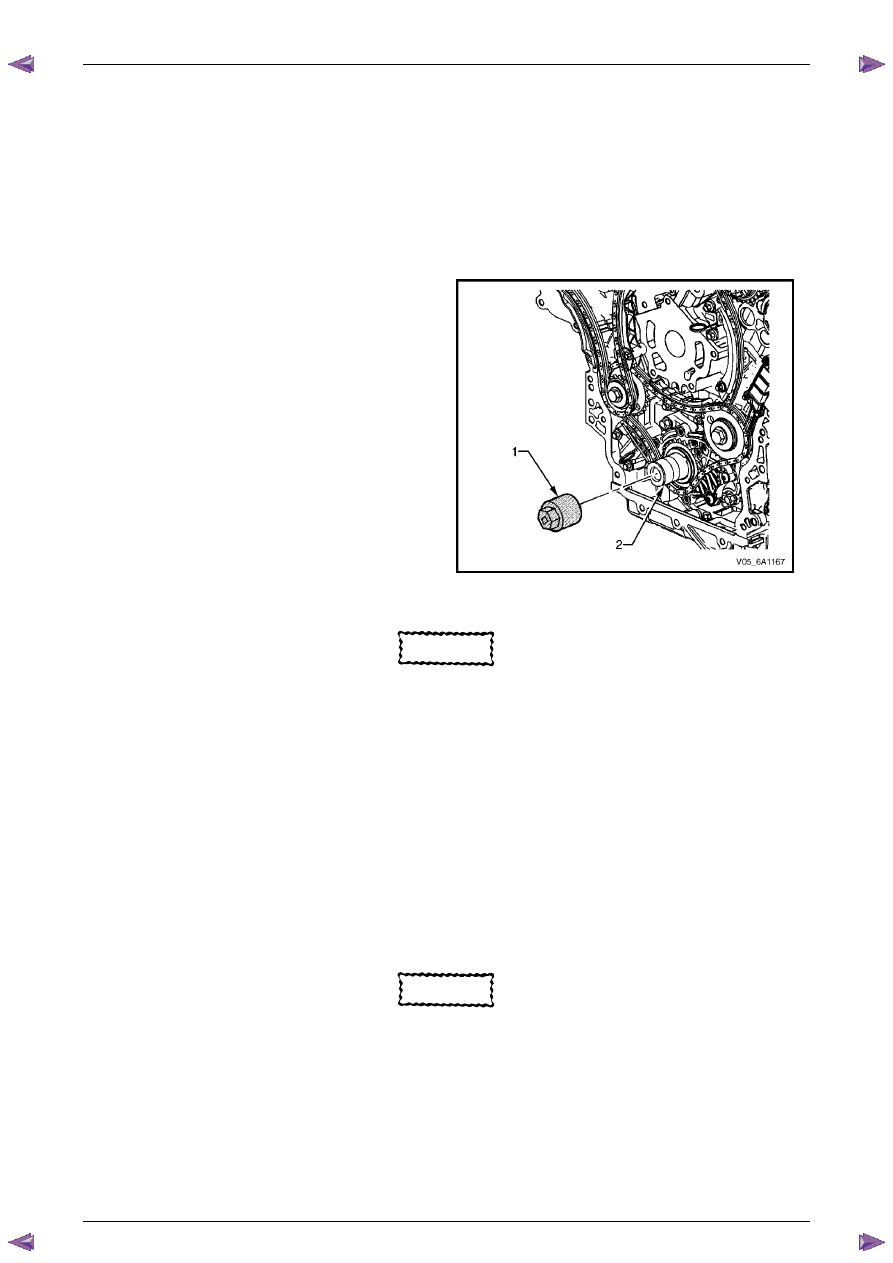
Install the guide pins, Tool No. EN-46109 (1) into the
two crankshaft rear oil seal housing bolt holes of the
cylinder block (2).
Figure 6A1 – 460
2
Apply a 3mm bead (1) of RTV sealant to the
crankshaft rear oil seal housing.
Figure 6A1 – 461
Engine Mechanical – V6
Page 6A1–264
Page 6A1–264
3
Install the crankshaft rear oil seal housing (1) to the
cylinder block (2).
N O T E
• Do not allow any engine oil onto the cylinder
block mating surface, where the crankshaft
rear oil seal housing is to be installed.
• A seal-protector is provided with the new
crankshaft rear seal and housing assembly.
Do not remove the seal protector from the
crankshaft rear oil seal housing until the
crankshaft rear oil seal housing is fully in
position.
4
Remove the guide pins from the cylinder block.
Figure 6A1 – 462
5
Install the crankshaft rear oil seal housing attaching
bolts (1) to the cylinder block (2) and tighten to the
correct torque specification.
Crankshaft rear oil seal housing
attaching bolt torque specification. . . .8.0 – 12.0 Nm
Figure 6A1 – 463
Engine Mechanical – V6
Page 6A1–265
Page 6A1–265
4.5
Pistons, Pins, Rings, Connecting Rods
and Big-end Bearings
Remove
1
Remove the engine assembly, refer to
4.1 Engine
.
2
Remove both cylinder head assemblies, refer to
3.22 Cylinder Head Assembly
.
3
Remove the oil pan assembly, refer to
4.2 Oil Pan and Oil Pump Suction Pipe Assembly
.
4
Mark the top of the piston being removed to identify its specific bore.
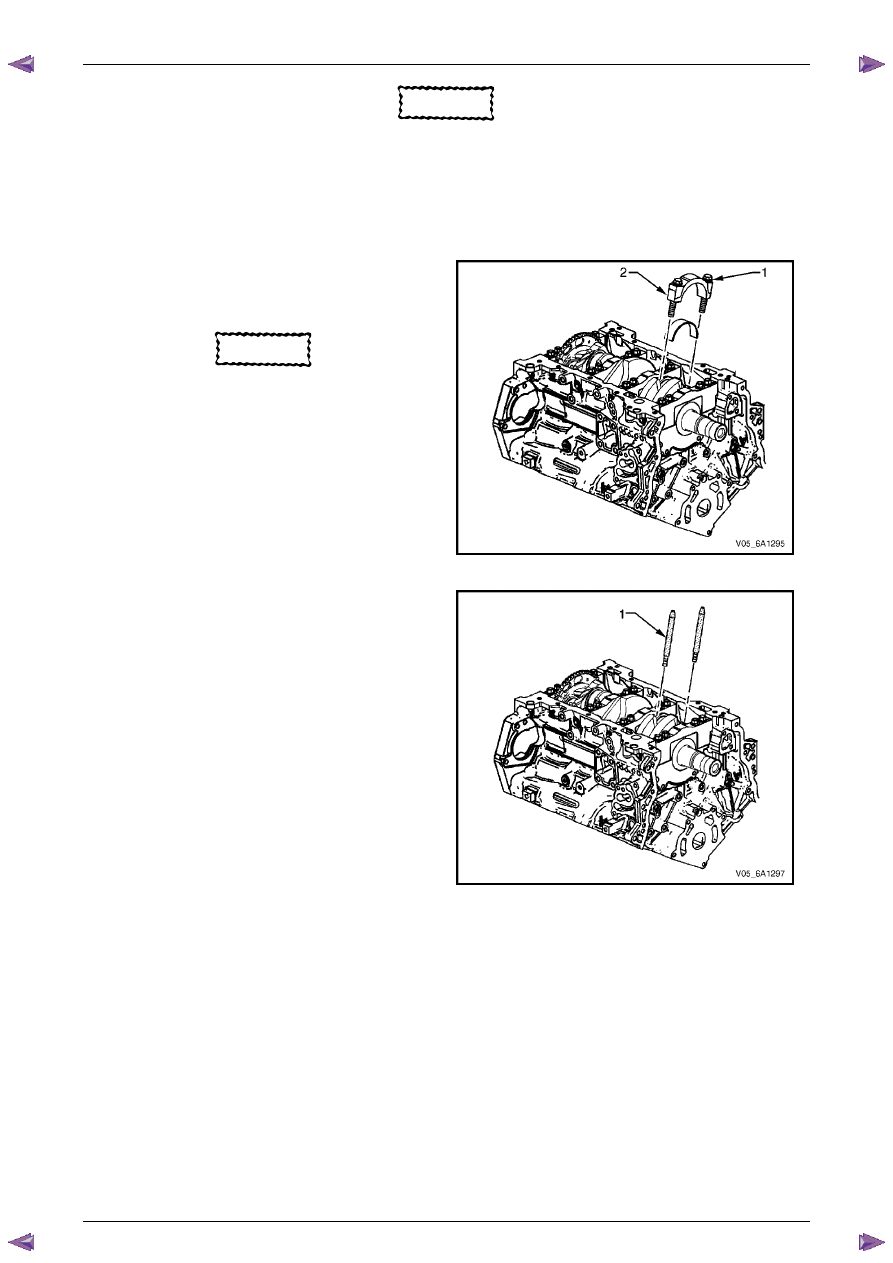
5
Install Tool No. EN-46111 (1) onto the crankshaft (2).
6
Rotate the crankshaft until the piston being removed
is at the bottom of its stroke; bottom dead centre
(BDC).
Figure 6A1 – 464
CAUTION
If the connecting rod bearings have been
used in a running engine, they must be
replaced with new connecting rod bearings
for reassembly.
7
Before removing the connecting rods, check the connecting rod side clearance using the following procedure:
a
Tap the connecting rod to one end of the crankshaft journal with a dead blow or wooden hammer.
b
Using feeler gauges, measure the clearance between the crankshaft counterweight and the connecting rod.
c
The connecting rod side clearance should not exceed specifications, refer to
5 Specifications
.
d
If the endplay exceeds the specified limits, measure the width of the crankpin end of the connecting rod, refer
to
5 Specifications
.
e
If the connecting rod width is significantly smaller than specified and severe wear is present on the side of the
connecting rod, replace the connecting rod.
f
If the connecting rod width is within specification and excessive scoring is present on the crankshaft journals,
replace the crankshaft.
CAUTION
Do not use a stamp, punch or any other
method that may distort or stress the
connecting rod and cap. Extensive engine
damage may result from a connecting rod that
is distorted or stressed.
8
Mark the cylinder number on the connecting rod and the connecting rod cap with a paint stick or permanent marker.
Engine Mechanical – V6
Page 6A1–266
Page 6A1–266
CAUTION
Powdered metal connecting rods have rod
bolts which yield when tighten to the
specified torque. If the bolts are loosened or
removed they must be replaced. Rod bolts
that are not replaced will not torque to the
correct clamp load and can lead to serious
engine damage.
9
Remove the connecting rod bolts (1), loosening
progressively from side to side.
CAUTION
The connecting rod caps must remain with
the original connecting rod.
10
Remove the connecting rod cap (2).
Figure 6A1 – 465
11
Install connecting rod guide pin set, Tool No.
EN-46121 (1) to the connecting rod bolt holes.
Figure 6A1 – 466
Нет комментариевНе стесняйтесь поделиться с нами вашим ценным мнением.
Текст