Isuzu KB P190. Manual — part 804
Fuel System – V6
Page 6C – 14
Removal
1
Depressurize the fuel system, refer to 3.4
Fuel
System Depressurisation.
2
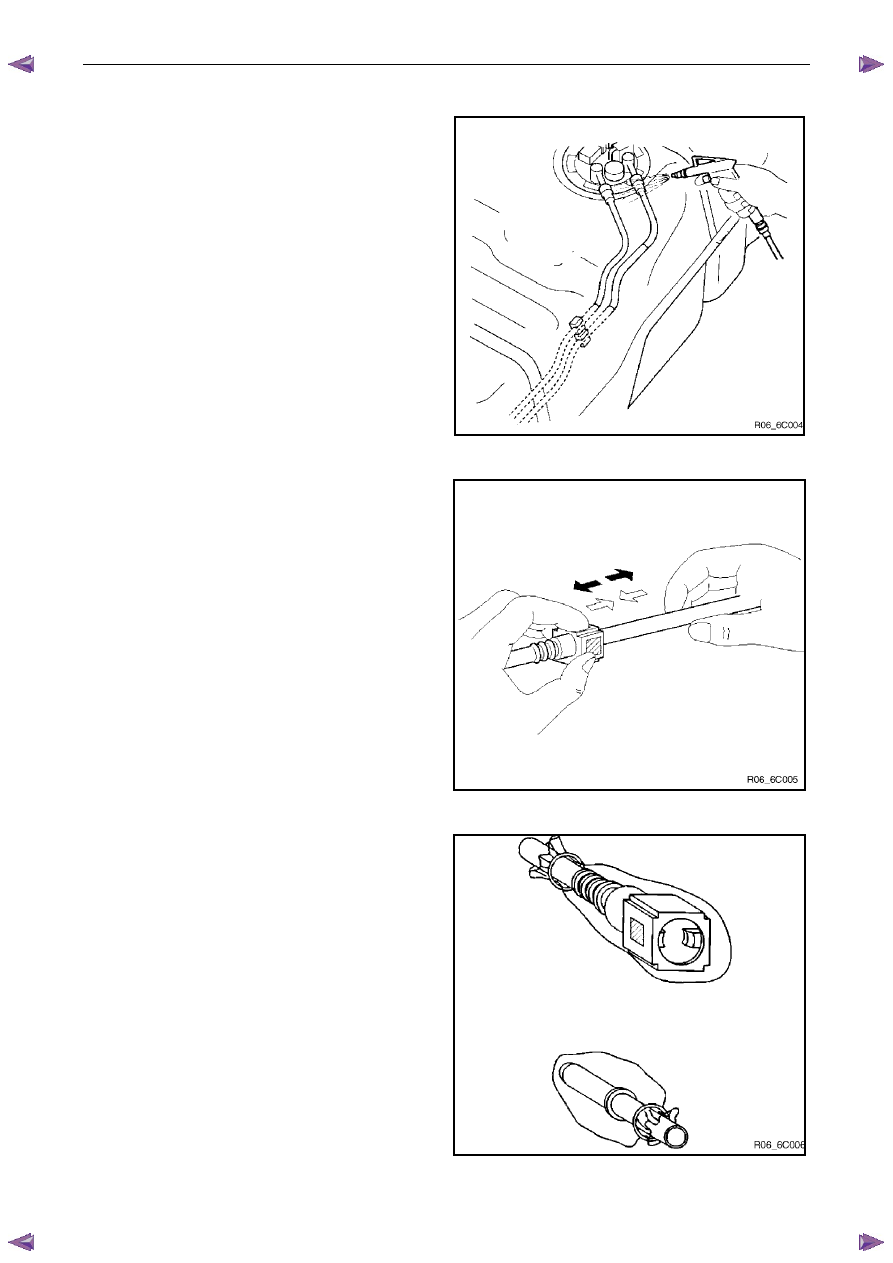
Use compressed air to remove any dirt around the fuel
line quick connect fittings prior to disconnecting the
fittings.
Figure 6C – 9
3
Hold the connector in one hand and depress the
square release buttons on the connector body while
gently pulling the quick connector and the fuel line
apart with the other hand.
Figure 6C – 10
4
Cover the quick connect fittings to prevent dirt or other
foreign material from entering the system.
N O T E
• Check the fuel lines and connector fittings for
any scratches, rust, dents, or cracks.
Replace the connector or the fuel line if found
to be defective.
• Inspect the O-rings in the quick connectors
and replace the connector if found to be
defective.
Figure 6C – 11

Fuel System – V6
Page 6C – 15
Reinstall
1
Apply a small amount of engine oil or light oil to the
fuel line to assist in the assembly of the connector.
N O T E
Assembly of the fuel line and quick connectors
should take place immediately after applying the
oil to prevent any dust from sticking to the
surface, which may cause the connector to leak.
Figure 6C – 12
4.2 Fuel
Filter
Removal
1
Depressurize the fuel system, refer to 3.4
Fuel
System Depressurisation.
2
Disconnect the battery ground cable.
A small amount of fuel will flow out of the
fuel lines and filter when disconnected.
3
Locate the fuel filter attached to the front of the fuel
tank, place a drain tray below the fuel filter and
remove the fuel line quick connectors from the inlet
(2) and the outlet (1) of the fuel filter, refer to 4.1 Fuel
Lines And Quick Connect Fittings.
Figure 6C – 13
Fuel System – V6
Page 6C – 16
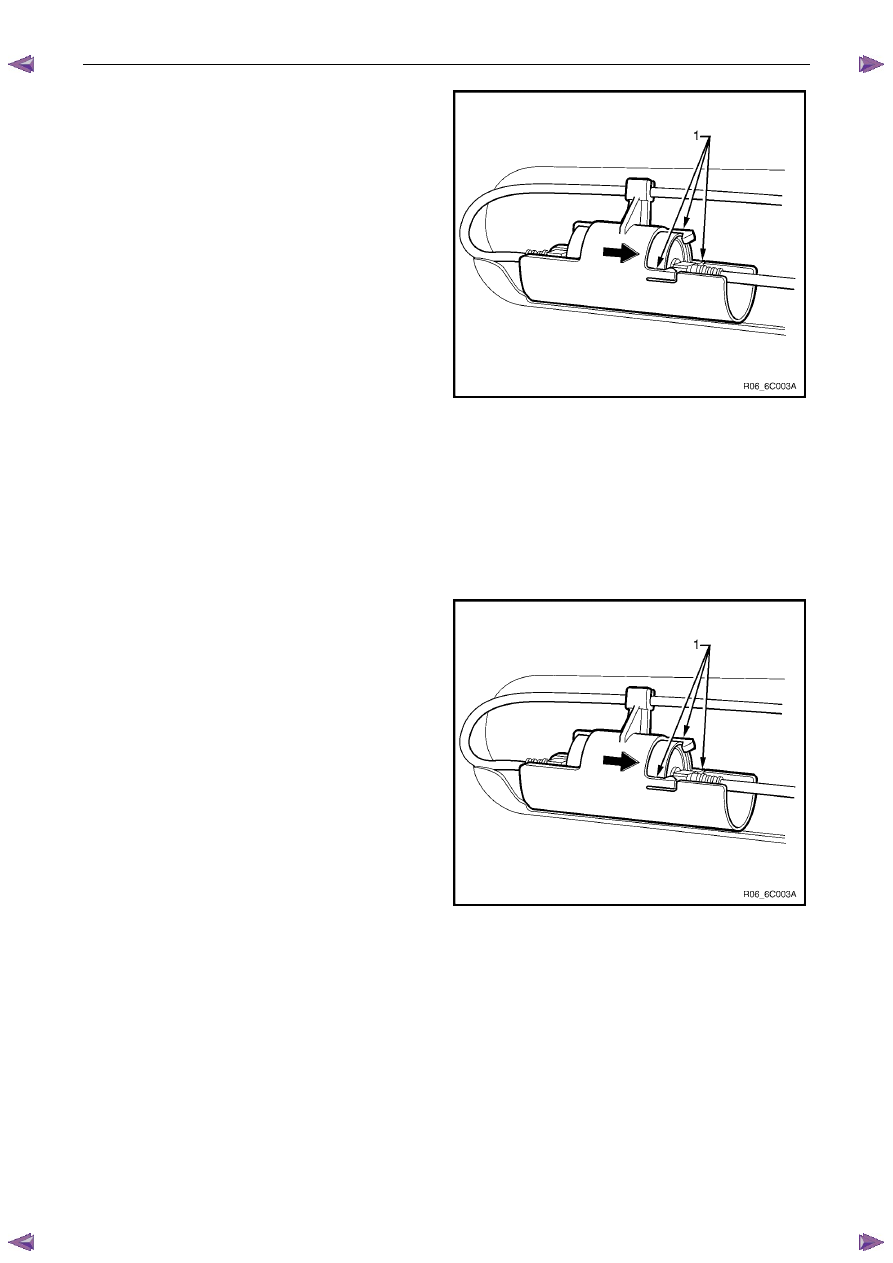
4
Release the 3 clips (1) on the passenger side of the
fuel filter holder and slide the fuel filter from the holder
in the direction of the arrow.
N O T E
Cover the quick connectors to prevent any dirt
from entering the fuel system.
Figure 6C – 14
Inspection
1
Replace the fuel filter if fuel leaks from the filter body or if the fuel filter body itself is damaged.
2
Replace the fuel filter if it is clogged with dirt or sediment or the filter shows signs of being contaminated with water
or other foreign materials.
Reinstallation
1
Slide the fuel filter into the holder attached to the front
of the fuel tank, make sure the three plastic locking
clips secure the filter in place.
N O T E
• Ensure the fuel filter inlet line is facing the
drivers side if the vehicle and the outlet line is
facing the passengers side of the vehicle.
• The direction arrow indicates the direction of
fuel flow.
2
Connect the inlet and outlet fuel line quick connectors
to the fuel filter, refer to 4.1
Fuel Lines And Quick
Connect Fittings.
Figure 6C – 15
Fuel System – V6
Page 6C – 17
4.3
Fuel Tank and Pump Assembly
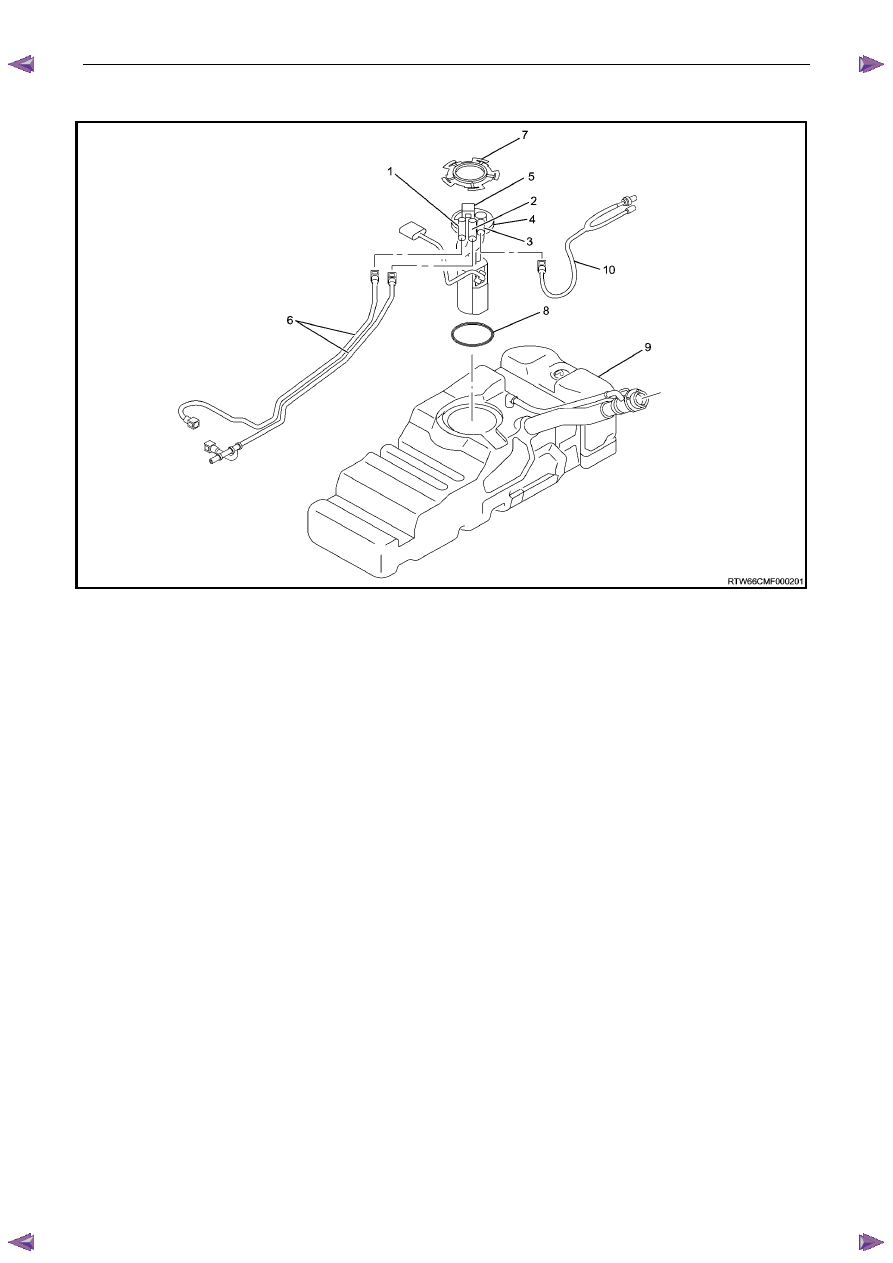
Figure 6C – 16
Legend
1
Fuel Feed Line
2
Fuel Return Line
3
Fuel Emission Line
4
Fuel Pump and Sender Assembly
5
Connector; Fuel Pump and Sender
6 Fuel
Lines
7
Retainer Ring (Fuel Pump Lock)
8 O-Ring
9
Fuel Tank Assembly
10 Evaporative
Line
Нет комментариевНе стесняйтесь поделиться с нами вашим ценным мнением.
Текст