Isuzu KB P190. Manual — part 1442
10-10 CAB
RUW5A0SH00300
1
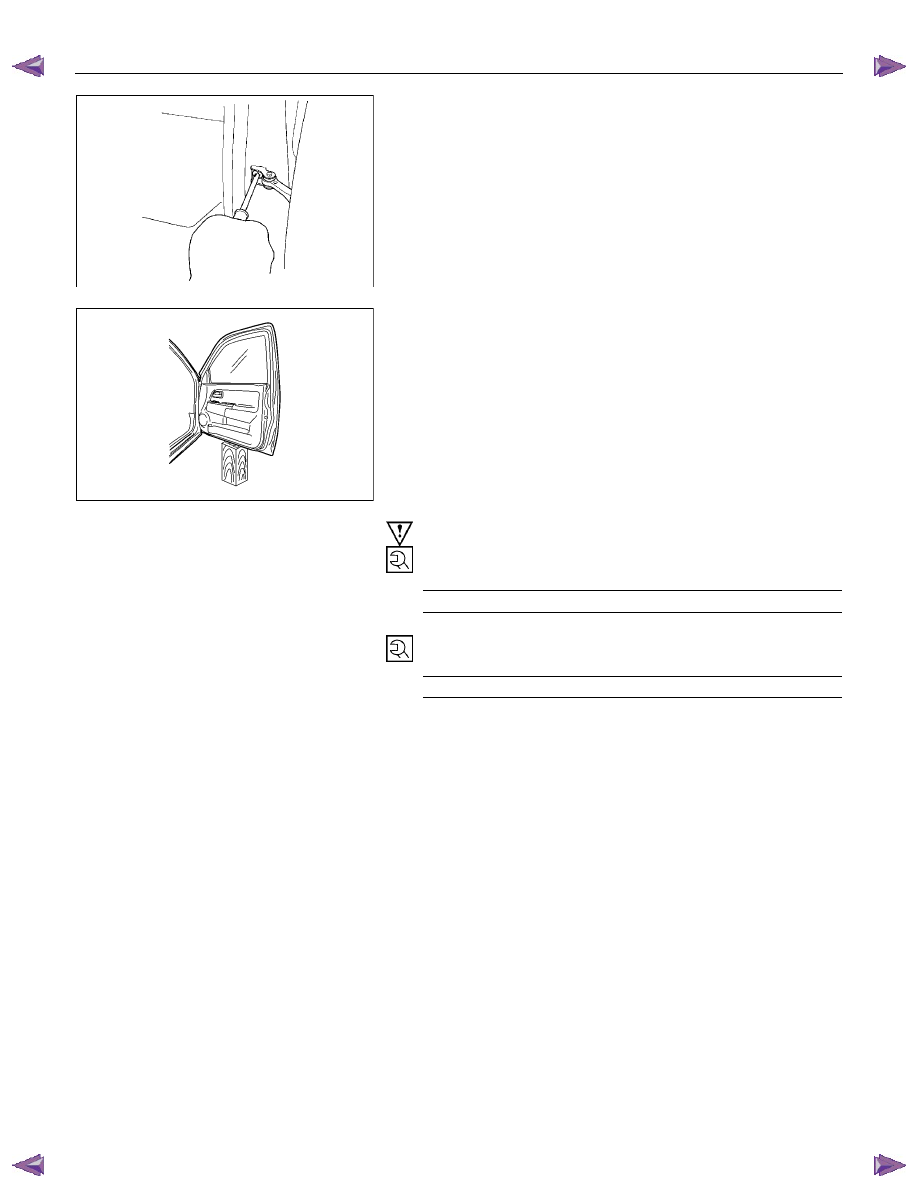
2. Check Arm Screw
3. Lower Hinge Bolt
Position a wood block under the door for protection and
support the door assembly with hands at removal or
installation.
Important Operations – Installation
3. Lower Hinge Bolt; Hinge to Door
Torque N
⋅m (kgf⋅m/lb⋅ft)
34 (3.5/25)
2. Check Arm Screw; Check Arm to Body
Torque N
⋅m (kgf⋅m/lb⋅ft)
24 (2.4/
17)
CAB 10-11
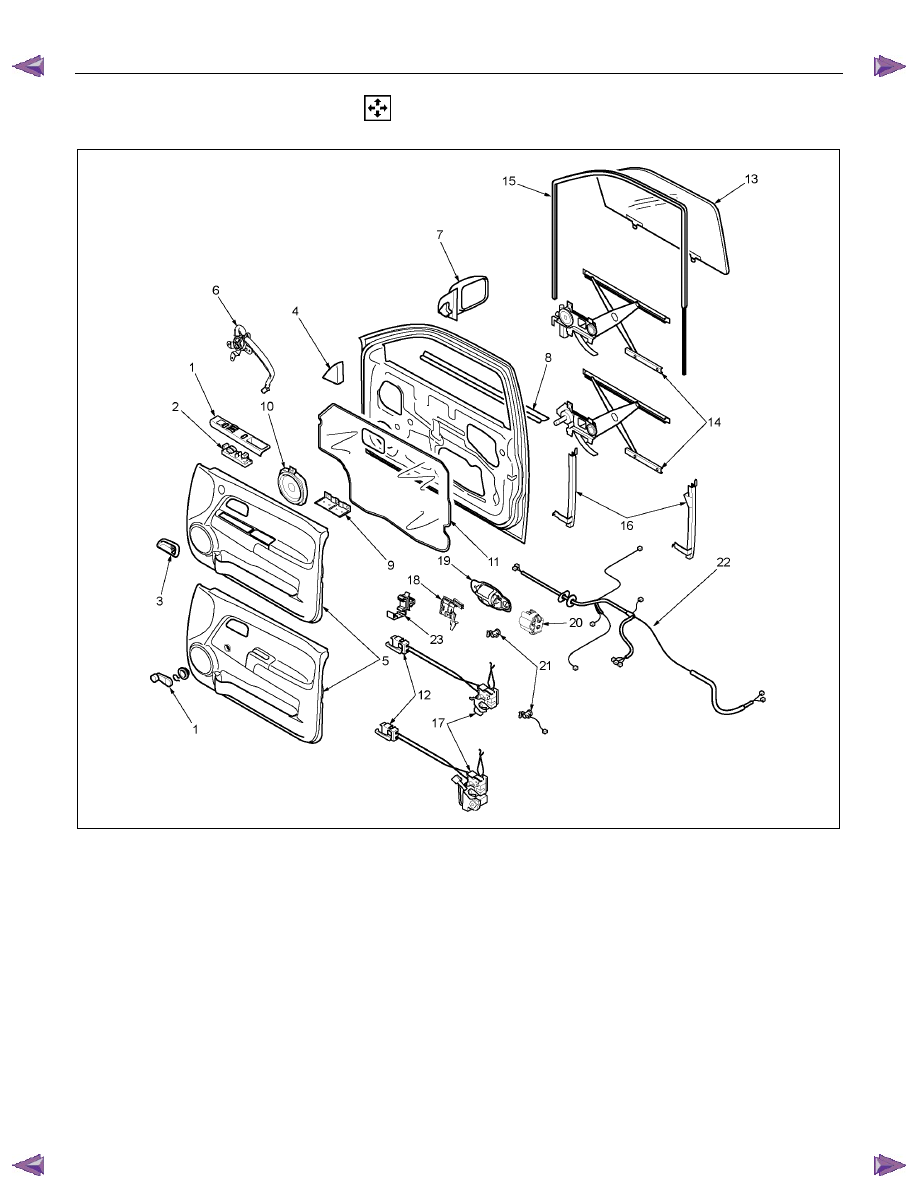
DISASSEMBLY
This illustration is based on RHD model
RTW4A0LF00070
1
Disassembly Steps
▲
1. Switch bezel/Window regulator handle
▲ 2. Power window switch
▲ 3. Bezel
▲ 4. Door mirror cover
▲ 5. Door trim panel
▲ 6. Tweeter (Required Option)
▲ 7. Door mirror assembly
▲ 8. Outer waste seal
▲ 9. Bracket
▲
10. Speaker assembly
▲
11. Waterproof sheet
▲
12. Inside lever
▲
13. Window glass
▲
14. Window regulator/Power window
regulator
▲
15. Glass run
▲
16. Glass run rear channel / Glass ran rear
channel with Door lock control or Anti
theft (European Countries)
▲
17. Door lock assembly/Door lock assembly
with super lock
▲
18. Outside handle protector (EUROPE)
▲
19. Outside handle
▲20. Door lock cylinder protector (EUROPE)
▲2
1. Door lock cylinder / Door lock cylinder
with door lock switch (European
Countries)
22. Door harness assembly
23. Anti rattler

10-12 CAB
RUW5A0SH00220
1
Important Operations
1. Switch Bezel/Window Regulator Handle
• Remove the 2 screws and disconnect the connectors.
• To remove the regulator handle, remove the clip at the
root of the handle by using wire.
2. Power Window Switch
• Remove the 2 screws.
RUW5A0SH00230
1
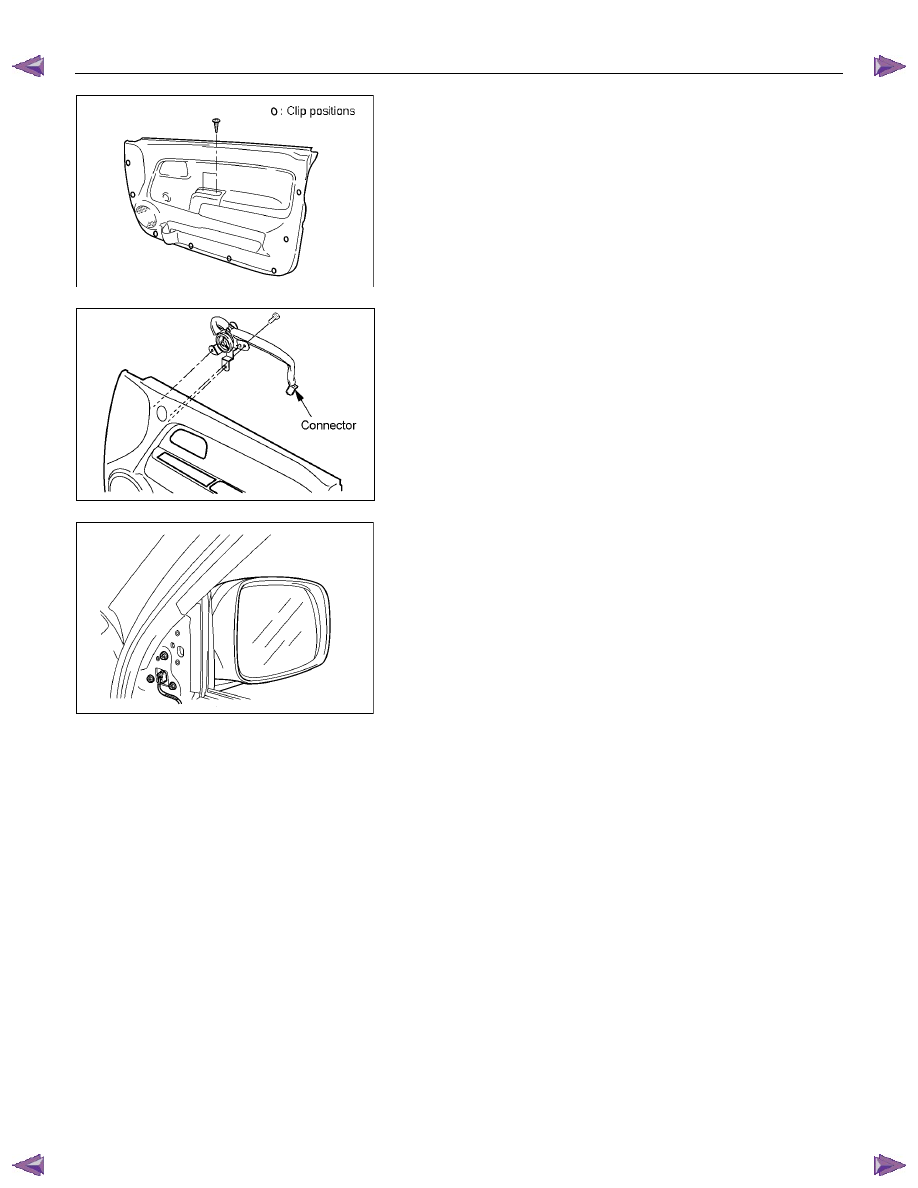
3. Bezel
• Remove the screw.
4. Door Mirror Cover
• Pull out the upper clip, and then take out the cover
upward.
5. Door Trim Panel
• Pull out the trim panel at the 8 clip positions (Power
window type).
CAB 10-13
• Remove the 2 screws and pull out the trim panel at the 8
clip positions (Window regulator handle type).
RTW3A0SH00070
1
6. Tweeter (Required option)
• Disconnect the tweeter harness connector and remove
the 3 screws.
7. Door Mirror Assembly
• Remove 3 fixing bolts and then remove the connector.
8. Outer Waste Seal
9. Bracket
10. Speaker Assembly
• Remove the fixing screw and then remove the
connector.
11. Waterproof Sheet
• Take care not to damage the sheet when peeling it off.
12. Inside Lever
• Disconnect the door lock cables.
Нет комментариевНе стесняйтесь поделиться с нами вашим ценным мнением.
Текст