Jaguar XJ (X350). Manual — part 1505
8 . Apply cutting lubricant to the windshield glass adhesive.
9
.
WARNING: When removing the windshield glass, personal protection must be worn. Failure to follow this
instruction may result in personal injury.
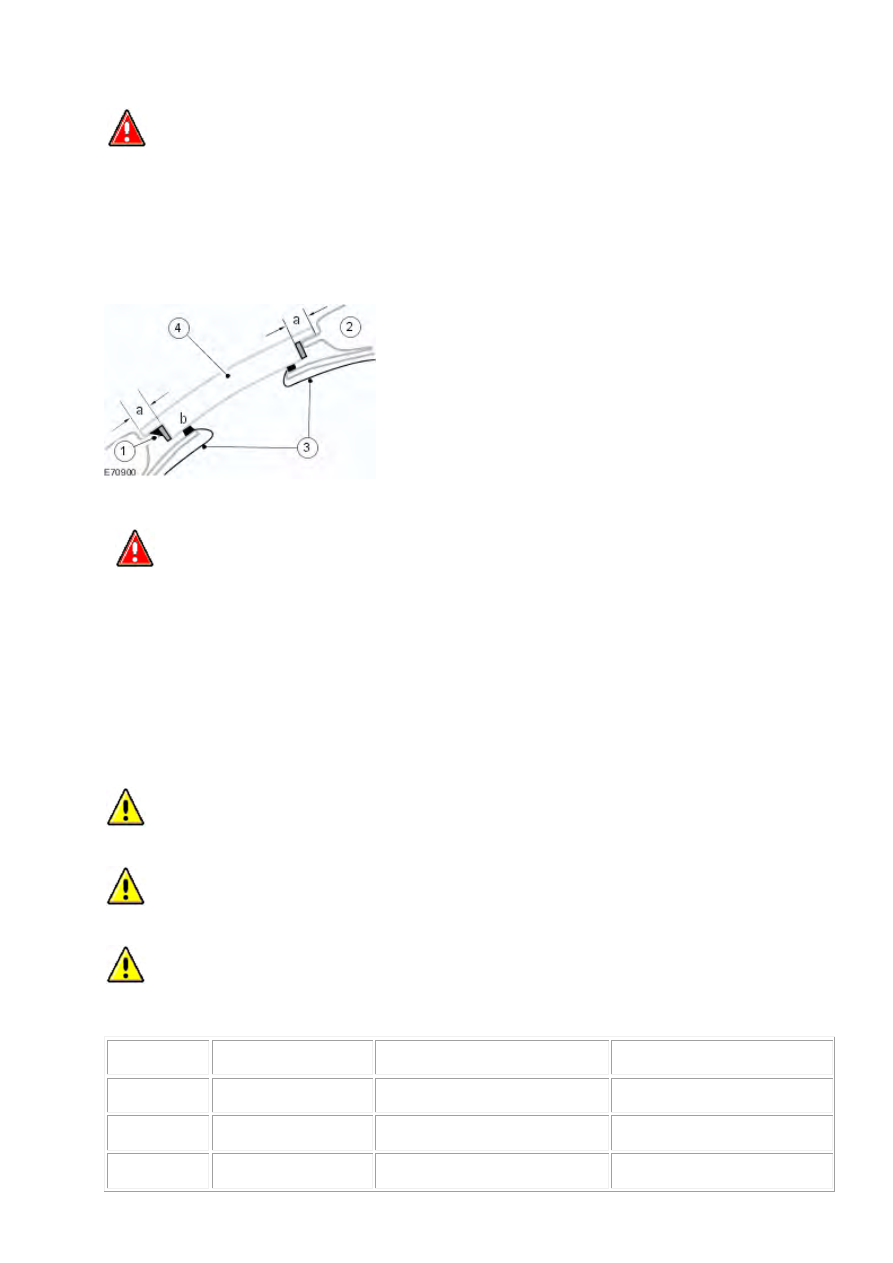
Using a suitable cutting tool, cut the seal between the armoured windshield glass and the armoured frame.
1) Windshield glass spacer.
2) Vehicle body.
3) Armoured frame.
4) Armoured windshield glass.
10
.
WARNING: When removing the windshield glass, personal protection must be worn. Failure to follow
this instruction may result in personal injury.
NOTE:
The windshield glass must also be pushed out from the inside of the vehicle.
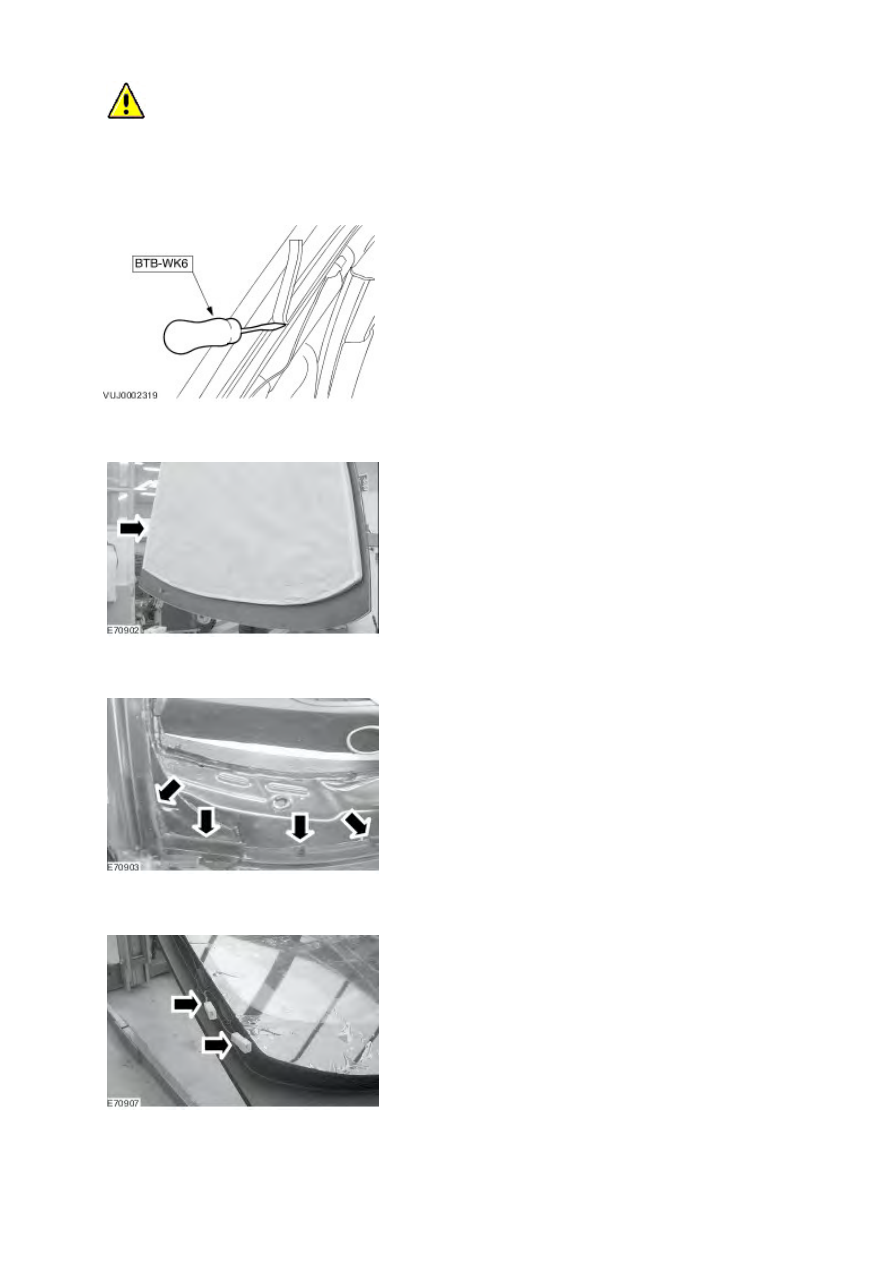
With the assistance of three people and exercising care, remove and discard the windshield glass.
Installation
1
.
CAUTION: Do not use thinners to clean the the windshield glass. Failure to follow this instruction may
result in damage to the vehicle.
CAUTION: Make sure that only the recommended degreasing and cleaning fluids are used. Failure to
follow this instruction may result in damage to the vehicle.
CAUTION: Make sure that only the recommended adhesive, sealant and primers are used. Failure to follow
this instruction may result in damage to the vehicle.
When installing the windshield glass make sure the products used are of the same specification as listed below.
PREPARATION
RUBBER AND PLASTIC
GLUING
METAL GLUING
GLAZING GLUING
Degreasing
BETAWIPE Type Ref :
18022
STANDOX Type SILICON
ENTFERNER Ref : 66012
BETAWIPE Type Ref : 18022
Primer
BETAWIPE Type Ref:
18031
-
BETAPRIME Type GURIT-ESSEX
AG Ref: 18026
Adhesive
BETASEAL Type
Ref:18016
SIKA 221 Type Ref:18040
BETASEAL Type Ref:18016
2
.
CAUTION: When installing the windshield glass, do not strike it in any way as this will crack the glass.
Failure to follow this instruction may result in damage to the component.
NOTE:
Make sure the windshield glass does not move out of position in the windshield glass aperture.
Using the special tool, remove any residual adhesive from the body.
3 . Protect the inside of the windshield glass.
4 . Install the windshield glass spacers to the frame to the same positions they were removed from.
5 . Tape the heated front windshield glass wiring harness aside.
www.
6
.
WARNING: When installing the windshield glass, personal protection must be worn. Failure to follow this
instruction may result in personal injury.
CAUTION: When installing the windshield glass, do not strike it in any way as this will crack the glass.
Failure to follow this instruction may result in damage to the component.
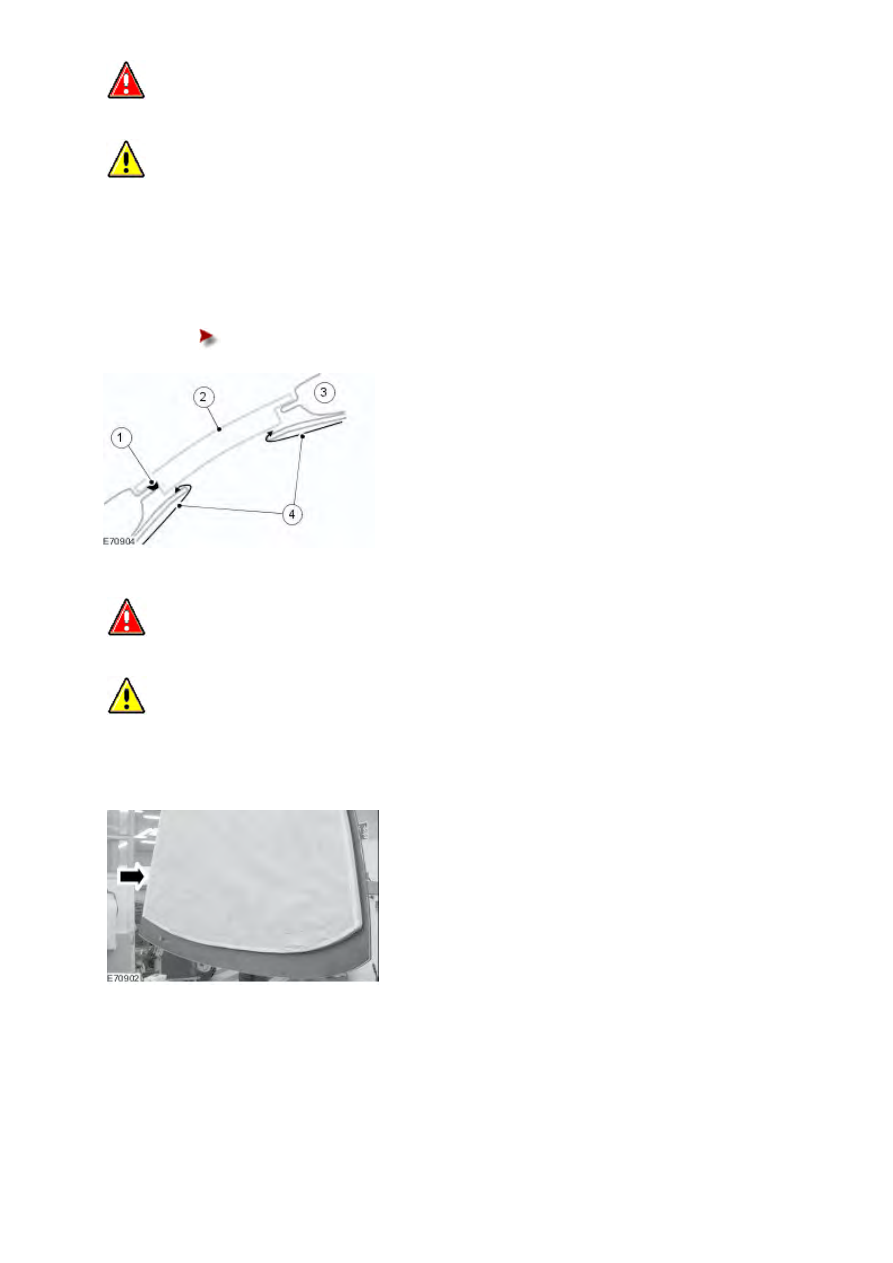
With the assistance of three people and exercising care, install the windshield glass.
1) Windshield glass spacer.
2) Windshield glass.
3) Vehicle body.
4) Armoured frame.
Center the windshield glass to the windshield glass frame and mark the central position of the
windshield glass.
7
.
WARNING: When removing the windshield glass, personal protection must be worn. Failure to follow this
instruction may result in personal injury.
CAUTION: When removing the windshield glass, do not strike it in any way as this will crack the glass.
Failure to follow this instruction may result in damage to the component.
With the assistance of three people and exercising care, remove the windshield glass.
8 . Clean the windshield glass surface using clean Betawipe spirit.

9 . The new windshield glass will be supplied with a new modified lower weather strip.
10
.
CAUTION: Make sure that the windshield glass is primed on the side, the frame as well as the windshield
glass edge. Failure to follow this instruction may result in damage to the vehicle.
Apply a suitable glass primer to the mating surfaces of the windshield glass.
11 . Apply glass primer to the mating face of the body flange.
12
.
Apply Betaseal on the windshield glass.
Around the edge of the armoured frame and also around the side of the windshield glass make a 15-
20 mm wide (0.59-0.79 inch) seal using Betaseal.
www.
Нет комментариевНе стесняйтесь поделиться с нами вашим ценным мнением.
Текст