Loader Bobcat 853, 853H. Manual — part 65
FUEL INJECTOR NOZZLES (Cont’d)
Removal And Installation (Cont’d)
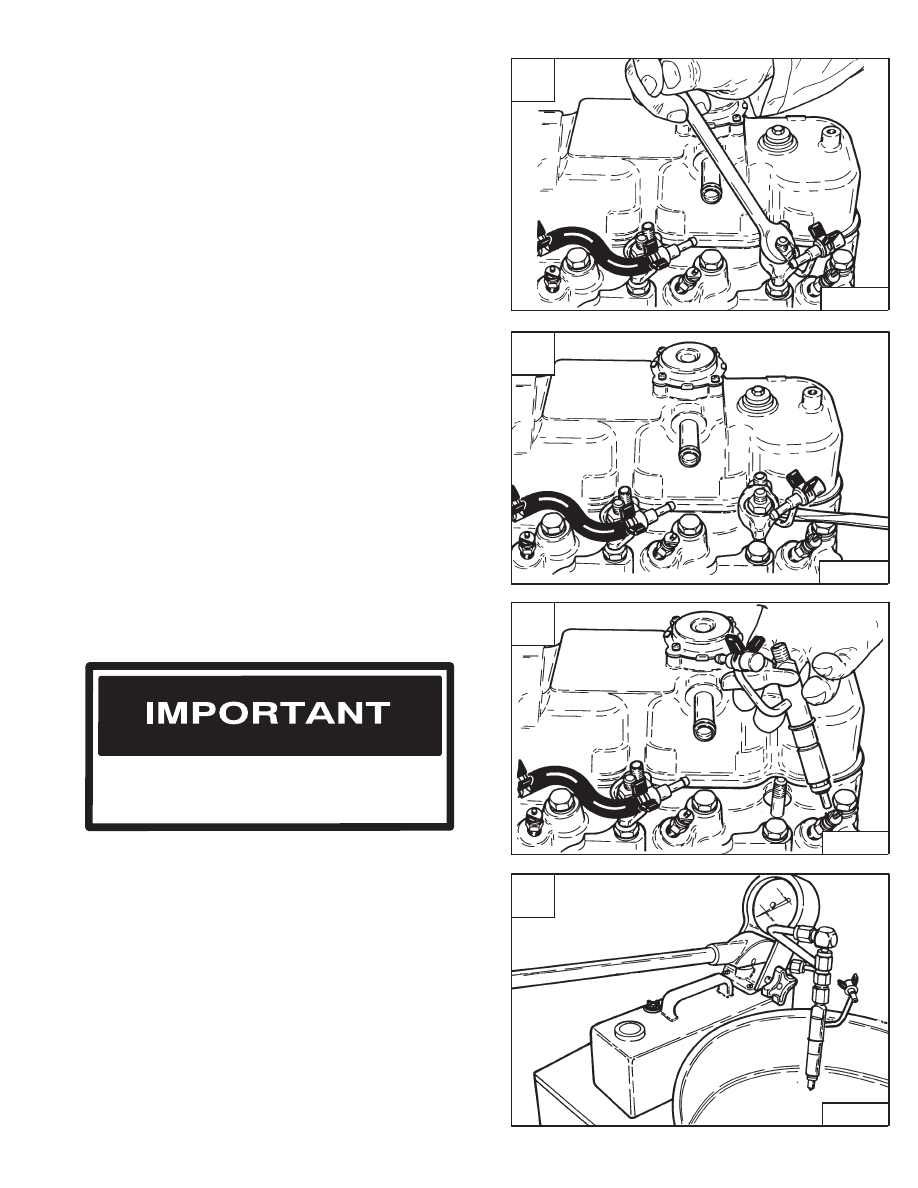
Remove the nut at the fuel injector holddown clamp [A].
Installation: Tighten the nuts to 23–32 ft.–lbs. (31–43
Nm) torque.
Use a screwdriver and pry the injector from the cylinder
head [B].
Remove the injector nozzle from the head [C].
Checking
Do not disassemble or test the fuel injector
nozzles unless you have the correct service
and testing tools.
I–2027–0284
The tools listed will be needed to do the following
procedure:
OEM1064 – Injection Nozzle Tester
OEM1065 – Accessory Set
Connect the nozzle to the test pump, in a down position
[D].
Operate the test pump until the nozzle valve opens:
Injection Pressure: 2630 PSI (18134 kPa)
A
B–08914
C
B–08916
D
B–08971
853, 853H Loader
–7–49–
Service Manual
853, 853H Service Manual #6720755 – Engine System Section Part 2 of 4
B
B–08924

FUEL INJECTOR NOZZLES (Cont’d)
Checking (Cont’d)
If the pressure is not correct, do the following:
Disassemble the injector nozzle and clean.
Replace the shim (Item 6) [A].
Check the pressure again.
Keep away from fuel under pressure in injector
system. It may not be visible. Wear safety
goggles. Fuel under pressure can penetrate
skin or eyes causing serious injury. If fluid
enters skin or eyes, get immediate medical
attention.
W–2072–1285
Tighten the retaining nut (Item 1) [A] when assembling
the injector nozzle to 29–32 ft.–lbs. (39–43 Nm) torque.
Checking nozzles spray pattern [B]:
Does not come out the side of the nozzle. Does not have
drops coming from the nozzle. Does not have a solid
stream coming from nozzle.
Any of the above conditions show a defect or dirty injector
nozzle. Clean or replace any injector nozzle that does not
operate correctly.
B
B–08895
INCORRECT
CORRECT
A
B–08959
1.
Retaining Nut
2.
Injection Nozzle
3.
Spacer
4.
Push Rod
5.
Spring
6.
Adjusting Shim
7.
Nozzle Holder
7
1
2
3
4
5
6
–7–50–
853, 853H Loader
Service Manual
CYLINDER HEAD
Removal And Installation
The tools listed will be needed to do the following
procedure:
MEL1267 – Cylinder Head Bolt Wrench
Clean all the debris from the cylinder head and engine.
Remove the coolant from the engine and radiator.
Remove the radiator hoses.
Remove the fuel injectors and fuel tubelines. (See Page
7–48.)
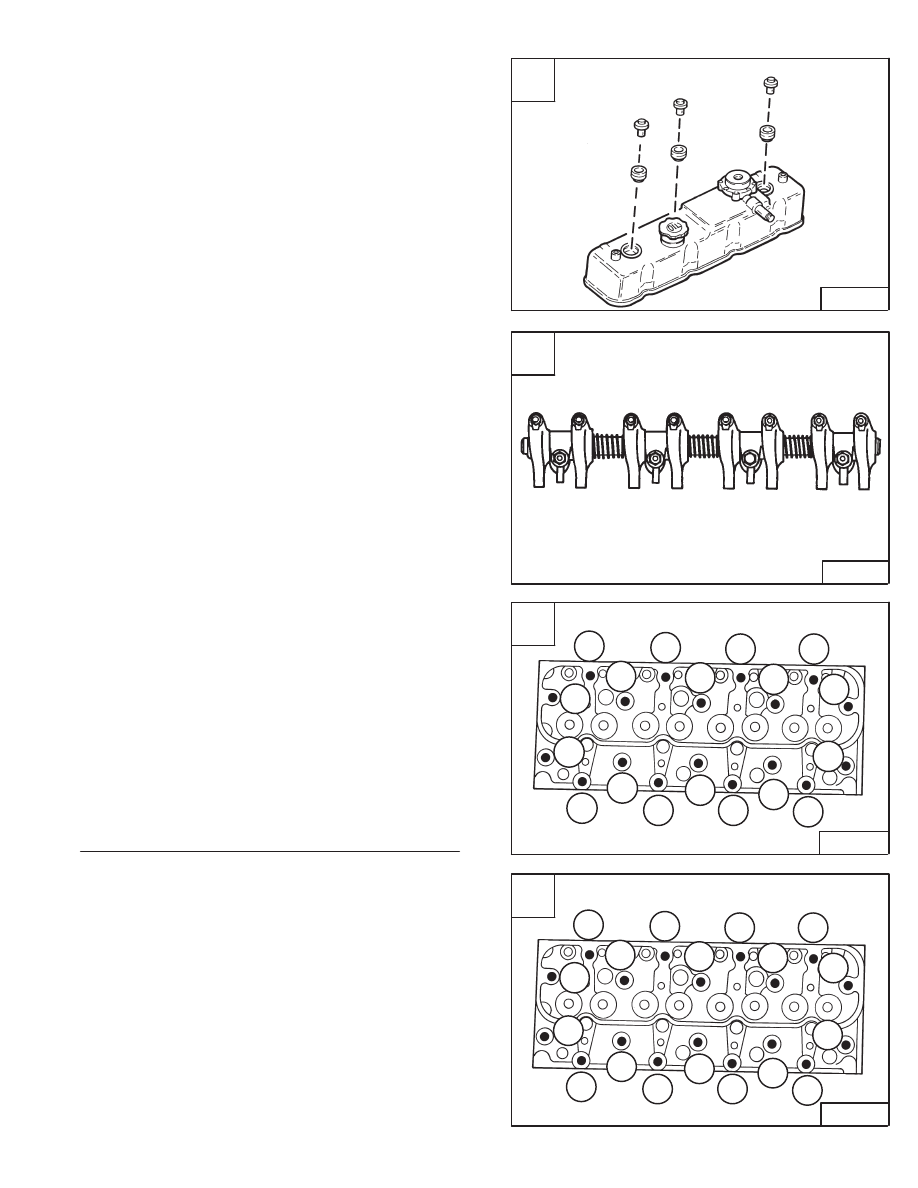
Remove the valve cover nuts in the correct sequence [A].
Installation: Tighten the nuts to 6–13 ft.–lbs. (8–17 Nm)
torque in the correct sequence [A].
Remove the rocker arm assembly bolts in the correct
sequence [B].
Installation: Tighten the bolts in the correct sequence to
36–43 ft.–lbs. (49–58 Nm) torque.
Remove the cylinder head bolts in the correct sequence
[C].
Installation: Lubricate the bolts and tighten them in two
steps as listed, in the correct numerical sequence [D].
Step 1
Step 2
New Bolts
29 ft.–lbs. (39 Nm)
59–67 ft.–lbs.
(80–91 Nm)
Used Bolts
62 ft.–lbs. (83 Nm)
72–80 ft.–lbs.
(97–108 Nm)
NOTE: When removing the head, do not use a sharp
tool between the head and the engine block.
Always put the cylinder head on a flat
surface, such as wood, to prevent damage to
the machined surface.
Remove the head from the engine.
See Page 7–53 for removing and reconditioning the
valves.
After the cylinder head is installed, adjust the valve
clearance. (See Page 7–41.)
A
B–08186
1
3
2
C
B–08189
7
1
2
3
4
6
5
9
13
17
16
12
8
10
18
11
15
14
D
B–08189
12
18
17
16
15
13
14
10
6
2
3
7
11
9
1
8
4
5
853, 853H Loader
–7–51–
Service Manual
B
B–08188
1
3
4
2
CYLINDER HEAD (Cont’d)
Cylinder Head Surface Alignment
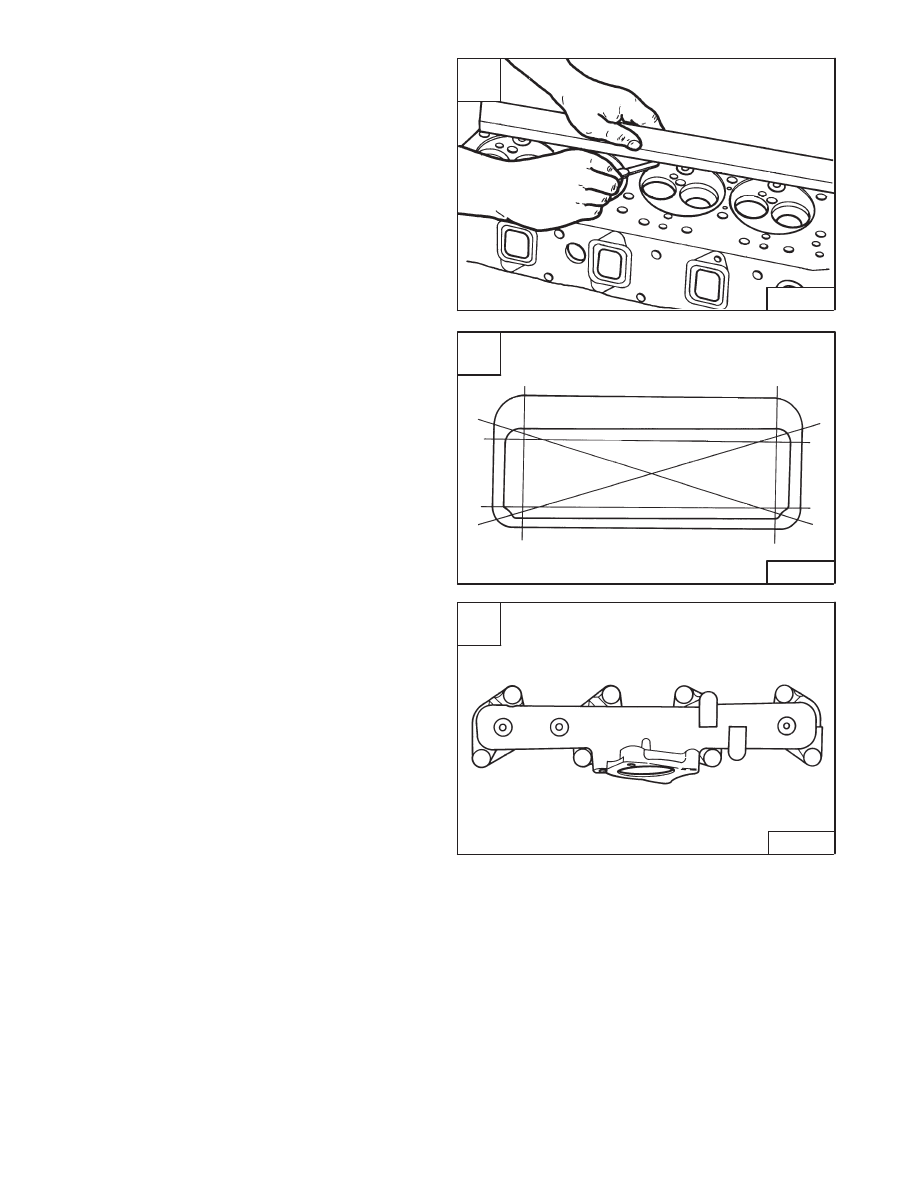
Check the surface of the head with the straight edge [A].
Check the head at six different directions [B].
The standard distortion is 0.002 inch (0,05 mm) and the
maximum limit is 0.008 inch (0,20 mm).
When the head distortion exceeds the maximum limit,
regrind the head with a maximum limit of 0.012 inch (0,30
mm).
Exhaust Manifold
If the exhaust manifold has been removed, use the
correct torque sequence and tighten the bolts to 10–17
ft.–lbs. (14–23 Nm) torque [C].
A
B–08198
C
B–08187
4
8
5
1
2
6
7
3
–7–52–
853, 853H Loader
Service Manual
B
B–08197
Нет комментариевНе стесняйтесь поделиться с нами вашим ценным мнением.
Текст