DAF LF45, LF55 Series. Manual — part 264

©
200508
4-3
Removal and installation
ALLISON MD 3060 AUTOMATIC GEARBOX
ΛΦ45/55 series
3
8
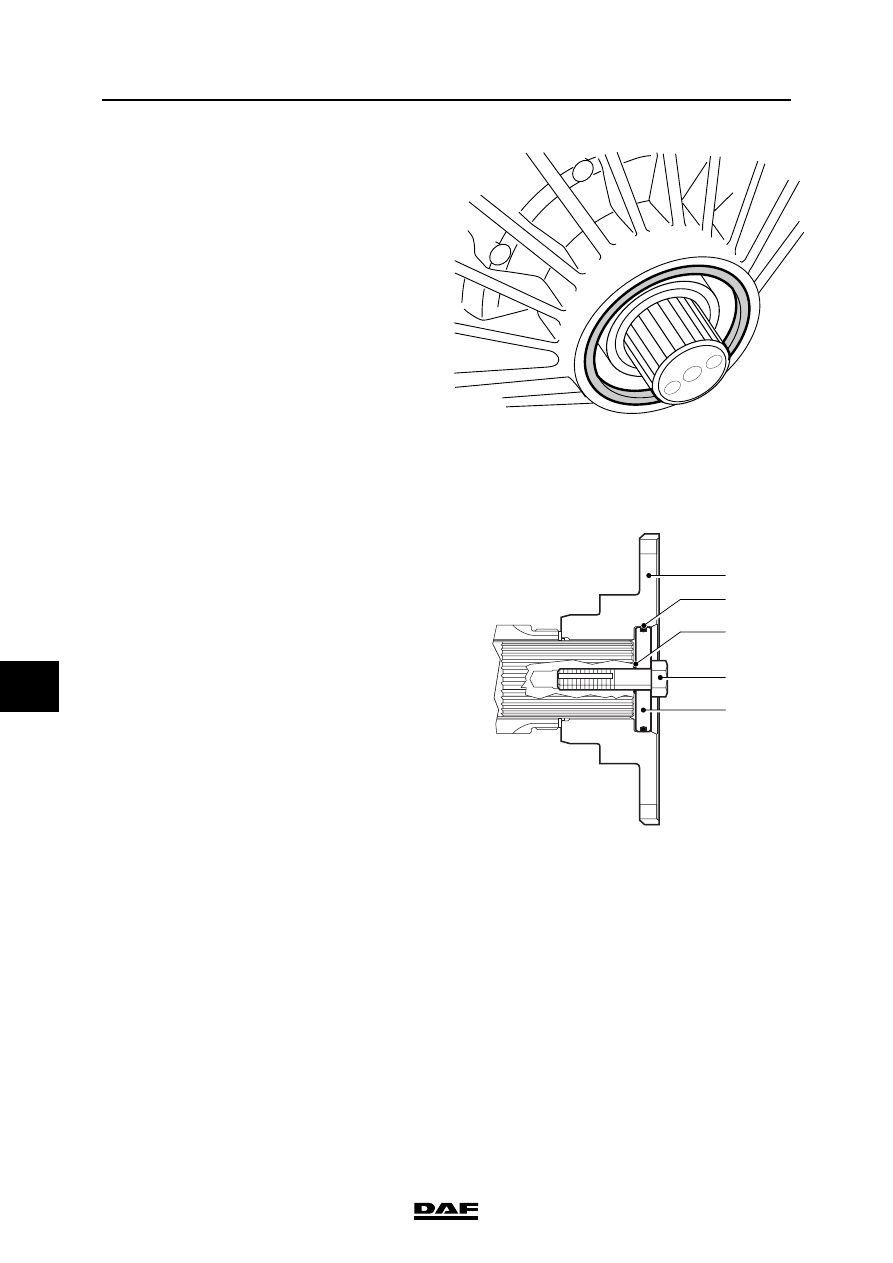
4.2 REMOVING AND INSTALLING OUTPUT SHAFT OIL SEAL
Removing output shaft oil seal
1.
Remove the prop shaft and secure it so that
it does not interfere with further operations.
2.
Unscrew the attachment bolt (5) of the flange
without removing it from the locking plate.
3.
Remove the bolt and locking plate from the
flange.
Pay attention to the sealing rings on the outer
circumference and on the inside of the
locking plate.
W 3 03 061
V300529
1
2
3
5
4
V300559
ALLISON MD 3060 AUTOMATIC GEARBOX
4-4
©
200508
Removal and installation
8
ΛΦ45/55 series
3
4.
Slide the flange off the output shaft or, if
necessary, use a tripod puller to pull it off the
shaft.
5.
Drill two holes in the external cover of the oil
seal and turn special tool (DAF no. 0484899)
into the oil seal. Pull the oil seal out of the
gearbox housing using special tool
(DAF no. 0694928).
Installing output shaft oil seal
1.
Apply a small amount of liquid gasket to the
outside of oil seals fitted with a steel cover.
Apply a small amount of green soap to the
outside of oil seals fitted with a rubber cover.
2.
Fit the oil seal in the gearbox housing using
special tool (DAF no. 1240037).
3.
Apply a small amount of grease to the oil seal
lips and slide the flange over the output shaft
until it abuts.
4.
Fit new sealing rings (2, 3) to the locking
plate and fit it with the attachment bolt to the
flange (apply a small amount of grease to the
sealing rings).
Note:
The attachment bolts on the new gearboxes
are no longer secured by a locking plate, but
by the self-locking screw thread in the output
shaft.
5.
Hold the prop shaft flange in place with the
special tool (DAF no. 0484977).
6.
Tighten the attachment bolt (5) to the
specified torque. See "Technical data".
If the locking plate is not tightened to
the specified torque, there is a risk of
it getting bent during fitting, which
could lead to serious oil leakage.
W 3 03 062
V300530
1
5
4
3
2
}
©
200508
4-5
Removal and installation
ALLISON MD 3060 AUTOMATIC GEARBOX
ΛΦ45/55 series
3
8
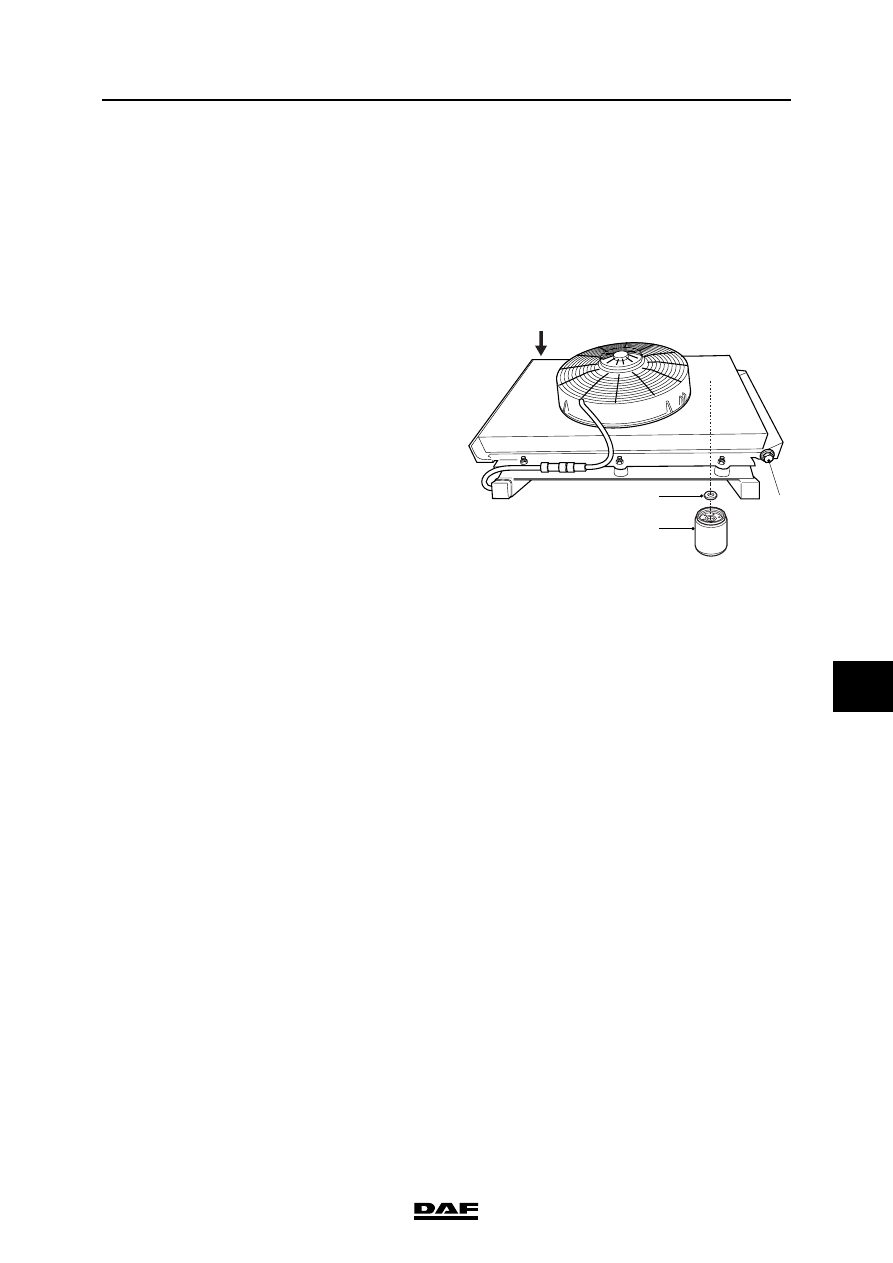
4.3 REMOVAL AND INSTALLATION, OIL FILTERS
To prevent skin injury, avoid
unnecessary contact with the
drained oil.
Allison MD 3060 automatic gearbox
Removing oil cooler oil filter
1.
Clean the oil filter (5), if fitted, and the
surrounding area.
2.
Loosen the oil filter on the heat exchanger.
Collect the oil that comes out.
3.
Remove the magnetic ring (4) and check it
for wear particles.
Note:
If there are large wear particles in the wear
swarf, this indicates excessive wear in the
gearbox and the cause must be ascertained.
4.
Clean the magnetic ring and the contact
surfaces on the heat exchanger.
Fitting oil cooler oil filter
1.
Fit the magnetic ring (4) on the heat
exchanger.
2.
If applicable, lightly lubricate the new oil filter
(5) with clean gearbox oil and fit it on the heat
exchanger.
3.
Tighten the oil filter until it touches the
contact surface. Manually tighten the oil filter
another 360
″.
4.
Check the oil level. See "Inspection and
adjustment".
}
5
4
6
3
V3 00 556
ALLISON MD 3060 AUTOMATIC GEARBOX
4-6
©
200508
Removal and installation
8
ΛΦ45/55 series
3
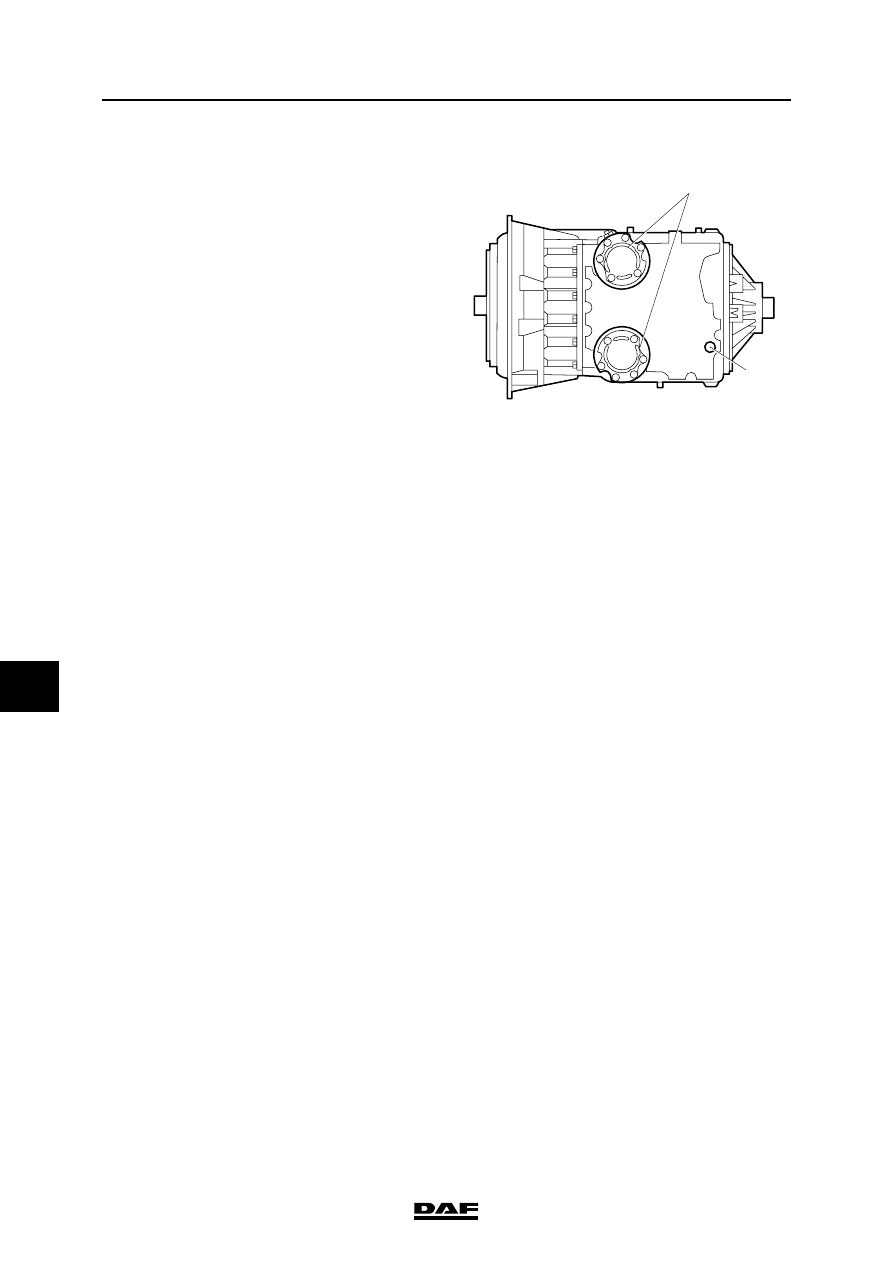
Removing oil filters
1.
Remove the attachment bolts from the filter
covers (2) and remove the filter covers.
Collect the oil that comes out.
2.
Remove the oil filters from the oil sump.
3.
Remove the various O-rings and the gasket
from the filter covers.
4.
Remove any gasket remains from the filter
covers and the contact surfaces.
Installing oil filters
1.
Lubricate the new O-rings with clean
gearbox oil and fit the various O-rings on the
filter covers.
Note:
Compare the new O-rings to the old ones to
ensure that the correct O-rings are used.
2.
Fit a new gasket on the filter covers.
3.
Lubricate the rubber inner ring of the oil filters
with clean gearbox oil and fit the oil filters on
the filter covers.
4.
Fit the filter covers together with the oil filters
on the gearbox and tighten the attachment
bolts to the specified torque. See "Technical
data".
5.
Check the oil level. See "Inspection and
adjustment".
V300371
2
1
Нет комментариевНе стесняйтесь поделиться с нами вашим ценным мнением.
Текст