Dodge Dakota (ND). Manual — part 1217
GLASS-REAR DOOR
DESCRIPTION
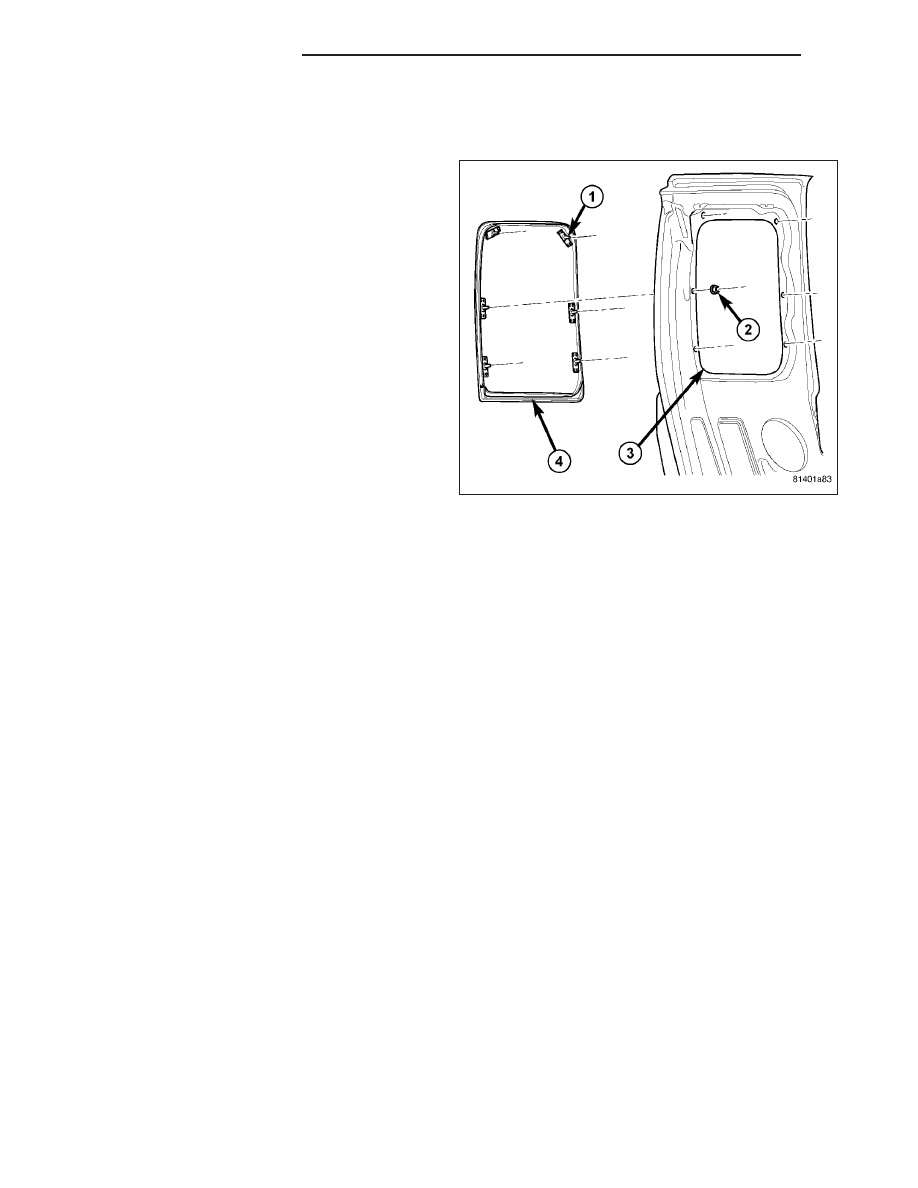
The rear door quarter glass (1) is seated within the
rear door fence line, attached by nuts and sealed with
butyl sealer.
1. To remove the quarter glass (1) (Refer to 23 -
BODY/DOOR
-
CARGO/GLASS-DOOR
-
REMOVAL)
WINDSHIELD
WARNING
WINDSHIELD SAFETY PRECAUTIONS
WARNING: Do not operate the vehicle within 24 hours of windshield installation. It takes at least 24 hours
for urethane adhesive to cure. If it is not cured, the windshield may not perform properly in an accident.
•
Urethane adhesives are applied as a system. Use glass cleaner, glass prep solvent, glass primer, pvc
(vinyl) primer and pinch weld (fence) primer provided by the adhesive manufacturer. If not, structural
integrity could be compromised.
•
Daimlerchrysler does not recommend glass adhesive by brand. Technicians should review product labels
and technical data sheets, and use only adhesives that their manufactures warrant will restore a vehicle
to the requirements of fmvss 212. Technicians should also insure that primers and cleaners are compat-
ible with the particular adhesive used.
•
Be sure to refer to the urethane manufacturer’s directions for curing time specifications, and do not use
adhesive after its expiration date.
•
Vapors that are emitted from the urethane adhesive or primer could cause personal injury. Use them in a
well-ventilated area.
•
Skin contact with urethane adhesive should be avoided. Personal injury may result.
•
Always wear eye and hand protection when working with glass.
23 - 280
STATIONARY GLASS
ND
CAUTION: Protect all painted and trimmed surfaces from coming in contact with urethane or primers.
Be careful not to damage painted surfaces when removing moldings or cutting urethane around windshield.
REMOVAL
1. Before proceeding with the following repair proce-
dure, review all warnings and cautions. (Refer to
23 - BODY/STATIONARY GLASS/WINDSHIELD -
WARNING)
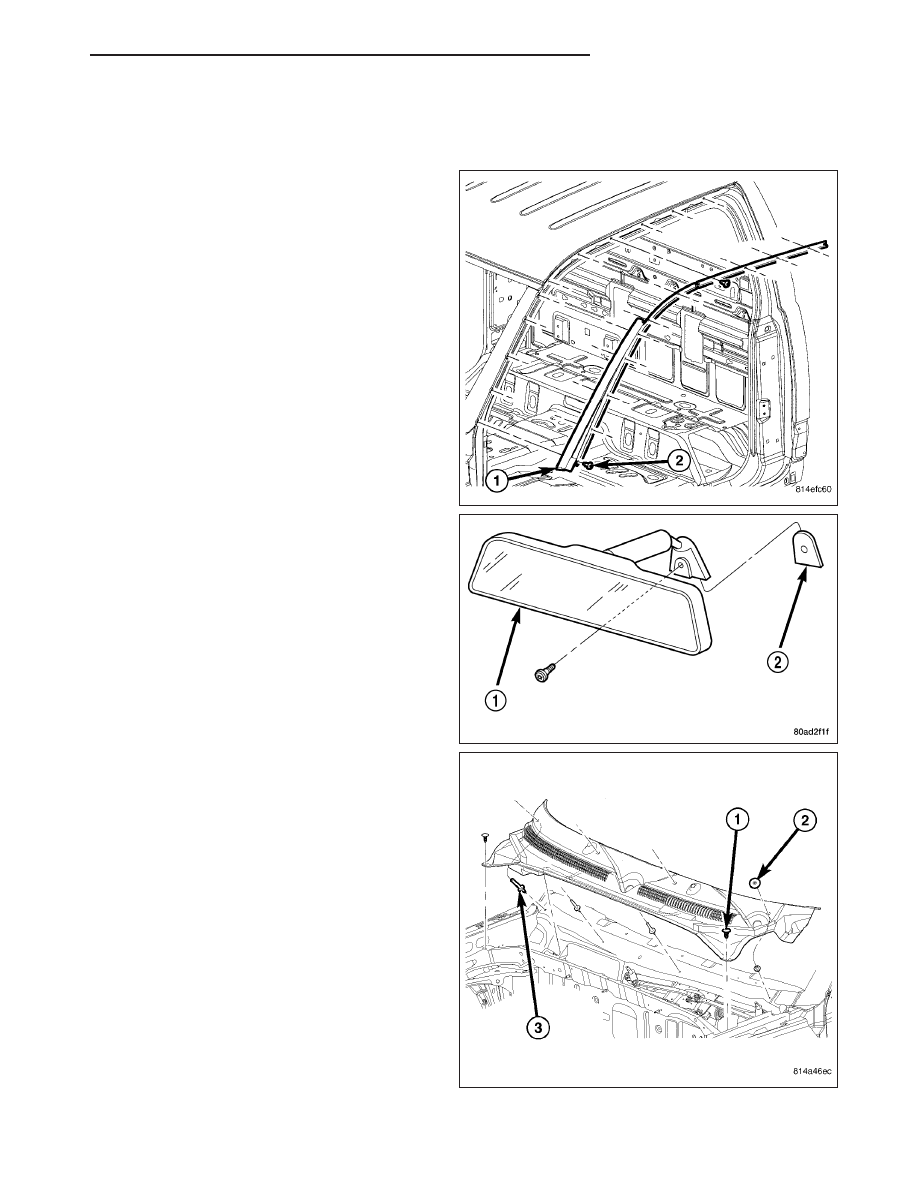
2. Remove the screws (2) attaching the side wind-
shield molding (1) to the a-pillars and remove the
molding.
3. Remove rear view mirror (1). (Refer to 23 - BODY/
INTERIOR/REAR VIEW MIRROR - REMOVAL)
4. Remove the cowl grille. (Refer to 23 - BODY/EX-
TERIOR/COWL
GRILLE
AND
SCREEN
-
REMOVAL)
ND
STATIONARY GLASS
23 - 281

5. Remove the a-pillar trim panels (3). (Refer to 23 -
BODY/INTERIOR/PANEL-A
PILLAR
TRIM
-
REMOVAL)
6. Remove the headliner (6). (Refer to 23 - BODY/IN-
TERIOR/HEADLINER - REMOVAL)
23 - 282
STATIONARY GLASS
ND
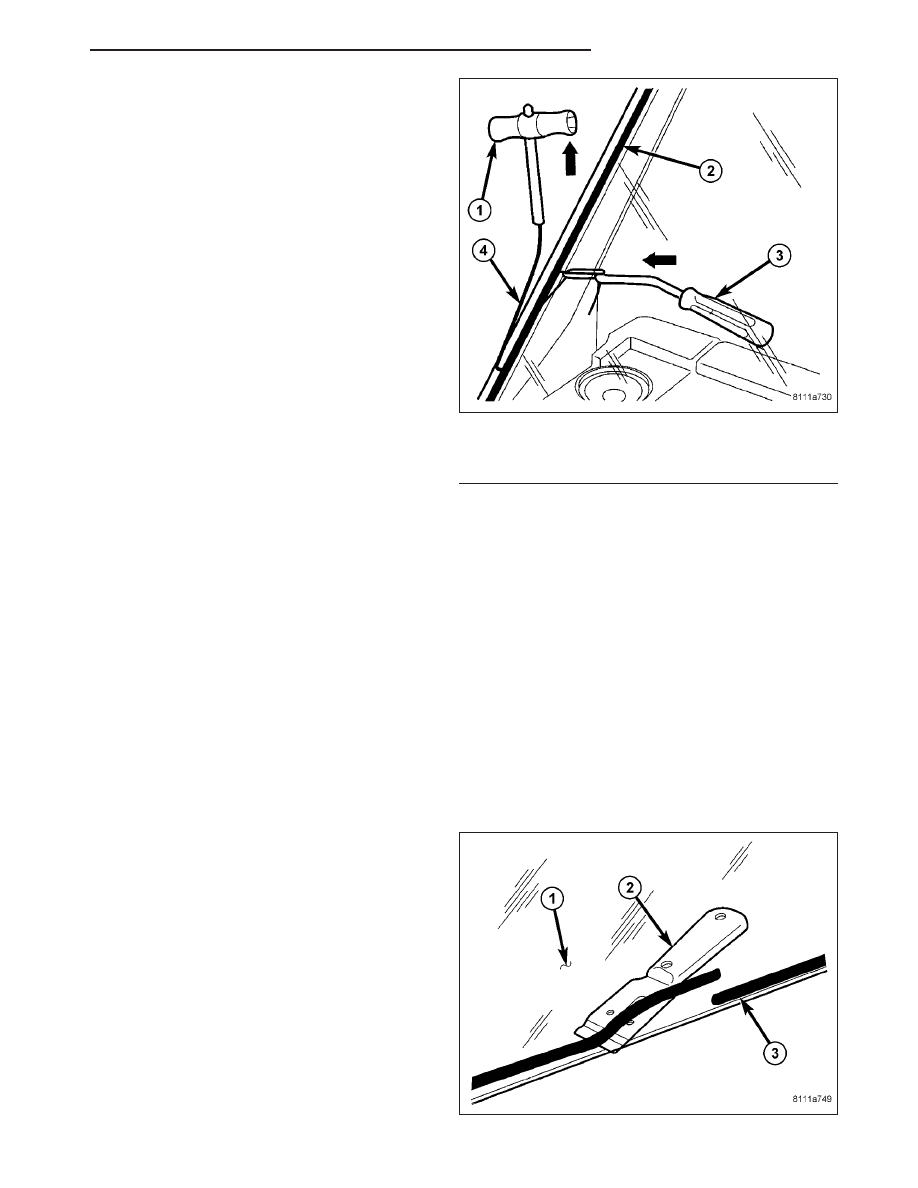
7. Using a windshield cut-out wire (4) or equivalent,
separate the adhesive (2).
8. Carefully remove windshield.
INSTALLATION
WARNING: Allow the urethane at least 24 hours to cure before returning the vehicle to use.
CAUTION: Roll down the left and right front door glass and open the rear glass slider (if available) before
installing windshield to avoid pressurizing the passenger compartment if a door is slammed before ure-
thane is cured. Water leaks can result.
NOTE: The windshield fence should be cleaned of most of its old urethane bonding material. A small
amount of old urethane, approximately 1-2 mm in height, should remain on the fence. Do not grind off or
completely remove all old urethane from the fence, the paint finish and bonding strength will be adversely
affected. Support spacers located on the cowl at the bottom of the windshield opening should be replaced
with new parts. Replace any missing or damaged spacers around the perimeter of the windshield opening.
Windshield Preparation - Installing A Previously Installed Windshield
1. Before proceeding with the following repair proce-
dure, review all warnings and cautions. (Refer to
23 - BODY/STATIONARY GLASS - WARNING)
2. Level old bead of windshield adhesive (3) to a
thickness of approximately 1 mm (0.04 in.) and
remove loose adhesive.
1 - T-HANDLE
2 - WINDSHIELD ADHESIVE
3 - COUNTER SUPPORT
4 - CUTTING WIRE
ND
STATIONARY GLASS
23 - 283
Нет комментариевНе стесняйтесь поделиться с нами вашим ценным мнением.
Текст