Dodge Dakota (ND). Manual — part 1218
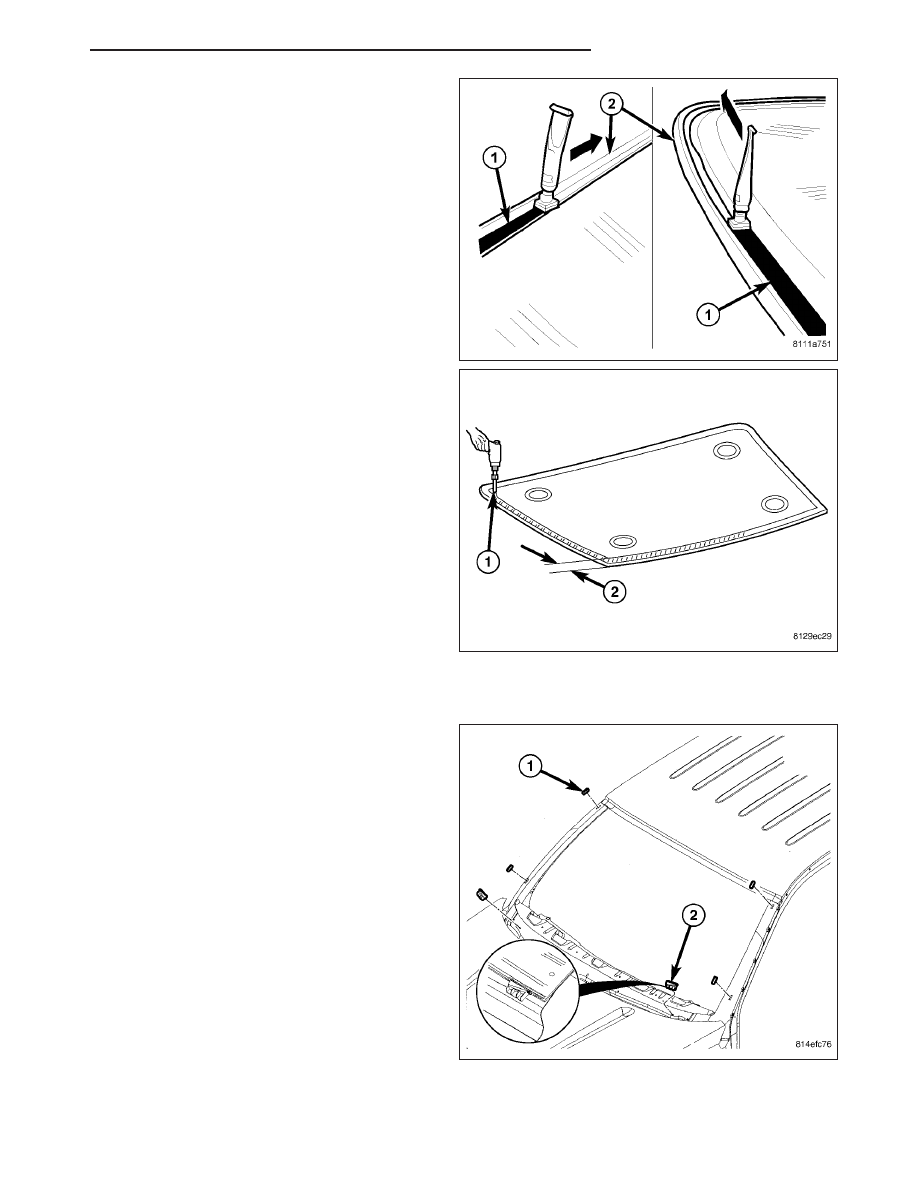
3. Apply four new spacers (1) to the a-pillars and
place them evenly apart at the top and bottom.
4. Install the lower spacer assemblies (2) into the slot-
ted holes and verify proper installation by pulling to
make sure they are locked on.
NOTE: Lower spacers must be facing with the flat
side upwards when installing into the slotted
holes.
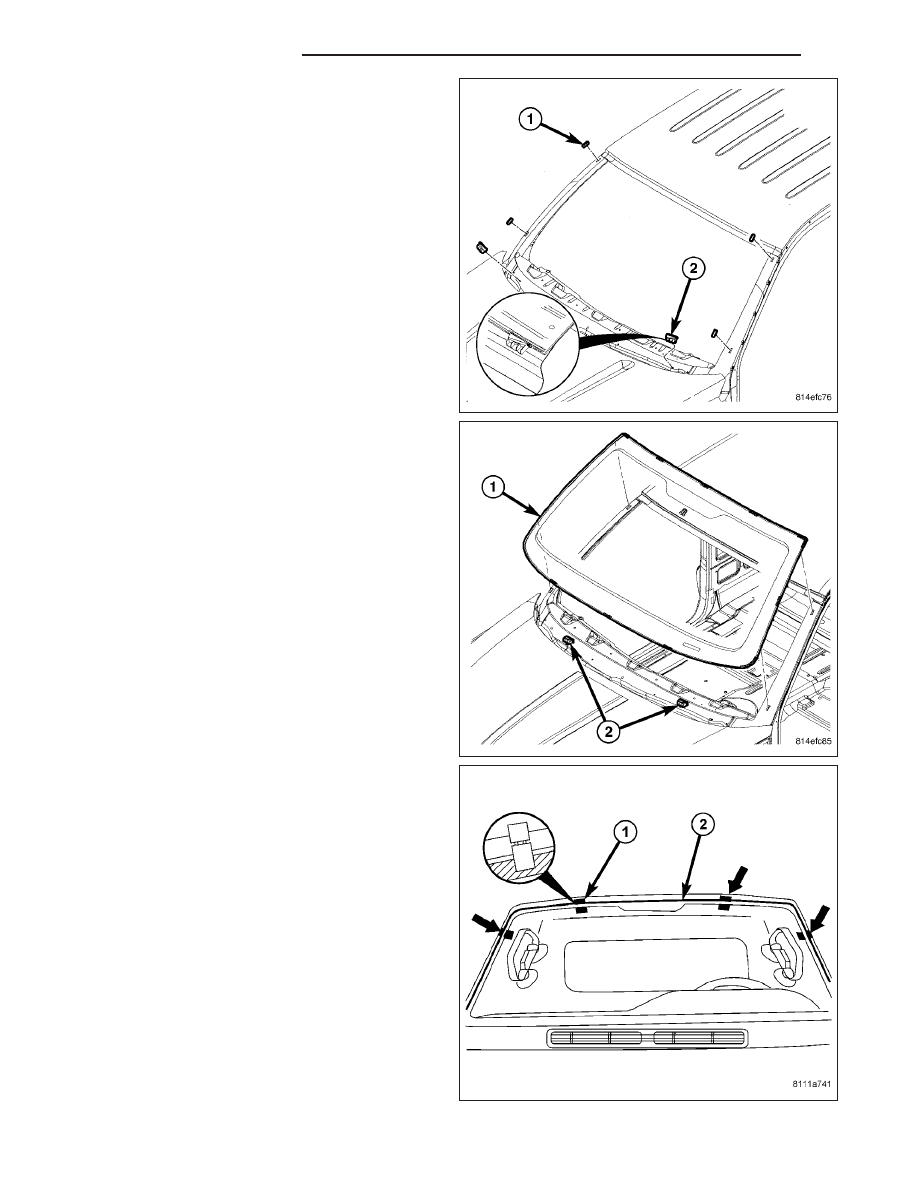
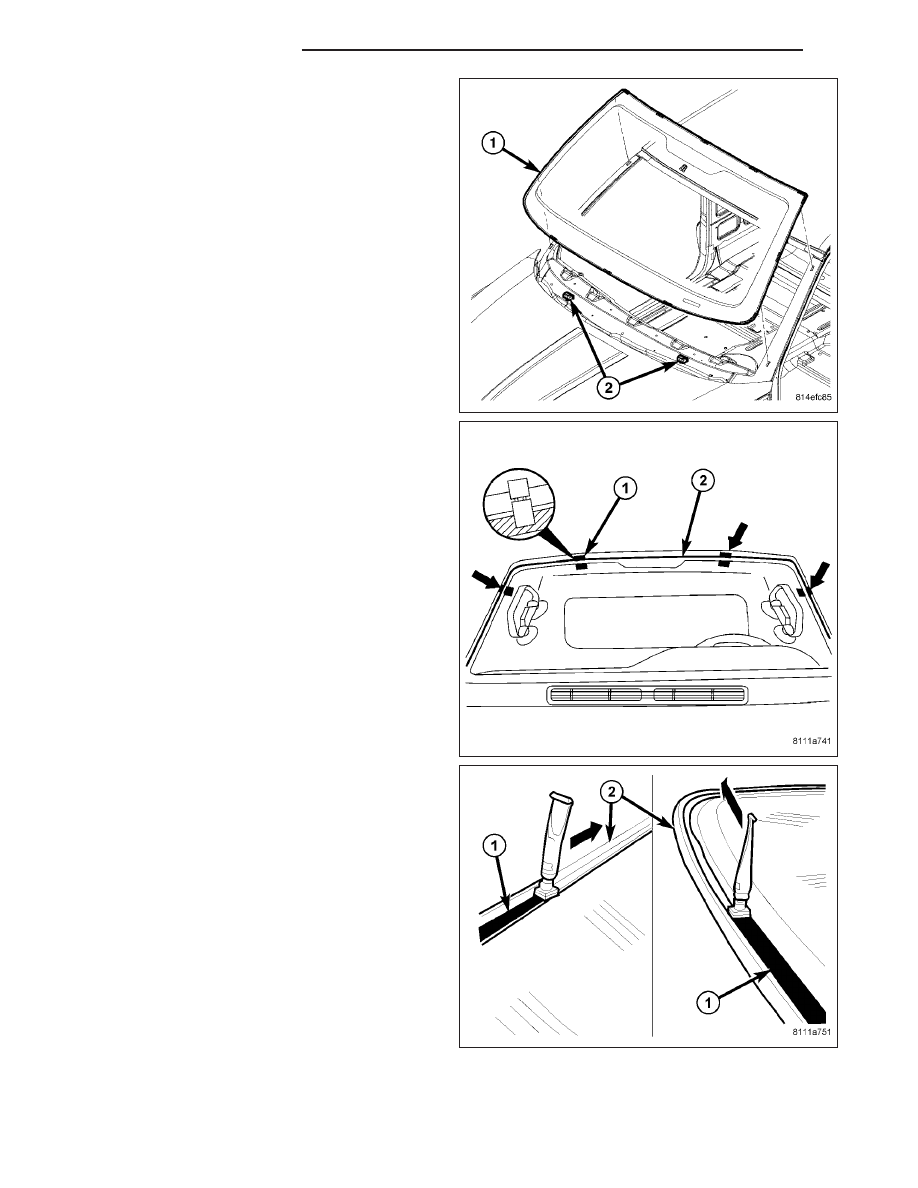
5. Position windshield (1) in center of windshield
opening and resting on the side and lower spacers
(2).
6. Adjust the lower spacers (2) as required, to center
the windshield in the windshield opening.
7. Apply adhesive tape (1) to the locations shown to
aid with final installation.
8. Verify windshield gap is parallel to with windshield.
9. Cut tape with a sharp knife and remove windshield.
23 - 284
STATIONARY GLASS
ND
NOTE: Typical primer installation shown.
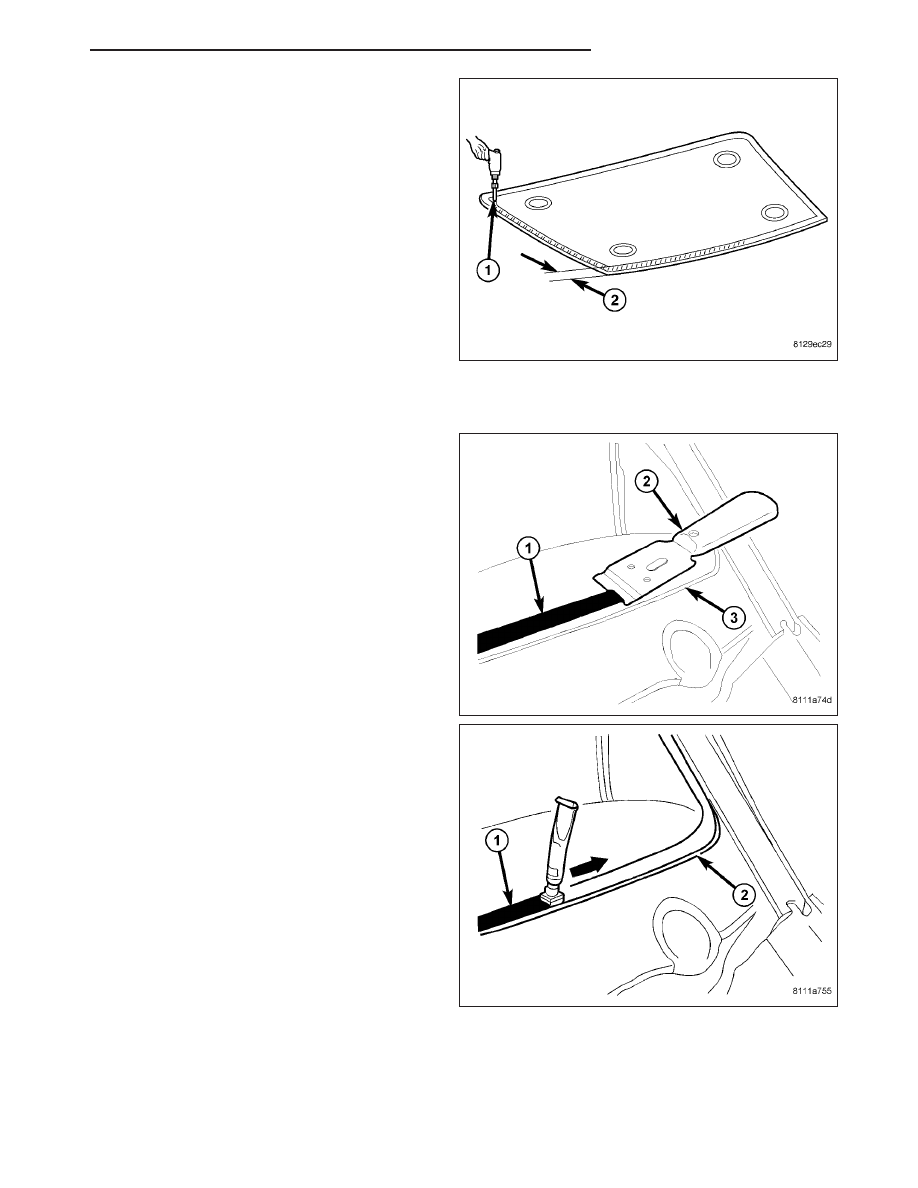
10. Clean and dry area of glass (2) to be re-glued
with a suitable glass preparation solvent and rag.
11. Using a flash light, verify that glass primer is with-
out damage.
12. Re-prime any damaged area. If old adhesive has
been exposed for more than 12 hours, entire
adhesive area needs to be re-primed.
13. Apply primer (1) around the perimeter of the glass
to a width of 15 mm (0.5 in.) (2).
14. Allow primer to air dry for at least 10 minutes.
15. Using a flash light, verify that glass primer is with-
out damage.
Windshield Preparation - Installing A New Windshield
1. Apply four new spacers (1) to the a-pillars and
place them evenly apart at the top and bottom.
2. Install the lower spacer assemblies (2) into the slot-
ted holes and verify proper installation by pulling to
make sure they are locked on.
NOTE: Lower spacers must be facing with the flat
side upwards when installing into the slotted
holes.
ND
STATIONARY GLASS
23 - 285
3. Position windshield (1) in center of windshield
opening and resting on the side and lower spacers
(2).
4. Adjust the lower spacers (2) as required, to center
the windshield in the windshield opening.
5. Clean and check windshield for damage.
6. Position windshield in center of windshield opening.
7. Apply adhesive tape to the locations shown to aid
with final installation.
8. Verify windshield gap is parallel to with windshield.
9. Cut tape with a sharp knife and remove windshield.
10. Clean and dry area of glass to be glued with a
suitable glass preparation solvent and rag.
11. Apply primer to gluing surface at windshield seal.
23 - 286
STATIONARY GLASS
ND
12. Apply primer (1) around the perimeter of the glass
to a width of 15 mm (0.5 in.) (2).
13. Allow primer to air dry for at least 10 minutes.
14. Using a flash light, verify that glass primer is with-
out damage.
Windshield Opening Preparation
1. Clean and vacuum windshield opening.
2. Level old bead of windshield opening adhesive (1)
to a thickness of approximately 1 mm (0.04 in.) and
remove loose adhesive.
3. Clean and dry area of windshield opening to be re-
glued with a suitable glass preparation solvent and
rag.
4. Re-prime any damaged area. If old adhesive has
been exposed for more than 12 hours, entire adhe-
sive area needs to be re-primed.
5. Allow primer to air dry for at least 10 minutes.
ND
STATIONARY GLASS
23 - 287
Нет комментариевНе стесняйтесь поделиться с нами вашим ценным мнением.
Текст