Dodge Dakota (ND). Manual — part 1219
Windshield Installation
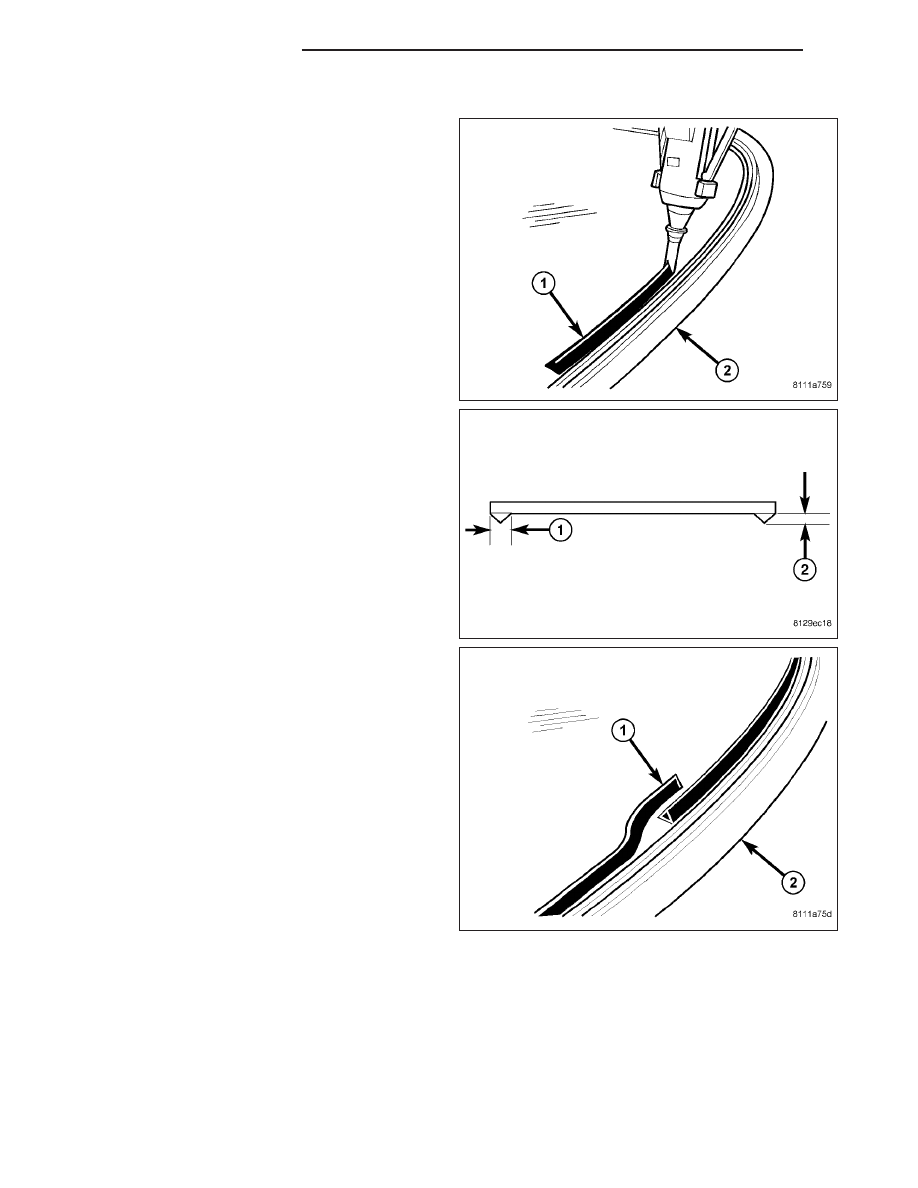
1. Apply bead of adhesive (1) with a triangular nozzle
directly to the windshield seal starting at bottom in
center of windshield.
CAUTION: Always apply bead of adhesive to the
windshield. Always install the windshield within 5
minutes after applying adhesive.
2. Bead dimensions should be approximately 9.5 -
12.0 mm wide (1) by 12.7 - 14.0 mm in height (2).
3. Allow end of adhesive bead to run out parallel to
the start of the bead and smooth ends flush.
23 - 288
STATIONARY GLASS
ND
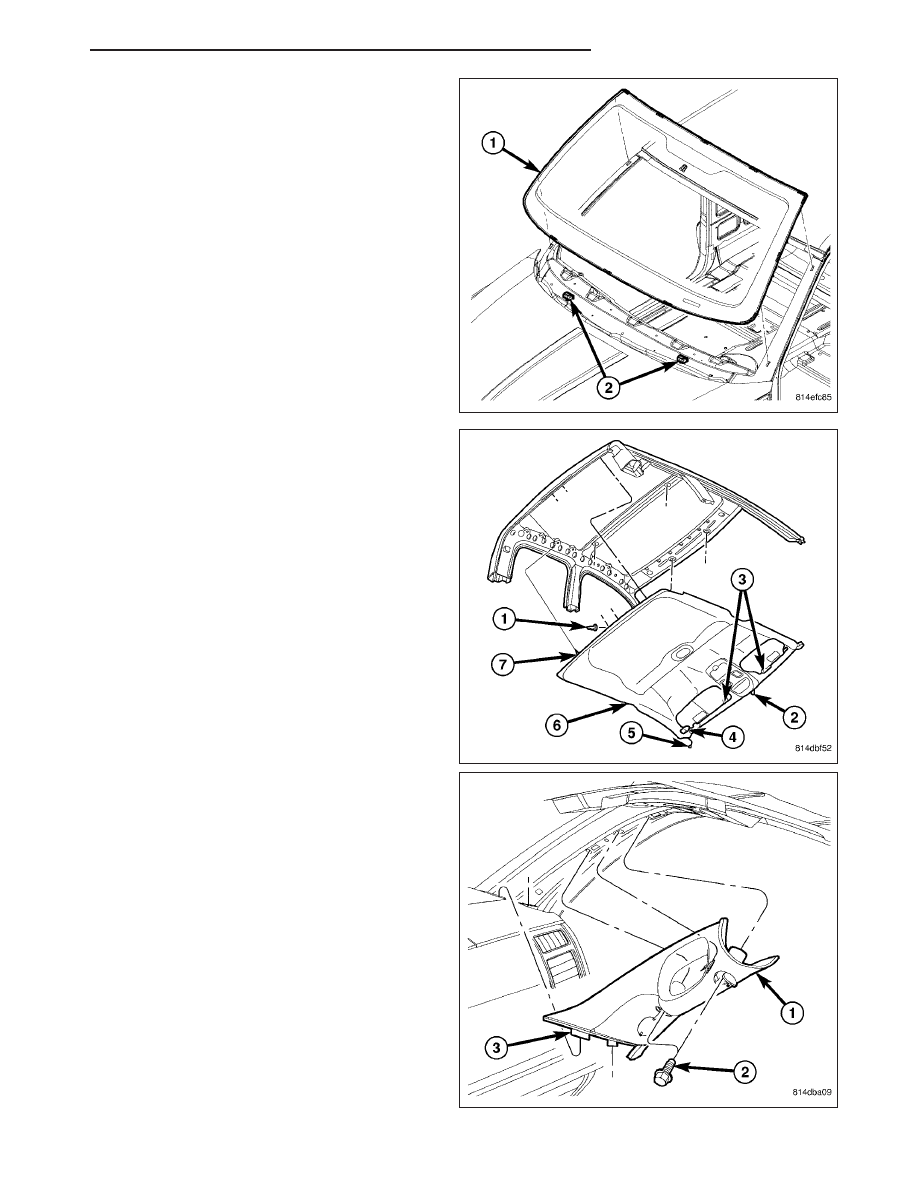
4. Lift windshield into place in the center of the wind-
shield opening and use the tape as a guide to aid
installation of the windshield into the center of the
cutout.
5. Carefully lay down windshield and press on.
CAUTION: It is no longer possible to move the
windshield
after
installation.
The
windshield
should never be pressed into place by more than
one person, because the windshield can break if
pressed simultaneously on both sides.
CAUTION: Roll down the left and right front door
glass and open the rear glass slider (if available)
before installing windshield to avoid pressurizing
the passenger compartment if a door is slammed
before urethane is cured. Water leaks can result.
6. Install the headliner (6). (Refer to 23 - BODY/INTE-
RIOR/HEADLINER - INSTALLATION)
7. Install the a-pillar trim (3). (Refer to 23 - BODY/IN-
TERIOR/PANEL-A PILLAR TRIM - INSTALLATION)
ND
STATIONARY GLASS
23 - 289
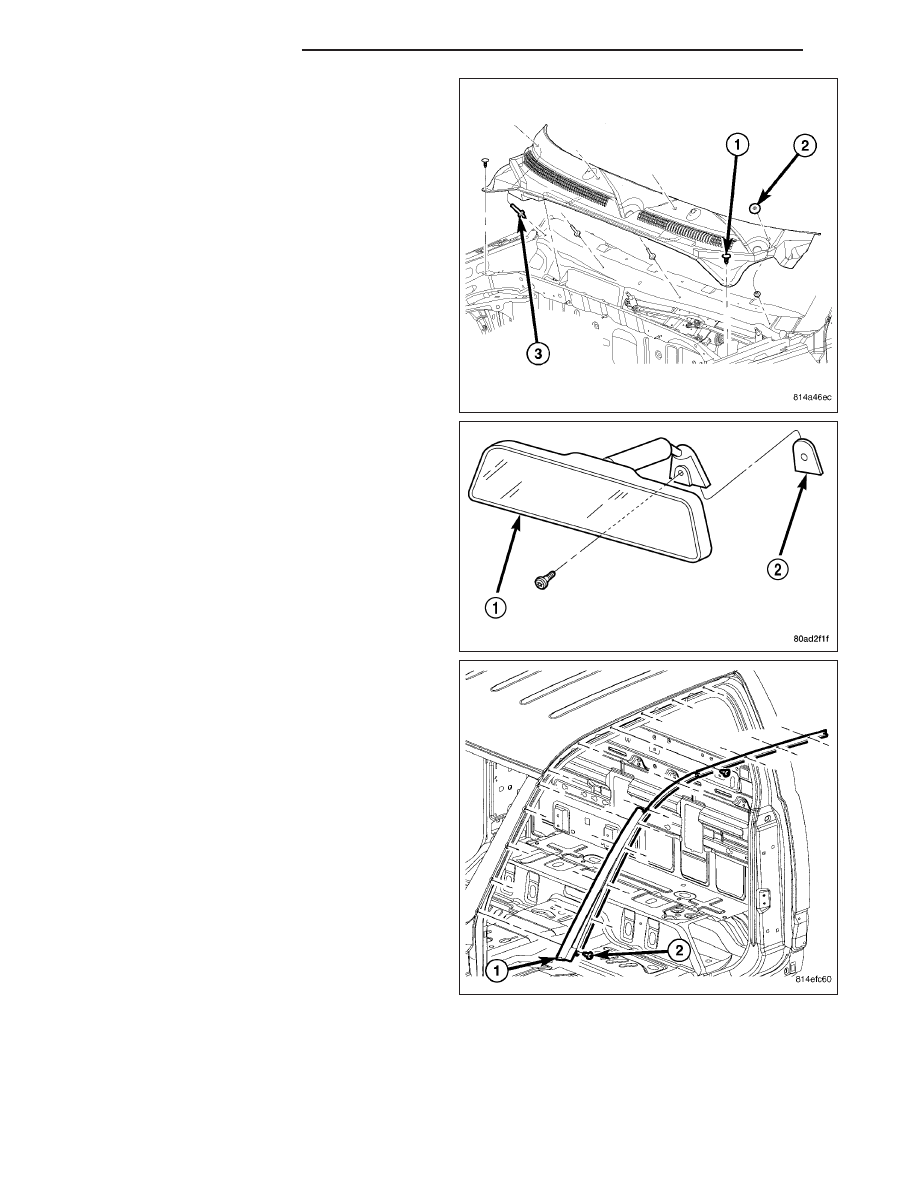
8. Install the cowl grille. (Refer to 23 - BODY/EXTE-
RIOR/PANEL-COWL TOP - INSTALLATION)
9. Install the rearview mirror (1). (Refer to 23 - BODY/
INTERIOR/REAR VIEW MIRROR - INSTALLA-
TION)
10. Install the windshield molding retainer (1) and
install the screws (2).
23 - 290
STATIONARY GLASS
ND
TAILGATE
TABLE OF CONTENTS
page
page
CABLE-CHECK
. . . . . . . . . . . . . . . . . . . . . . . . . . . . 291
. . . . . . . . . . . . . . . . . . . . . . . . 292
LATCH
. . . . . . . . . . . . . . . . . . . . . . . . . . . . 293
. . . . . . . . . . . . . . . . . . . . . . . . 293
LATCH STRIKER
. . . . . . . . . . . . . . . . . . . . . . . . . . . . 294
. . . . . . . . . . . . . . . . . . . . . . . . 295
RELEASE HANDLE
. . . . . . . . . . . . . . . . . . . . . . . . . . . . 295
. . . . . . . . . . . . . . . . . . . . . . . . 296
TAILGATE
. . . . . . . . . . . . . . . . . . . . . . . . . . . . 296
. . . . . . . . . . . . . . . . . . . . . . . . 297
CABLE-CHECK
REMOVAL
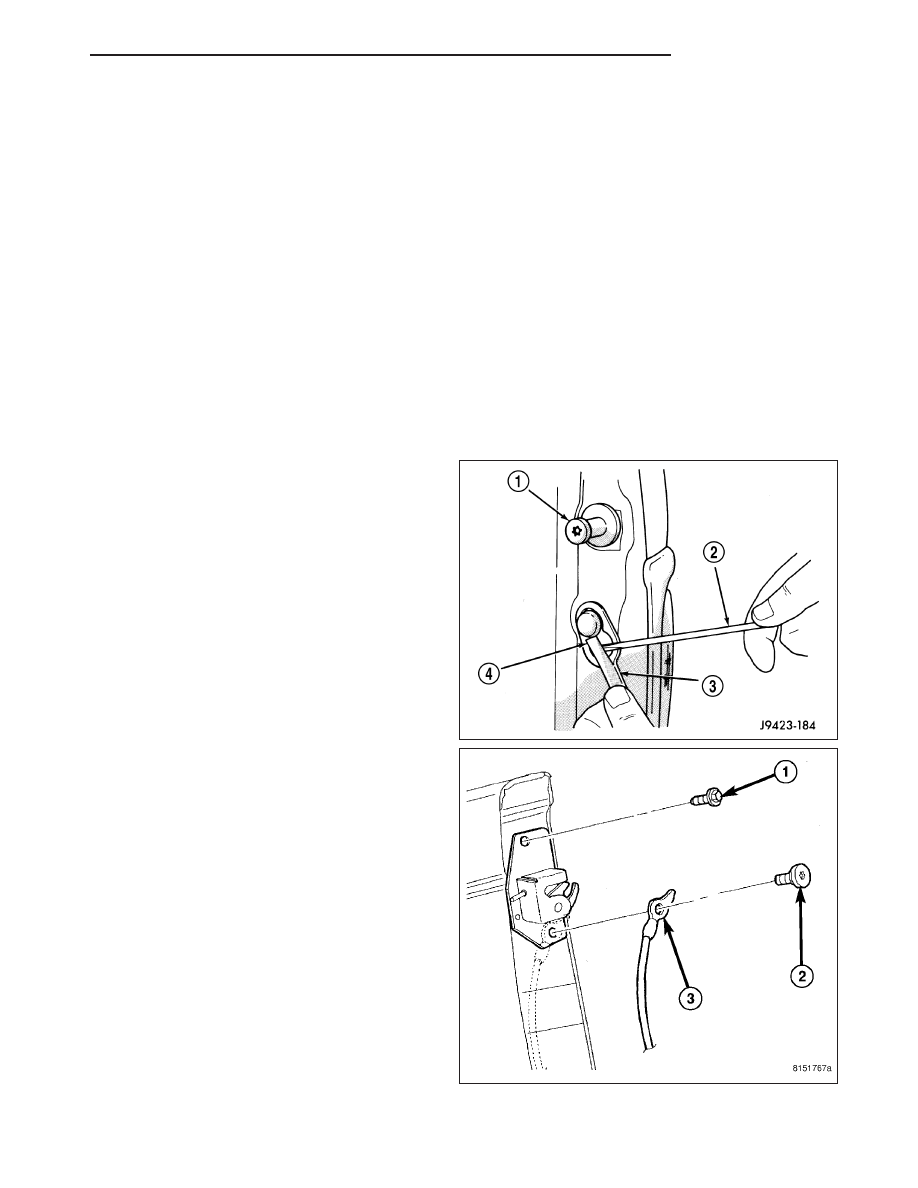
1. Open the tailgate and locate the tailgate check
cable (3) on the left and right of the cargo box
below the tailgate striker (1) as necessary.
2. Pry the cable lock tab(s) (4) outward using a
screwdriver or flat bladed tool (2) and remove the
tailgate check cable(s) from the cargo box.
3. Remove the bolt (2) that secures the tailgate check
cable (3) to the left and right side of the tailgate as
necessary.
4. Remove the tailgate check cable(s) from the
tailgate.
ND
TAILGATE
23 - 291
Нет комментариевНе стесняйтесь поделиться с нами вашим ценным мнением.
Текст