Infiniti FX35 / FX45. Manual — part 615
EI-24
< SERVICE INFORMATION >
FENDER PROTECTOR
FENDER PROTECTOR
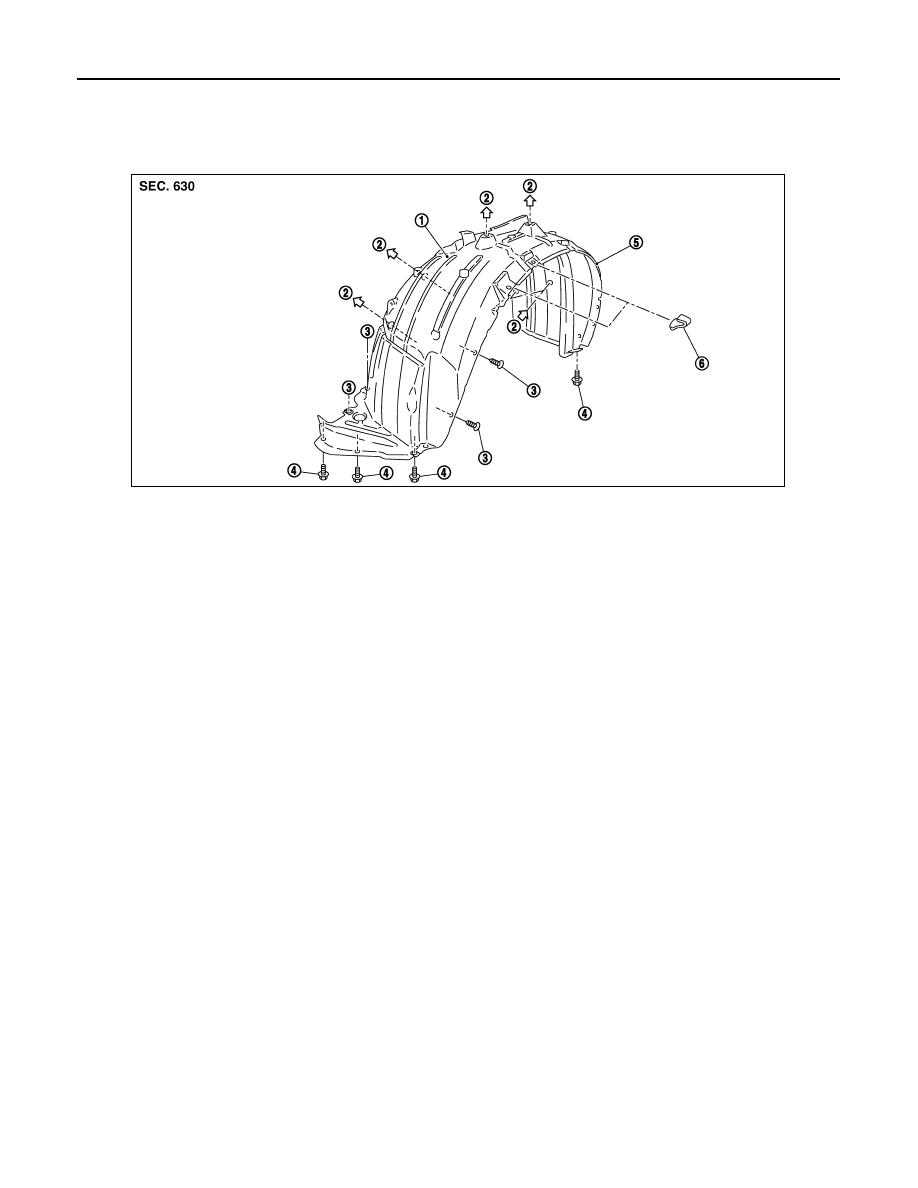
Component Parts Location
INFOID:0000000001328064
Removal and Installation
INFOID:0000000001529399
REMOVAL
1.
Remove bolts of fender protector front.
2.
Remove clips of fender protector front.
3.
Remove fender protector front.
4.
Remove bolt of fender protector rear.
5.
Remove clips of fender protector rear.
6.
Remove fender protector rear.
INSTALLATION
Install in the reverse order of removal.
1.
Fender protector front
2.
Clip (C103)
3.
Screw
4.
Bolt
5.
Fender protector rear
6.
Clip
PIIA4326E
DOOR OUTSIDE MOLDING
EI-25
< SERVICE INFORMATION >
C
D
E
F
G
H
J
K
L
M
A
B
EI
N
O
P
DOOR OUTSIDE MOLDING
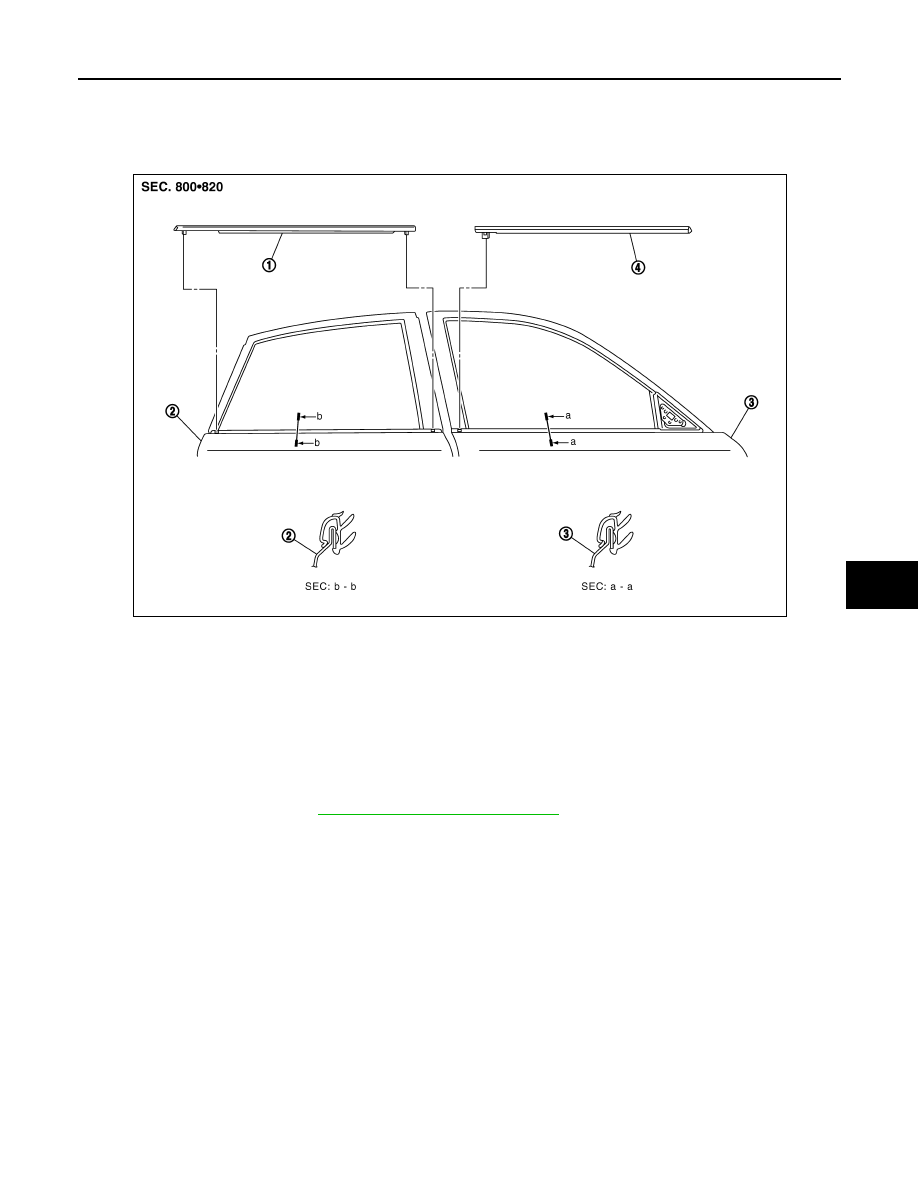
Component Parts Location
INFOID:0000000001328065
Removal and Installation
INFOID:0000000001529400
FRONT DOOR OUTSIDE MOLDING
Removal
1.
Open windows fully.
2.
Remove door mirror. Refer to
GW-87, "Removal and Installation"
3.
Disconnect pawl on rear edge of molding.
4.
Lift up to upper side, and remove molding.
Installation
Install in the reverse order of removal.
REAR DOOR OUTSIDE MOLDING
Removal
1.
Open windows fully.
2.
Disconnect pawl on front edge and rear edge of molding.
3.
Lift up to upper side, and remove molding.
Installation
Install in the reverse order of removal.
CAUTION:
• Be careful not to apply excessive force when removing because it is easy deform parts.
• After removal, visually inspect molding, and it is deformed, replace it with new molding.
1.
Rear door outside molding
2.
Rear door panel
3.
Front door panel
4.
Front door outside molding
PIIA4949E
EI-26
< SERVICE INFORMATION >
DOOR OUTSIDE LOWER MOLDING
DOOR OUTSIDE LOWER MOLDING
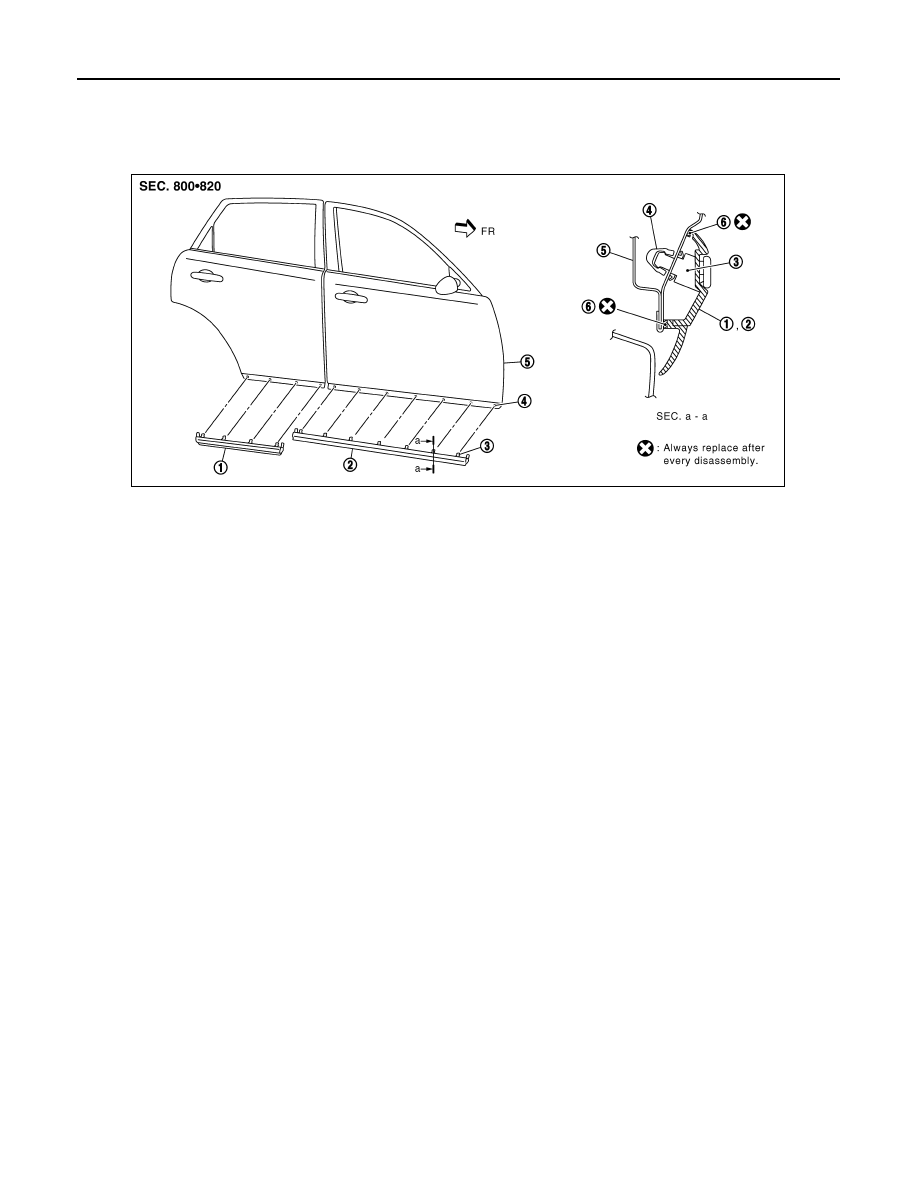
Component Parts Location
INFOID:0000000001328066
Removal and Installation
INFOID:0000000001529401
FRONT AND REAR DOOR OUTSIDE LOWER MOLDING
Removal
Remove clips, then remove door outside lower molding with double-faced adhesive tape.
Installation
1.
Clean adhesive portion of front and rear door with white gasoline.
2.
Strip pattern from the new door outside lower molding and paste on door.
CAUTION:
• Do not let air between contact surfaces when installing.
• To secure contact, do not wash vehicle within 24 hours after installation.
1.
Rear door outside lower molding
2.
Front door outside lower molding
3.
Clip (with lower molding)
4.
Grommet
5.
Door panel
6.
Double-faced adhesive tape
PIIA4348E
DOOR PARTING SEAL
EI-27
< SERVICE INFORMATION >
C
D
E
F
G
H
J
K
L
M
A
B
EI
N
O
P
DOOR PARTING SEAL
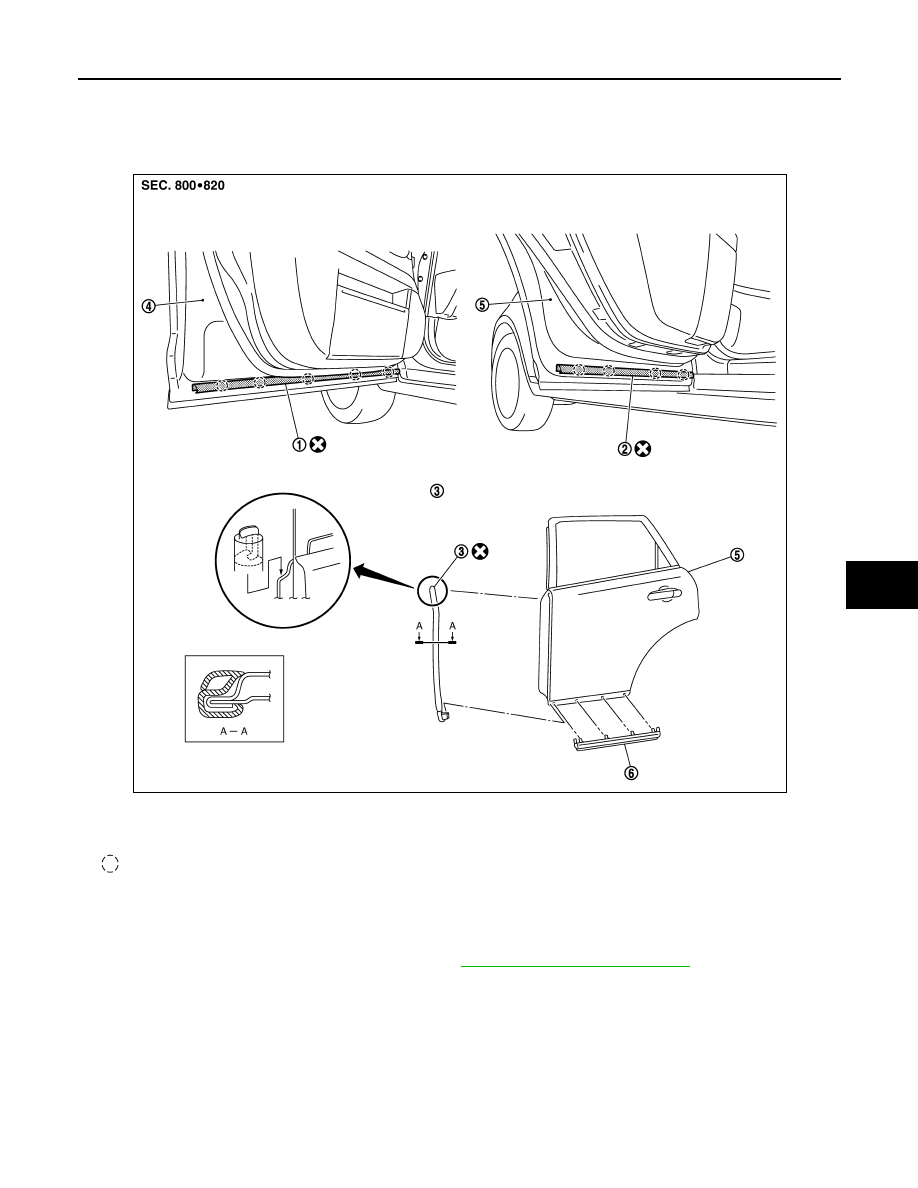
Component Parts Location
INFOID:0000000001328067
Removal and Installation
INFOID:0000000001529402
REMOVAL
1.
Remove rear door outside lower molding. Refer to
EI-26, "Removal and Installation"
.
2.
Open front door and rear door fully.
3.
Remove double-faced adhesive tapes and rear door parting seal (front).
4.
Remove clip and double-faced adhesive tapes, and then remove front door parting seal (lower).
5.
Remove clip and double-faced adhesive tapes, and then remove rear door parting seal (lower).
INSTALLATION
1.
Clean adhesive portion of rear door with white gasoline.
2.
Strip pattern from the new rear door parting seal and paste on rear door panel.
1.
Front door parting seal (lower)
2.
Rear door parting seal (lower)
3.
Rear door parting seal (front)
4.
Front door panel
5.
Rear door panel
6.
Rear door outside lower molding
: Clip
PIIB8501E
Нет комментариевНе стесняйтесь поделиться с нами вашим ценным мнением.
Текст